Blog entries tagged with "photos"
Saturday, November 5th, 2022 at 10:58am
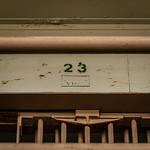
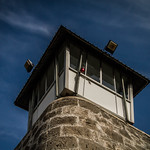
Six years ago I stopped by the St Kilda Botanical Gardens, mainly within the Alister Clark Memorial Rose Garden, and took a few photos. I did start sorting and editing them but none of them really grabbed me so they remained in my todo folder. Last year I had the idea of going back on the same day and taking the same photos as a five year comparison.
I don’t recall why but I never did that, so with it approaching six years I decided to try to get back to these gardens. It isn’t like I have this new camera (now fixed after sending it back) to justify…
So, six years to the day I returned to the St Kilda Botanical Gardens and wandered around with my camera. On my phone I had the shots I needed to replicate, but I also was looking for other things as well.
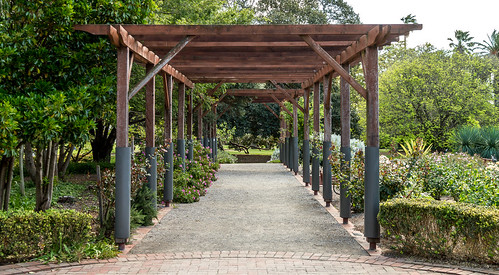
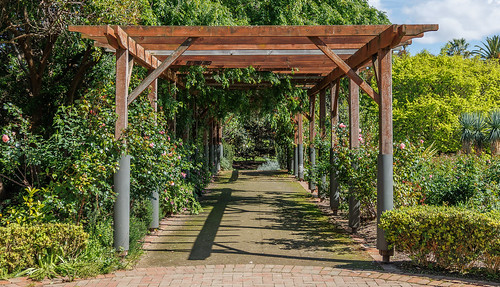
Some were quite easy to replicate:
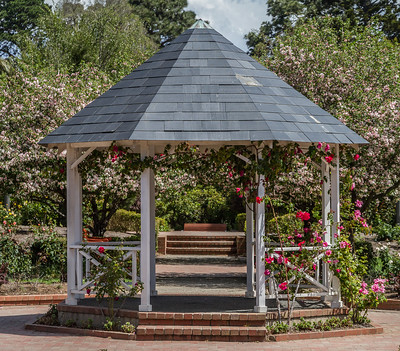
While with others it wasn’t until I got home that I realised I hadn’t gotten the location quite right, for example with the gazebo I should have been standing a lot further back with more zoom:

In the end there were only four shots that worked in showing the similarities (the structures) and differences (the plants), see the gallery on Flickr.
While I probably won’t do anything further with these photos and I also regret not matching up the time of day better, I consider this a successful experiment.
Tagged with: camera, photos
Saturday, July 30th, 2022 at 09:21pm
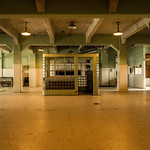
Today I was in the city for the first day of Open House Melbourne and I have just finished geotagging the photos. My approach of shooting both JPG and CR3 so I could use the JPG for geotagging worked out ok.
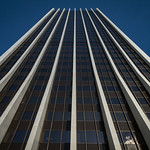
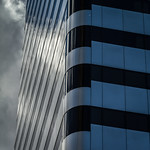
I did use gpsPhoto.pl to tag them all and while I expected the photos taken indoors to either not have a found location or to be in the wrong location, I had forgotten how bad a GPS track around a lot of tall buildings could be:
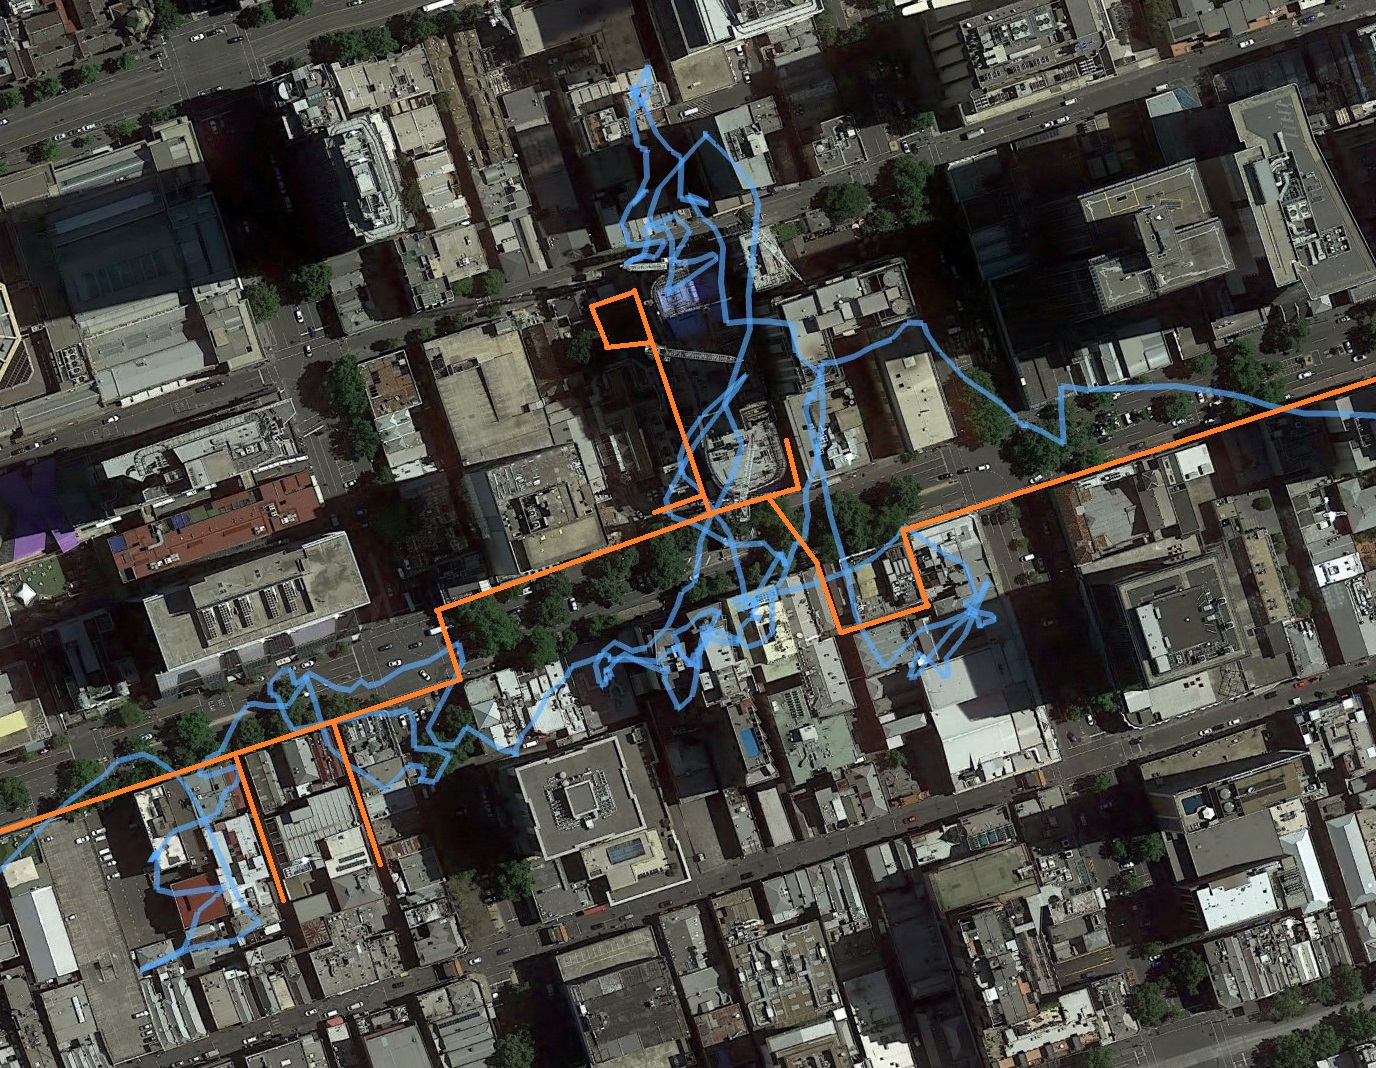
This is a screenshot of Google Earth showing in blue the result of the GPS track, while the orange lines are indicating the path I actually took.
When I manually correct the locations on the images I am not trying to be too precise, within 5 metres maybe 10. Close enough that if you go to that location you should be able to look around and see the thing or perspective I was taking a photo of. An error of a few hundred metres might not matter much for a landscape out in the country, but in a dense urban environment I want to be close.
Tagged with: geotagging, photos
Monday, July 25th, 2022 at 08:08pm
In my previous post I mentioned that I had a problem with geotagging the CR3 files from my new camera, this is that story…
I geotag most of my photos, both so that I have a record of where it was taken and so that when I share the photos (such as to Flickr) that others can also see where they were taken. Part of my trip planning is opening up the Flickr map to the areas I am going to and doing a search.
When I started geotagging the map module in Lightroom wasn’t that good, while I understand that it is a lot better now I still want to geotag before I load the photos into Lightroom so I can be sure that the files themselves are tagged, not just locations stored in the Lightroom catalog.
Two tools have served me well:
- gpsPhoto.pl – a commandline tool written in Perl (which I know quite well) to geotag the image files based on a GPX track
- GeoSetter – a free windows program that I like for manually placing images on a map or correcting the location when the GPX track isn’t quite right (eg like it does when the GPS signal reflects off tall buildings)
gpsPhoto.pl is working perfectly, it is Geosetter where there are some problems. The program hasn’t been updated in a number of years and while it still works the Google Map is covered by a “For development purposes only” watermark. The more recent and relevant issue to me is that being old it does not have support for the CR3 format that the R6 uses. Because of this I spent around three hours looking for a replacement for Geosetter that supported CR3 files. It turns out there are very few free options and I couldn’t get any of them to work. The most promising one specifically listed support for CR3 files, but then all I could get it to recognise were JPG files, it didn’t even support CR2.
In the end I was able to geotag the photos I took at the MSTEC National Steam Centre and while it was a workaround it is possibly also an indicator of what my new process might have to be.
I had 350 images to manually geotag and I could have taken the easy way out of using exiftool to tag them all with a single location (eg the front gate), this is the workaround I came up with:
- temporarily load all the CR3 files into Lightroom
- export them all as JPG with the same names
- use Geosetter to tag all of the JPG files
- run a script that copies the GPS tags from a JPG (eg IMG1234.jpg) to the corresponding CR3 (eg IMG1234.CR3)
- sort the tagged CR3 files into their date/time based folder and sync into Lightroom
This worked and means that for now (possibly forever…) I have changed the R6 to save both JPG and CR3 images, using the JPG for the geotagging and then only storing the CR3 files long term. Although gpsPhoto.pl will happly geotag the CR3 files, I will still tag the JPG files first because I use Geosetter to confirm (and fix) their locations.
Tagged with: geotagging, photos
Sunday, July 24th, 2022 at 10:24pm
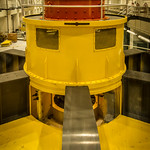
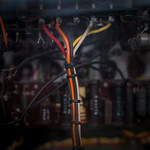
I mentioned that my plan for the weekend was to get out with my new camera so today I headed down to the MSTEC National Steam Centre. It would have been better to go on a day when the engines were running, but I knew that there are plenty of interesting machinery to photograph, even when stationary.
I went light, just the R6 with 24-105mm and also the 16mm because even though I expected better low light performance than the 7D I knew that the f/2.8 would be nice when trying to get close ups indoors.
The first difference I noticed was due to the articulated screen as I am not sure if I want to have it facing in or out. I am so used to chimping after every shot so that means it should be out, but then it is always on unless I have my eye to the viewfinder. If I have the screen facing out I need to see what I can turn off with the touchscreen so I don’t accidentally change settings.
The next thing I found was that I am used to pressing the focus/zoom button on the 7D to zoom in when reviewing images. But on the R6 this is just a focus select button, you zoom with the horizontal wheel. A few times I realised that I had changed the type of focus points… will I learn to not use that button or should I customise so it is no longer focus select?
A big change is needed when I change lenses. As the 7D is a DSLR, when the camera is on not much is happening you can look through the viewfinder whenever you want and have the camera focus on something, it is only when you take a shot (or turn on live view) that the sensor is exposed. Although not quite the best practice I haven’t had issue with simply detaching one lens and attaching another one, the sensor is projected by the mirror and shutter. However with the R6 there is no mirror and the sensor is always on to capture an image for the viewfinder or display screen. I have it set so then when you turn the camera off it will close the shutter, but if I simply detach the lens then the sensor (that nice big full frame sensor) is fully exposed and as there is no mirror it is really close to the lens mount. I must re-train myself to turn the camera off and wait for the shutter to close before switching lenses.
None of what I have mentioned so far is a problem as I will need to adjust to having a new camera, however something that has now sucked up a few hours of my time is that so far haven’t been able to geotag the images I took today. I didn’t take my GPS with me as I expected that most of the photos I took would be indoors and a GPS track inside a metal building is never good. So I was fully expecting to have to manually geotag the images at home. I have previously described my geotagging process but all I will say for now is that I haven’t been able to find a tool that will work with CR3 files.
Overall it was a good day as I learned about this camera and how have a challenge in regard to geotagging…
Tagged with: camera, geotagging, photos
Sunday, July 3rd, 2022 at 07:28pm
My camera is still the Canon 7D and earlier this year I realised that I have had it for ten years, and I got it secondhand which means it is over twelve years since it was released. Despite the age I have been happy with it, except when I am able to directly compare the results from my camera with the results from newer cameras, so it has been in the back of my mind for a few years that it was time to upgrade.
On a few Canon Collective (RIP) events such as birds of prey and ice hockety I was able to use a 1DX which was impressive, but also way out of consideration. It was the Canon 5D Mark IV that I used on my Lake Eyre trip in 2019 that was much more reasonable. When I got home from that trip I started looking for a 5DIV, but I didn’t find any for a reasonable price and I realised that I should first get back into taking photos more often before spending money.
I barely touched my camera for the remainder of 2019 and then in March 2020 I made a resolution that if I started getting out to take photos again I could justify upgrading my camera. I even signed up and paid the deposit for a photography tour to Kakadu later in the year, with the aim to upgrade before that tour.
We all know what happened to the rest of 2020…
The tour almost went ahead in 2021…
Thankfully the 2022 attempt at the tour went ahead a few weeks ago, with Luke from NT Bird Specialists and Jay (formerly Canon Collective…) from The Photography Workshop Co being a great double act.


Although I hadn’t upgraded my camera, I did hire a 100-400mm lens to take instead of my 70-200mm lens. I love that 70-200mm lens but I knew that it wasn’t long enough, I would need more zoom for birds and other small subjects.
Although I got a lot of great shots, being part of a group (almost all Canon and a mix of 90D, 5D, R6 and R3 bodies) also showed the limitations of my camera:
- newer sensors have more pixels and less noise – I had shots that I can’t use because in the low light my ISO was cranked way up and there is too much noise that not even Topaz DeNoise AI could give a decent result. However shots from others at the some time at the same ISO have come out good.
- eye detection autofocus – It was amazing to see how the new cameras could keep focus on the bird as it took flight, but in my case I had to track the animal myself, resulting in a lot of unusable action shots that I deleted.
- the viewfinder for mirrorless is a screen – No having to check the back of the camera to see if the exposure is correct, you will see it directly in the viewfinder, it was said you can control everything you need to without moving the camera from your eye.
It would be great if I could drop thousands on a new camera body and lenses, but that is not reality so I need to be more sensible.
Taking stock
I have acquired a variety of camera gear over the years, but when I think about it there are only a few key pieces:
- The Canon 7D body
- My main lens is an EF-S 15-85mm which I got in 2014 after my 17-85mm locked up on my first trip to the US
- My long lens is the EF 70-200mm (f/4 not the f/2.8) which I use at events like an airshow or bike race, or at a location like a zoo
- My wide lens is an EF-S 10-18mm which I will sometimes use for landscapes or architecture
A possibly inclusion on this list is my EF 28mm f/1.8 which I did use for a while for low light indoor (and on my Perth road trip when my 17-85mm broke) but haven’t used for a long time.
What do I want?
The single feature that I wished I had is an articulated screen as there are many times when I am holding the camera low or high and not able to see through the viewfinder. It was interesting to read back in my earlier post to see that was a compromise I made when getting the 7D.
Finally making the jump to full frame should give me the sensor size and noise improvements that I want, but those that know Canon lenses have already spotted that I would have to also replace my main lens. I would also need to replace my wide lens, and while at it it would be good to replace my long lens. So replace everything…
If I have to replace everything do I make the switch to mirrorless? If making that switch, do I even stay with Canon? I know a number of people that switched from Canon to Sony or Olympus…
A camera body new enough to have eye detection autofocus would be fantastic, but that is unlikely on something secondhand, and do I need it? It was great for wildlife photography, but that is not my normal subject. Buildings and structures do not move and don’t have eyes that need tracking…
The incremental option
This option involves sticking with Canon but switching to full frame, which will mean replacing lenses as well as the camera body. Due to the switch over to mirrorless there hasn’t been a new Canon DSLR for some time, the 5D Mark IV from 2016 the 6D Mark II from 2017 are the latest in their respective lines, meaning that the secondhand price is still reasonably closed to RRP.
Of these two I am considering the 6D Mark II as while it is in the lower range than the 5D Mark IV, it got good reviews, is slightly newer and is also half the price at $2000 instead of around $4000. There are some secondhand ones available, looking like a good condition one will go for around $1500.
Now on to lenses, to replace my main lens it makes sense to go for a L lens. The equivalent to my 15-85mm in focal range would be 24-136mm. There is no L lens with this range, the closest being the 24-105mm with the II version running $2000 new or $1000 secondhand, with the earlier version coming in around $650 secondhand.
I don’t have many options for a wide lens from Canon, they have some cheap EF-S lenses, but anything EF is L and expensive, the cheapest being the 17-40mm f/4 for around $1300 new or $600 secondhand, not sure how justifiable this is for occasional use.
I wouldn’t need to replace my 70-200mm lens immediately, but long term I would love to get a 100-400mm. Maybe one will come up secondhand for a good price, otherwise if I know of a specific event (such as an airshow) then I will consider hiring a lens. This worked out well for the Kakadu tour, but there is a point where hire costs would exceed purchase costs. I could also keep my eye out for an extender that will work with the 6D Mark II and the 70-200mm, more zoom for not as much money.
All this means is that the “budget” option would be to go for a 6d Mark II with a 24-105mm for $2000-2500. That is still a fair chunk of money and still leaves me years behind in the latest tech.
The splashy option
What would it mean to get up to date with the current technology? With the limitation of not wanting to overspend and also the caveat of (for now) sticking with Canon?
Based on discussions amongst the tour group the current choice would be the Canon R6 mirrorless body. At under two years old there is very little chance of finding this secondhand, so the only option to get below the RRP of $4000 is to wait for a special. There were some EOFY specials at around $3600, but possibly even better with Black Friday later in the year.
The main lens I would use with an R6 would be the RF 24-105mm, while there is a version for $600, if I am spending money then it makes sense to go for the L version at $2000 RRP. Combined with the body this is already putting the total at $6000 before looking at a wide lens…
Being realistic
To be honest I don’t need to spend any money, my 7D is still working great and for the amount I spent overall on the Kakadu tour (flights, accommodation in Darwin, etc) I could have instead bought a new camera, but then I would have a new camera and not have the experience of going on the tour.
I’m not going to rush into anything, and will preference spending money on going places with my existing camera over having a new camera but not going places.
Tagged with: camera, photos
Thursday, January 7th, 2021 at 07:14pm
How long does it take me to use up twenty seven metres of photo paper? Four and a half years.
At least that is the interval between buying the roll of paper and when I am at the end of the roll, with enough for two more prints. Over that time my usage has changed. After the couple of large prints I was making two prints a month (only ten months of the year) for camera club competitions. Then the club comp dropped down to one print per member per month, and then in 2020 we had to drop the print competition.
So what made me get to the end of the roll now instead of early last year, because I have been entering international competitions. I usually only enter digital competitions, but I need to get acceptances from Australian competitions, there aren’t many of those and a big one closing soon is a print competition.
So, after not printing anything for ten months, last night I printed out twenty images:
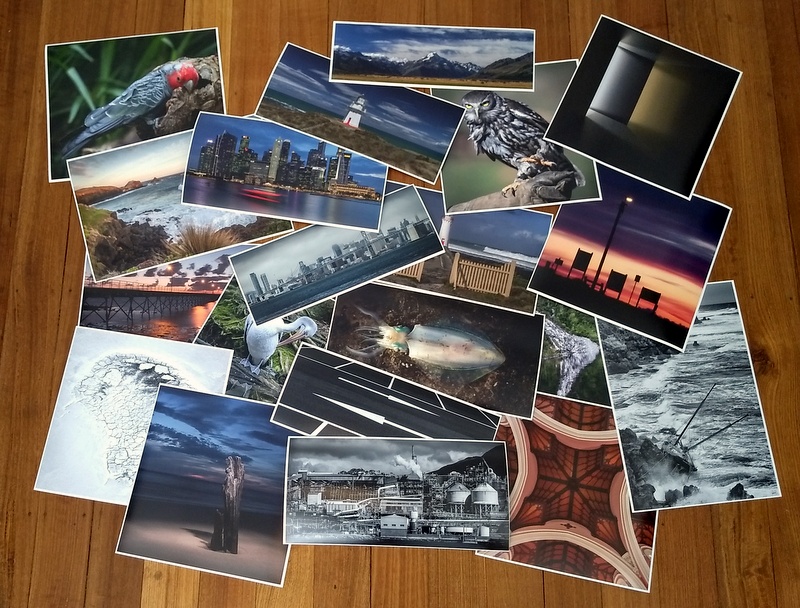
I had a couple of failed prints so I am glad that when I realised I was at the end of the roll that it wasn’t quite the end.
This all means that it is time to buy some new paper, with a big question being do I want to get another roll, or should I go back to sheets?
The main advantage of the roll is that I have the option of making quite large prints, but a big disadvantage of the roll is that the paper has a curl. If I cut a piece off and want to print with it immediately I need to roll it back on itself to remove the curl, otherwise it doesn’t feed through the printer right and at the start/end it rises up and gets marks on it. This is usually ok as it is outside the image I am printing which is then covered by the matt board, but it would be good to avoid this. (My printer is 13″ wide so doesn’t support the 17″ wide roll, as I am feeding it in 90° to the curl that is part of the issue, if it was fed in normally that would be ok)
If I had planned it out better I would have known I was getting near the end of the roll and saving the last few metres in case I wanted to make large prints, then buying normal sheets for most of my use.
Getting another roll does work out cheaper and if I plan ahead I can cut a bunch of sheets and let them lay flat for a while to remove the curl, though right now I am not able to make the decision as both rolls and boxes of A3+ sheets are out of stock at the local places I know of, so I will have to wait…
Tagged with: photos, printing
Friday, January 1st, 2021 at 02:44pm
Every couple of years I clean behind my desk. I don’t do it more often as this task involves taking everything off the desk, unplugging everything and disassembling the desk. Once clean I then have to put it all back together, all up this takes a number of hours so is generally done when I have time off around the new year.
Previously I have taken a photo of the tidy desk, but this time I attempted to capture most of the room in a panorama:
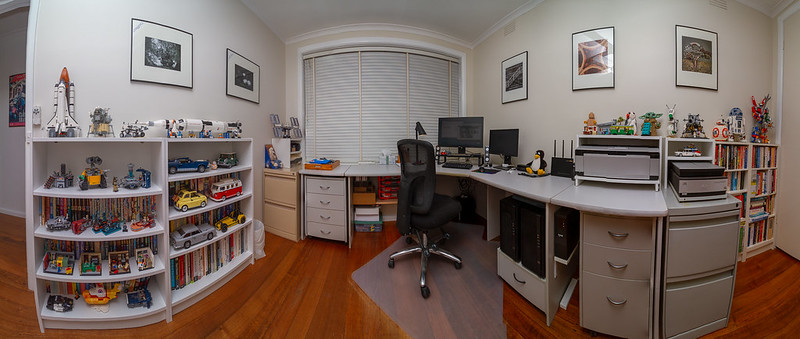
I spent about an hour just on taking the photos for this, camera on tripod, in portrait with my homemade L bracket, and using my widest lens. Each set is eight or nine images and I took around five sets until getting a set I was happy with. I initially considered capturing the full 360°, but that was more difficult to get aligned so I settled on around 280°, skipping the cupboard and room doors.
The above panorama was merged in Lightroom with the built in tool, but if you look at the large image you can quickly find a number of alignment issues. Look along shelves, picture frames, the cornice, etc. A proper panoramic tripod head would have helped, but I don’t have one of those.
I had a try at using Photoshop to do the merge, it essentially gives the same results but with each source image as a layer so you can fine tune where the joins are and then re-merge for exposure. At least that is what I picked up from reading some tutorials, I don’t know how to do that because I rarely use Photoshop.
Thinking back at how I have made panoramas in the past I realised that I wanted to be able to go to a misaligned part and be able to fine tune that section so they were aligned. Something like I remember doing in the Canon PhotoStitch software, but that was 20 years ago and while I do happen to have the install for that, it doesn’t want to run under Windows 10.
Another program that have used is the Microsoft Image Composite Editor which I recalled was an amazing tool, but it was last updated five years ago. I gave it a try anyway, no better than Lightroom and also no fine tuning ability.
It was getting late, so thought that the Lightroom merge was good enough so I uploaded it to Flickr and wasn’t going to spend anymore time on it. Until today when I decided to see what had happened to another tool I remembered: Hugin
Back in 2011 on a road trip from Melbourne to Perth and back I played around a fair bit with Hugin. What I remember of it was that it could give good results, but it was also prone to crashing. I don’t know when I last used it because I don’t do panoramas that often and the one in Lightroom has been good enough when I do make a panorama. Upon finding that it was still an active project and that it had a release only a few weeks ago meant that I had to give it a try:

I was impressed. While I saw the options to fine tune control points and other things, the above panorama was made using the simple settings and it has come out a lot better than Lightroom or Photoshop. All the big issues I saw before are fixed, with only a couple remaining on the lower right that could be fixed by a small amount of cloning.
However it is nowhere near as convenient as selecting the images in Lightroom and clicking Photo Merge > Panorama. Instead I exported full size versions as TIFF, loaded those into Hugin, generated the panorama, copied the result into the directory for Lightroom to see. I also took the final image into Photoshop for some content aware fill of floorboards in the corners and tweaked some levels before exporting the final JPEG for Flickr.
I don’t know if I will use Lightroom or Hugin for my next panorama, but it is good to know that suitable alternatives exist.
Tagged with: panorama, photos
Thursday, September 3rd, 2020 at 10:45pm
For the past year or so I haven’t been getting out with my camera as much as I had liked, so earlier in the year I decided to make and effort to get out, but then the world changed…
At the camera club we have managed to keep most of our meetings going (now over Zoom) as well as our monthly competitions (digital only, no prints) and I typically find a suitable image from the past to submit as my entries.
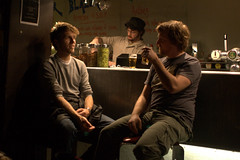
However the set subject for September was “Film noir” and I knew that I didn’t have any existing photos that would fit. So I turned to LEGO:

I got the idea for the scene by looking at images online and then looking through the LEGO that I had available. The first obstacle was getting the road base plates from my parents, and then I spent around two hours playing with the position of the figure, the car and the lighting. The final scene is solely lit by the torch hanging above and getting that right took the most time.
This was the final result:

I would have loved to add some smoke/fog or rain, but I didn’t have anything to do that practically as I’m not a fan of adding that in post.
In the competition this image received a Merit which I was quite pleased with, especially when you consider the other images it was up against.
Tagged with: lego, photos, waverley camera club
Tuesday, February 5th, 2019 at 09:28pm
I’ve been sitting on this post for a while (first started while in San Francisco) so my trip around the South island of New Zealand is a good time to get it finished. Upon reflection it is pretty much the same…
Equipment:
- Camera – of course
- GPS – I have a Garmin eTrex Vista HCx that is intended for bushwalking, but I just use it to log
- Computer – A small windows laptop with Lightroom and other tools
During the day:
- Take photos, lots of them
- Have the GPS on and always keep it near the camera
- Take a photo of the GPS device showing the current time
Each night:
1. Copy photos and GPS track
Once I am settled down for the day and have the laptop out I start to copy the photos from my Compact Flash card (or cards if a big day) into an ‘incoming’ directory.
As copying the photos can take a while (though not as long now I used a USB3 card reader) I leave that running and copy the GPS tracks (in GPX files) from my GPS device. I used to to put my GPS device in mass storage mode to access the microSD card via a USB cable, but these days I pull out the microSD card and put it into the card reader.
2. Check GPS track and photo times
I rarely find errors in the GPS track (mostly in areas with lots of tall office buildings, or long periods indoors) but I still check it at this point by loading the GPS track into Google Earth. This does require an internet connection, but gives a nice overview of the day, possibly highlighting if I missed a location.
The photos should have completed copying, so I locate the photo of the time so I can confirm that the camera time is the same as GPS time. If I am careful when setting the time on the camera it can be within a few seconds of the GPS time, but if more than that I will use exiftool to adjust all the times of the photos so they match the GPS time.
3. Geotag photos
With the photos and tracks on the laptop I now use a command line tool called gpsPhoto.pl for most of my geotagging. This tool doesn’t appear to be maintained anymore, but it works for me. When I run it I specify the directory with GPS tracks, the directory with the photos, and the offset in seconds between the time of the photos and UTC.
4. Check tagged photos
If the GPS track is clean then typically all the photos will be correctly geotagged, but to allow for missing sections or errors in the track I check using another tool, this time a GUI tool called GeoSetter. I believe I can use this instead of gpsPhoto.pl to tag based on GPX files, but my current method works, and it looks like GeoSetter might also no longer be supported…
In GeoSetter I am mainly checking the location of all the photos against the map (fixing if required), and then manually adding location to photos if needed.
5. Import into Lightroom
Up to this point I have been directly updating the metadata of the photos, I want it to be correct at the source. While you can update the time and location in Lightroom, I’m not confident that the original file will be updated, not just in the Lightroom catalogue.
While I say “import” here, I’m not using the Lightroom import functionality. Instead I:
- run a script to rename the photos in the ‘incoming’ directory to a date based (the corrected GPS date) directory and filename. eg ‘incoming/IMG0349.CR2′ to ‘lightroom/todo/2019/2019-01-30/20190130T092158101-0349.CR2′
- within Lightroom right click on the ‘todo’ folder and use ‘Synchronize Folder…’ to find the new photos
I give the photos a quick check to see that the photos I expect from the day are now included in the Lightroom catalog and nothing is obviously wrong (eg corrupted).
6. Backup
Now that the photos have been added, I exit Lightroom and run a backup. This is nothing special, just robocopy to mirror the Lightroom catalog file and the photos to an external SSD.
7. Clear cards
Once the backup is complete I know that the photos exist in two locations (the internal drive of the laptop as well as the external backup SSD) I can clear the cards ready for the next day. I do this by formatting them in the camera.
8. The first cull
I will try to make at least one pass through the photos from the day using the Pick and Rejected flags in Lightroom. Mostly I will use the Rejected flag on any obviously bad (out of focus, undesired movement) or excessively duplicated (a couple of identical images are ok, but I don’t need a dozen) photos, but I occasionally Pick an image that I will definitely do something with.
Once this first pass is complete I will now delete all the Rejected photos, the CTRL+Backspace shortcut is very handy for this. I have found that I take a lot of photos during the day, and will cull around a third in this first pass…
Further processing
Depending on how long this has taken and the time I have available, I will keep going through the photos, rejecting some more but now starting to play around with some adjustments. While I save the bulk of the post-processing until I get home (on a more powerful computer with a much better screen) it is good to get started on it right away.
In fact I have set myself a goal on this trip to edit and post one image from each day, I’m trying to break my past habit of taking months (or years) to do something with the photos.
Back home
Unfortunately every trip comes to an end, for my workflow that means incorporating all the new photos into my existing library. I don’t try copying them from the laptop directly, instead I ensure that everything is synced to the external SSD, so I plug that into my desktop for the copy.
To simplify merging the two Lightroom catalogs I use the same directory structure for the photos on both computers, so they are copied directly over. I then open my main catalog and import from the copy of the laptop’s catalog. So far this has worked nicely, the photos are now incorporated in the main catalog along with any edits or flags that I made while travelling.
Tagged with: geotagging, photos, travel, workflow
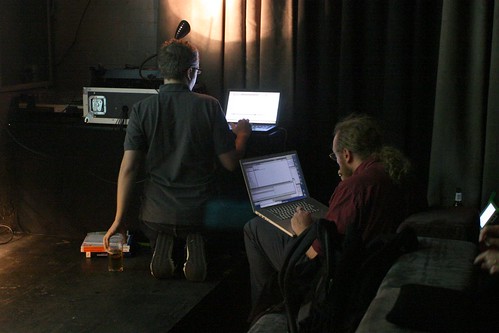
Thursday, July 20th, 2017 at 04:53pm
At the end of a recent post I mentioned a couple of places that I would like to go/do to to take photos. I have a much longer list and decided that I would list a few of them here:
Tagged with: backstage, photos, tour
Wednesday, June 21st, 2017 at 10:25pm
I don’t often take photos on my phone but when I do they are automatically backed up to Google Photos. As well as it being a backup it comes in handy every so often as it is a way to access the photo without copying it off the phone.
Every so often I clear the photos off my phone, incorporating some of them (usually just for future reference) into my photo collection (but not the section that Lightroom looks at). While the photos are no longer in the DCIM folder they all still exist as the backups in Google Photos, which I don’t want. When I look at Google Photos I prefer to only see the photos that I have shared in Albums.
Annoyingly there doesn’t appear to be a way to see all photos not in an album (this is trivial in Flickr and I am not going to get into the future of Flickr now…), despite it being a feature requested by many people over the years.
I have found an alternative that is also the better solution for my actual problem, you search for the following:
#autobackup
This is an undocumented feature (one of probably many) that does what it says…
Update March 2017: this no longer works :(
Tagged with: backups, google, photos
Sunday, December 18th, 2016 at 11:57am
In the four years since I last upgraded my windows desktop the only hardware change was that I had added hard drives for additional storage. On the software side it is also similar, except newer versions (Windows 10 instead of Windows 7, updated browsers, Lightroom CC and Photoshop CC, etc).
In mid 2015 when Lightroom introduced the ability to use the GPU my initial experience was negative as it broke the develop module. It was detecting the GPU in the onboard video, but was failing to use it properly. It turned out the solution was to install the Intel drivers instead of using the generic Microsoft ones. At the time there were people saying that unless you had a really high resolution display that you shouldn’t bother enabling the GPU, I didn’t notice a different either way so I left it enabled.
I don’t make panoramas that often, but I was glad that there is now merge functionality built into Lightroom, except when it fails. There was one panorama I was trying to merge earlier this year that would fail with an internal error, but it would succeed with the GPU disabled. I only had the default amount of memory allocated to the GPU, but increasing it didn’t help.
I haven’t played games for a long time so the onboard video was sufficient, but a small part of me started to wonder whether adding a graphics card with a decent GPU would be worthwhile. It doesn’t need to be a fancy gaming card, just something better enough than the onboard video.
Last Monday I went along to a Canon Collective workshop that was about shooting panoramas to make into little planets:
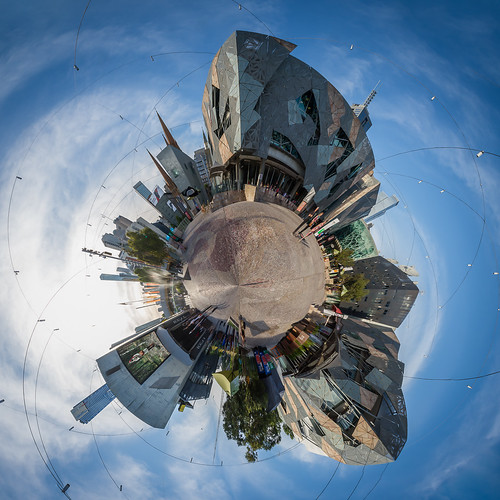
When performing the initial merge I found that it would again fail when using the onboard GPU, and then when the GPU was disabled Lightroom would max out the CPU and RAM, failing about half the time. So yesterday I picked up an Nvidia GTX 750 Ti graphics card, the second cheapest card available at local stores, but still rated around 450% better than the onboard GPU.
I don’t notice much difference while adjusting images, but based on what I see in task manager it is using less CPU and memory. However there is a big difference when merging images into the panorama. Where before it would take 15 minutes and all available memory, the same merge now takes around 3 minutes and about half the available memory. So a useful improvement.
The other thing that came out of the panorama workshop was the benefit of a tripod head that lets you pan independently of tilt. The Manfrotto 486RC2 ballhead that I use has one locking action, so to pan I used the kludge of rotating the tripod column. This isn’t ideal so on a whim I checked ebay, within 24 hours I had upgraded the ballhead to the (now discontinued) Manfrotto 488RC2 ballhead. This also came with a spare quick release and plate, which I believe I can use to make an L bracket, which will be a post for another time…
Tagged with: camera, computers, hardware, lightroom, photos
Sunday, August 7th, 2016 at 09:58pm
It has now been two years since I got back from my big US trip and started a new job. For the following year and a bit I rarely picked up my camera, but over the last nine or so months I have been making up for that with some travel, some photo walks, some photography meetups and other events.
Though those who follow me online will have seen more photos than that as for the past couple of months I have been spending a lot of time sorting through the post-processing photos in my todo folder.
This resulted in the following albums:
Looking back I didn’t realise how long this list would be, I makes me even happier that I have caught up.
Tagged with: flickr, photos
Thursday, June 9th, 2016 at 10:09pm
I have written before about how I print images, but I haven’t mentioned what I do with them once I get them back from the camera club competitions.
As they are images that I like and they are all the same size, I bought a number of 16×20″ frames so I could hang them up at home. I like the look of the simple black frame around the off-white mat board, and I have a few larger frames containing some other posters which includes Up Goer Five.
There were two locations that I wasn’t quite sure what would be best suited, in one spot a single 16×20″ seemed a bit lonely and in the other two 16×20″ images seemed two crowded. I realised that panorama images would work better. But what images and what frames?
It didn’t take me long to come up with the two images that would work:
After playing around with the numbers I worked out that Mechanical could be printed at 21×10″ to go in a 28×16″ frame, and Downtown behind printed at 28×9″ for a 34×16″ frame. Then it was time to work out the various components…
The mat board comes in 40×36″ sheets and the last time I got some I had them cut them into quarters, much easier to handle and no further cutting required as that takes them down to the 16×20″ size. For the larger images I picked up a full sheet, cut it down the middle for the 16″ dimension, then cut those down for the 28″ and 34″ lengths.
The frames were also straightforward and I went down to the place where I got all of the other frames and ordered them. While they have 16×20″ at a standard size, they didn’t have what I wanted as a standard size, but a couple of weeks later (I was in no hurry) I picked them up. At the same time I also ordered a frame to fit the 12″x48″ Up Goer Five poster.
Printing the images involved a lot more research and thinking…
While I had previously printed both of these images, I had printed them on A3+ paper to be mounted on 16×20″ mat board. The A3+ paper is 13″ wide so that is sufficient, but the other dimension is 19″ which is too short. I briefly thought that I could get an A2 sheet that I could cut in half, but that would still only give me a 23″ length which isn’t enough.
So I started to investigate getting the images printed, but as well as the cost there is the uncertainty about the quality of the print. Until something made me think about roll paper which my printer supports.
A significant issue I would have with printing on roll paper is that my printer only supports paper up to a maximum 13″ width. Epson make roll paper at that size, but my preferred Ilford paper is only available in 17″ and up. I could cut the roll paper into smaller sections manually, but apart from being able to print these large panorama images would there be any cost benefit?
If I am printed for mounting on 16×20″ mat board I will leave at least a 2″ border. This means the largest visible image will be 12×16″, but bump that up to 13×17″ to allow for a generous overlap under the mat board.
Hmmm, 17″ is the width of the Ilford roll paper and 13″ is the maximum width of what the printer can take. The roll of paper is 27 metres long, so can be divided up into 81 and a bit sections. A price for a roll is $193 which translates to a per section price of $2.38. From the same place a box of A3+ paper (13×19″) is $57, that contains 25 sheets at $2.28.
So far the roll paper is looking like it would be both more expensive and less convenient.
Looking around I found another site that that has the roll paper on special, for a price that brings the cost down to $1.68. Even once postage was allowed for this is a small but significant saving, so I ordered a roll of paper.
I picked the paper up from the post office after work and I spent the evening printing and then mounting these images. I haven’t been able to get a decent photo of it, but I am quite pleased with the result.
The first image I printed myself for a camera club competition (after various test prints on different papers) was Mechanical, so it was a nice coincidence that it would also be the first print I did on the roll paper. Trimming the width of the first piece of paper was a bit of a juggle as I was cutting along a 24″ length but using a mat that is only 18″ wide. Working out where to set custom paper sizes in the print dialog also took a couple of minutes but once that was entered it was a straightforward matter of selecing the custom size, setting the dimensions of the image, centering it and then starting the print. It was a little bit nerve-wracking watching the print slowly appear, but it worked out.
I also increased the difficulty with mounting this image as I repeated the same treatment I had done previously which was to leave a 5mm border between the print and the mount. This means no overlap and the mount must be cut very accurately, but the final look is the image, 5mm of the white paper, the white core of the mat board on the 45°, the off-white of the mat board, then finally the black frame.
Printing Downtown behind was easier as I had already figured things out, and this time I had the mat board overlap the print, no ultra-precise cutting to leave a 5mm border.
Now that I have gone through all this effort I don’t know when I will next print an image larger than A3+, but it is now an option and once I have used up the last few sheets of A3+ I will be using sections cut from the roll…
Tagged with: photos, printing
Sunday, February 7th, 2016 at 11:19pm
The place I have been working for the past eighteen months is part of a larger company based out of Kansas City. One of the biggest direct impacts this has on me is working 7am-4pm so that the start of our day overlaps with the end of their day, but I have come to appreciate avoiding the crowds on the train or on the bike path.
The other possibility is travelling to Kansas City for work, which has just happened for me. A few of us went over, my reason for going was to be there to support the first US based team that is using the tools we have build to upgrade their application for the new servers.
This was my second trip to the US, and only my third trip overseas. This was quite different as I didn’t pay for the flights or hotel, and I received a per diem, but of course most of the time was spent doing work. During the two weekends I was there I managed to squeeze in some sightseeing with my camera, I went to places that other people (who have made the trip multiple times before) had not even considered going to. As I ended up having one of the cars to myself, I headed out over a couple of lunchtimes to some nearby areas.
Of the photos I took, my final selection of 60 is in a Flickr album, with my favourites including:


Tagged with: photos, work
Thursday, June 11th, 2015 at 08:19pm
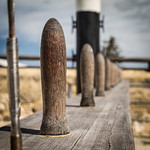
This last weekend was a long weekend due to the Queen’s Birthday public holiday. I spent it down at Phillip Island with others from the Waverley Camera Club. I took a lot of photos, ending up with a final selection of 40.
As well as giving me an incentive to get out with my camera, the weekend was also the first time I experiemented properly with my Lee filters, in particular the Big Stopper. It is only a year since I got them…
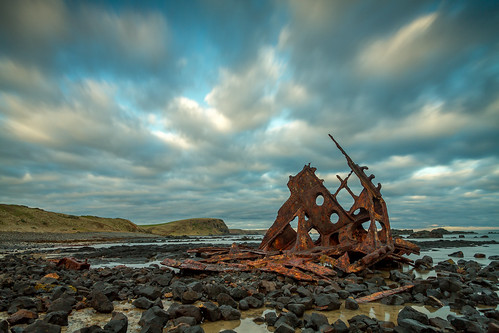
My first stop when I got down there on Friday was at the wreck of the SS Specke. Unfortunately this was after high tide and I didn’t get much water around the wreck itself. This image has movement in the clouds, but others I have seen from this angle have smoothed out water.
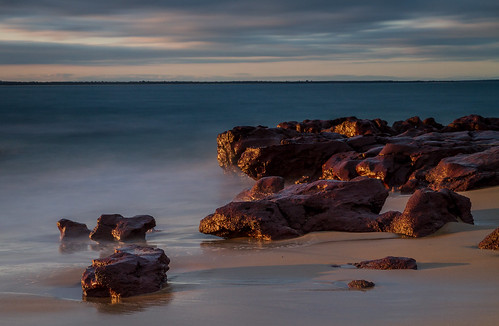
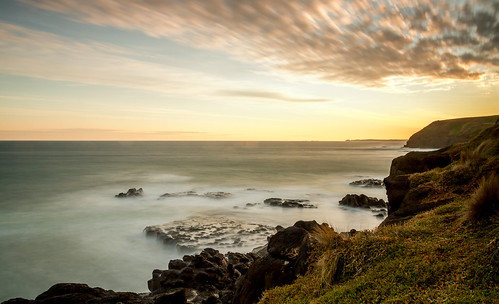
For the sunset on Saturday we split into two groups, I went with others to Red Rocks near Cowes. Although this image doesn’t feature the smoothed out effect in the water, I prefer it as it was one of the brief times that the sun broke through the clouds.
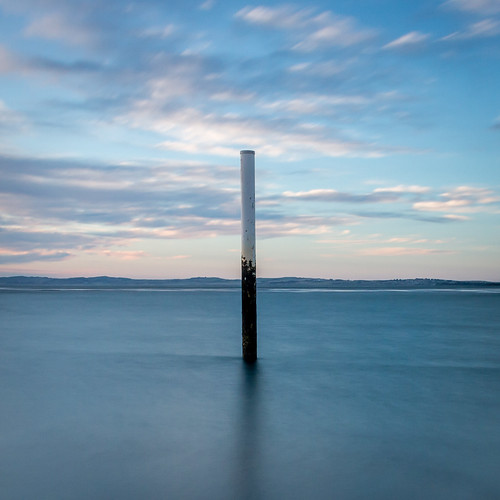
The sunrise on Sunday was quite colourful, but that doesn’t require the big stopper. Once there was more light I started to play around, getting images such as this around the Rhyll boat ramp.
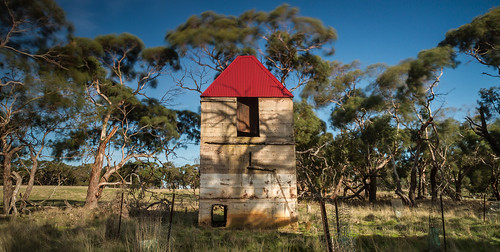
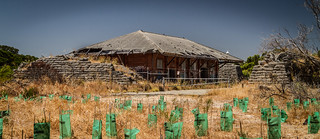
The middle of the day isn’t the best for photography, so while scouting around for other locations we stopped at an old chicory kiln (albeit with a new roof). A wider shot with more of the sky and interesting clouds would be an improvement to this shot.
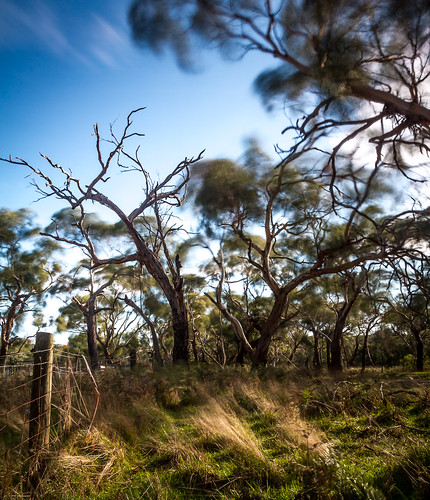
While at the kiln I took a photo in a different direction, while not a good image overall there is something about the effect of the dead trees being stationary against the branches moving in the wind.
While down at Pyramid Rock for the sunset on Sunday I took most of my photos without the big stopper as I wanted to catch the shape of the breaking waves, but I took a couple with the big stopper to see what it looked like.
It was a good weekend, with my only regret being that I didn’t get up for the sunrise on the Monday.
Tagged with: photos, waverley camera club
Sunday, December 14th, 2014 at 11:22am
Among my growing collection of unfinished blog posts there are a couple about my entries to the monthly competition at the camera club. As the year is now over I am rolling them up into a single post.
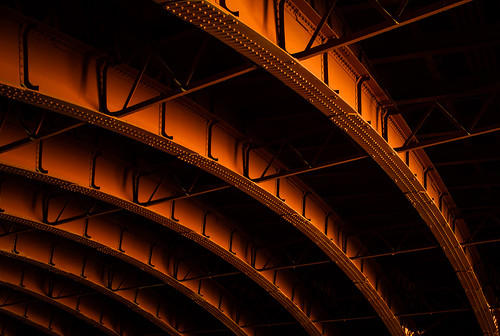
One of the few photos (because there were so many people) I took on the Trey Ratcliff photowalk in early 2013 was of the underside of the Princess Bridge.
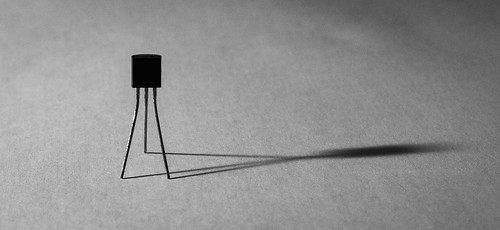
In 2013 I joined a weekly black and white photo project, while I only managed to stick with it for six months it did force me to take a number of new photos specifically for monochrome. This was was taken for technology.
Taken while on a photowalk, submitted for archtecture, the to the camera club.
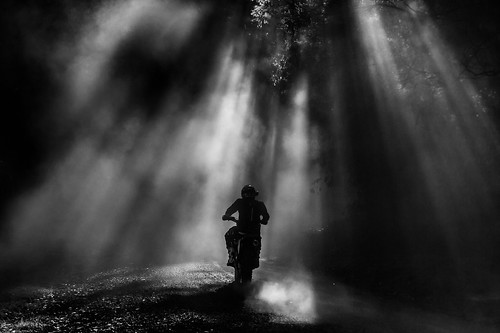
While on the club weekend away to Marysville a couple of us split from the main group and headed west towards Murrindindi. There were a few other cars and bikes around that had kicked up dust and while stopped taking photos of the rays of sunlight some bikes went past. A fair amount of adjustment was done to balance out the light, and in the final version the bike and rider was darkened to be a silhouette. This was awarded image of the month for May and then got third place in the end of year competition.
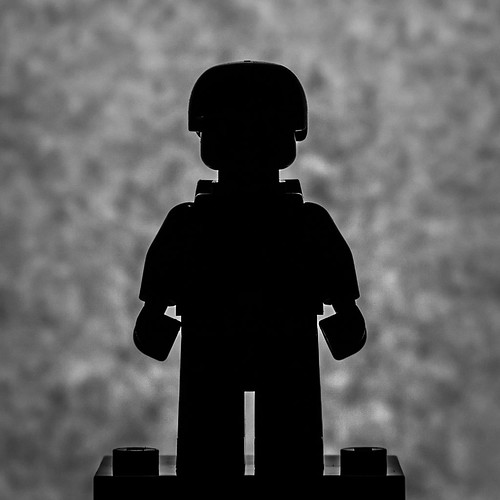
How could I not resist submitting an image of a Lego minifig that shot for silhouette under ‘Shadows, Silhouettes & Reflections’.
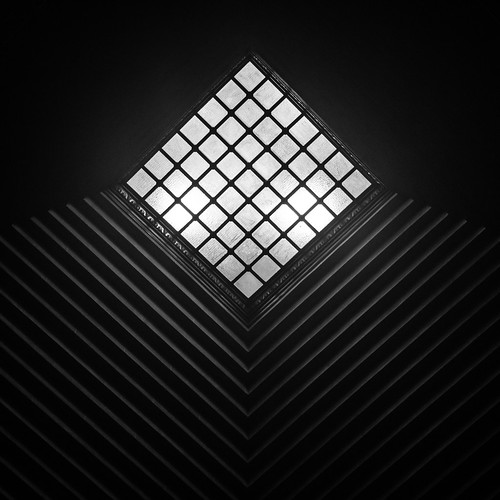
The topic one month was ‘creative’ and I had no idea what to submit, it was a struggle as I try to be accurate and reflect what is there… While sorting through some older images I came across an image that after some extreme level adjustment came out like this:

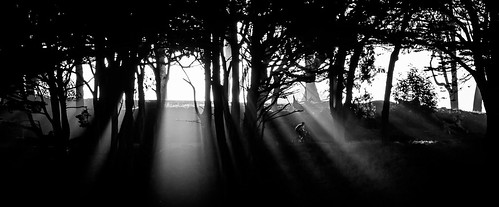
There were three competitions after I returned from my US trip and all of the images I submitted were from that trip. Starting with this early morning shot in San Francisco. It wasn’t until editing the image later that I noticed the cyclist which I thought changed the whole feel of the image. At the monthly competition this received a merit, and in the end of year it received second place for monochrome print.
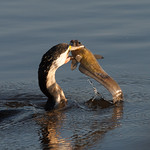
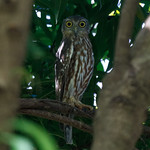
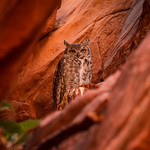
I don’t take photos of people, so for the portrait competition (even when extended to include animals) I struggled and only submitted one entry, but it was this image of an owl in Owl Canyon which is near the infamous Antelope Canyon in Arizona.

It took me a while to adjust to my new job (started right after returning from my US trip) so I got a bit slack with entering printed images. I should have made the effort as the judge liked the two images I did submit for the ‘Travel’ competition, obviously they are from my US trip.
I still have a lot of things on my todo list, but one thing for sure is that I enjoy going out to take photos and I will make sure I find the time. We have the list of topics for the club competitions in 2015 and I have just seen that the B&W Project will be running as a project 26 in 2015.
Tagged with: photos, waverley camera club
Thursday, October 16th, 2014 at 09:19pm
Along with which program to edit your images, another contentious topic that comes up in regard to digital photography is what colour space to use. Initially it starts out as someone being told that they must change their camera from sRGB to Adobe RGB, it snowballs from there.
A couple of years ago I did some research and tried to write up a post about it, I didn’t get very far because it is crazy complex, you need to consider an entire colour managed workflow from the camera, through editing and then output somewhere on a webpage, on another device, as a print, etc. Fortunately others have gone to the trouble of explaining colour management.
Cambridge in Colour is an excellent resource for Photographers and one of its tutorials is on Color Management & Printing that is worth reading all of the way through. If you only want to read one thing, then make it the page that compares sRGB vs. Adobe RGB.
Another example of how complex colour spaces are to explain is a seven part series of articles titled Digital-Image Color Spaces which also includes quite a number of example images. Note that this series is now almost eight years old, so be aware that web browser support for colour profiles has improved a lot since then.
On the topic of web browsers, the International Color Consortium (ICC) has a test page so you can see what version of ICC colour profiles your browser supports. Though if you want an extreme example, computer forensics researcher Neal Krawetz shows how one image can display in ten different ways depending on what you use to view it.
Want to read more about sRGB vs Adobe RGB? Stop. Don’t do it. There are countless articles (yes, I know you are reading one of them right now) where people give their opinion about whether your should use sRGB or Adobe RGB. Many of them are pure opinion without any supporting information, or contain information already covered by something like the Cambridge in Colour tutorials.
So what do I do? I avoid the issue… I shoot in RAW to capture as much information as possible, adjust (on my calibrated and profiled monitor) in Lightroom with all that image data, and only at the end discard data when exporting to an 8-bit JPG in sRGB for the internet. When I print I trust that Lightroom and the Epson printer driver are doing what is best.
Tagged with: colour space, photos
Sunday, August 31st, 2014 at 04:42pm
Today, four weeks after returning from my US trip, I have completed processing my photos and uploading them into albums (also completing the draft posts I wrote while on the trip). Of the 6,000 I came home with, 275 made the cut and can be seen in 12 albums over on Flickr. They can also be found on Google+ and Panoramio, but they don’t have a nice collections page to link to.
My use of the word “completed” is not quite correct. Every day after getting the photos off the camera I did a bit of sorting, mostly deleting obvious bad images but also flagging images for editing. About half of what I flagged during the trip made it into the final selection, but I still need to go back through and cull out other unwanted images.
It is also been four weeks since I started my new job and I think that I am almost used to getting up for the early start. When asked about how I an finding it my response has been that it is “different.” There were good things as well as bad things at Monash, there are also good things and bad things about this place as well. Further down the track I might have another view, but for now there are so many new things to pick up that I don’t know what to think.
Tagged with: photos, travel, work
Thursday, July 31st, 2014 at 11:23am
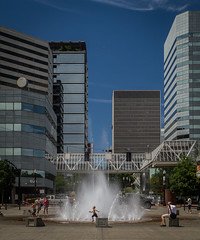
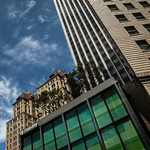
While right now I am killing time at LAX, for the past six days I have been exploring San Francisco and some surrounding areas.
After arriving in San Francisco from Portland my first stop was the accommodation at Fort Mason, but I immediately headed to the nearby FedEx store to pickup the lens that I had rented. There was a short wait, but I then had the lens, it was interesting to see how it was double boxed, the inner box being used with the provided shipping label to return the lens.
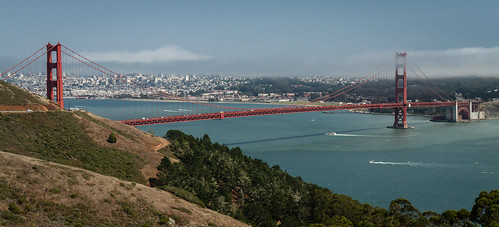
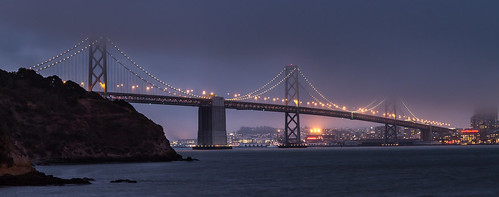
There wasn’t much left in the day so I went in search of some dinner and some initial exploring to confirm that I could look out towards Alcatraz, see the Golden Gate Bridge in the distance and was not far from the Waterfront area:

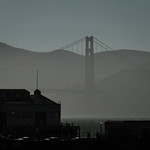
The next day I woke up early and headed out immediately for some interesting light:
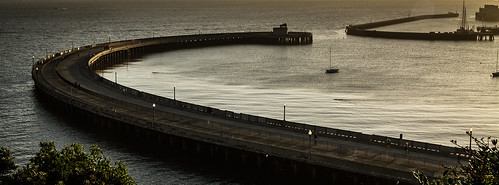
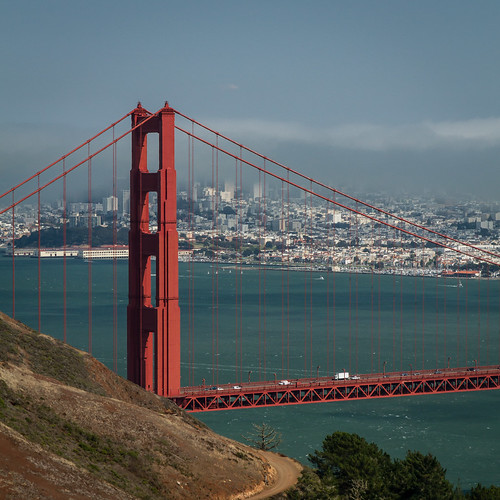
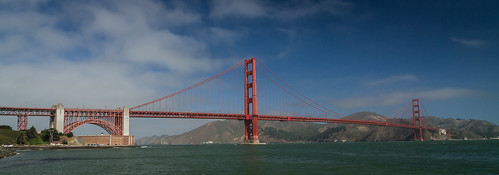
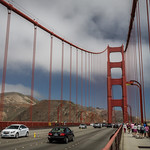
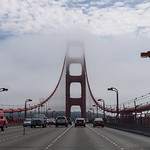
After a quick breakfast I headed out properly, which was to start walking north until I got to the Golden Gate Bridge, crossed over and then continued on to Sausalito. Unfortunately I had developed some blisters, so I caught a ferry, tram and bus back to the accommodation where I spent the rest of the day giving my feet a rest.
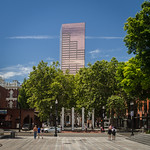
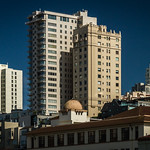
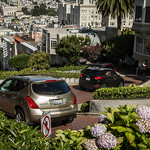
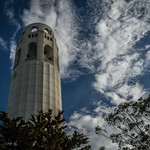
The next day turned out to to be the San Francisco Marathon which ran right by the acommodation. As I was still resting my feet, by the time I went out in the afternoon it was over and packing up was well underway. I headed east, towards Lombard Street and Coit Tower:

While planning this trip I was given a tip about booking the Alcatraz tour well in advance, the possibility of ending up with bad weather vastly outweighing actually having a booking.

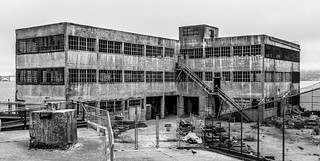
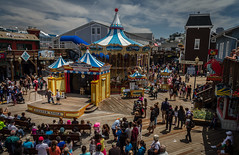
After a couple of hours I seemed to have covered the entire island, so caught the ferry back and headed towards Pier 39 and Fisherman’s Wharf:
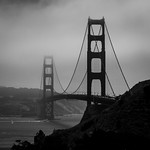
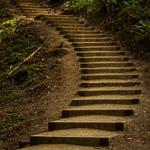
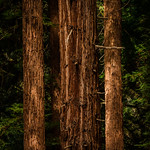
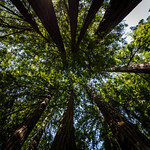
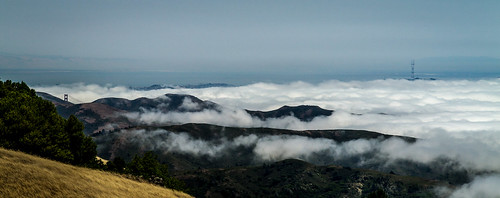
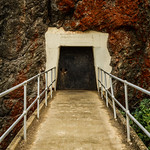
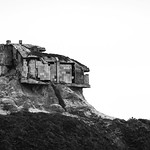
I had wanted to head out to Muir Woods and Marin Headlands but the buses weren’t going to work for me, so for the second half of my stay I hired a car (via a very good deal through the accommodation) so I could get out there. My first stop being Muir Woods followed by some views over the fog covering the city:
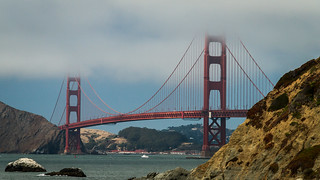
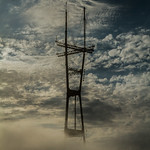
My visit to Marin Headlands was disrupted because areas were closed due to filming of what turned out to be Terminator Genisys. I also was there on the wrong day for access (go on Saturdays, Sundays and Mondays from 12:30pm to 3:30pm) to the Point Bonita Lighthouse, so after some shots of the Golden Gate from this side I headed up to Twin Peaks and Sutro Tower.
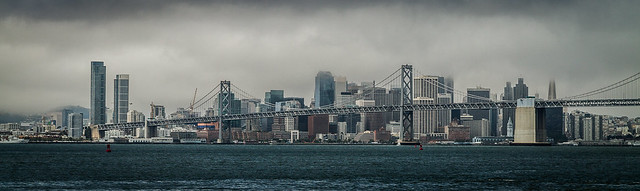
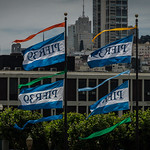
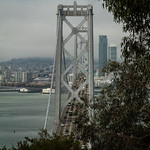
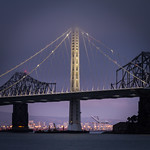
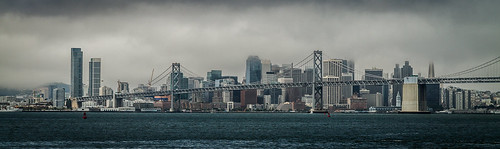
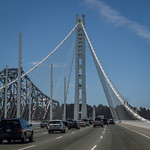
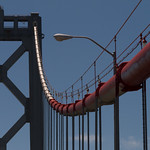
The following day I headed south down the coast, but first scouting views of the new Bay Bridge from Treasure Island for my return at sunset:

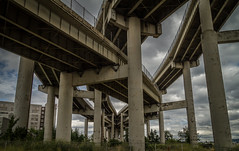
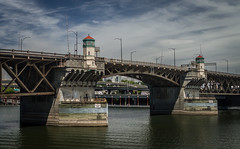
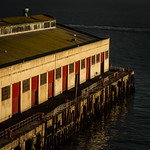
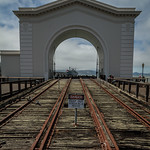
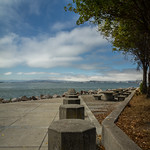
For my final half day I headed over the Oakland and Alameda, getting a few dock related shots:

This completes my first trip to the United States, unfortunately there were lots of places I didn’t get to plus more that have been added to the list…
Tagged with: photos
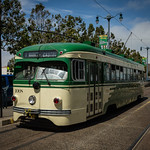
Friday, July 25th, 2014 at 04:56pm
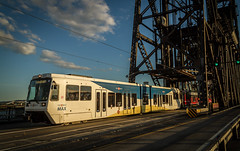
Tagged with: photos, trams
Saturday, July 19th, 2014 at 03:23pm
Five days ago I picked up a rental car, and then proceeded to drive over a thousand miles on the wrong (not to the locals though) side of the road.
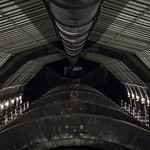
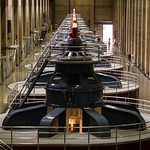
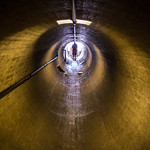
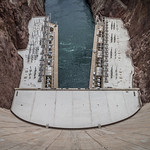
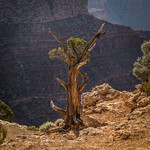
My first stop was to the Hoover Dam where I walked around, took a tour and overall marvelled at the engineering involved:


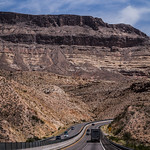
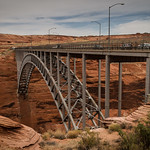
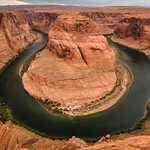
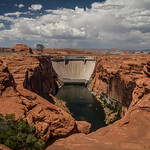
The next day it was time to head west from Las Vegas, after leaving Nevada I would cross back and forth between Utah and Arizona a couple of times before ending up at Page. There are a few national parks that I would have loved to detour to, but I didn’t have the time, I did fit in a tour of the Glen Canyon Dam and stopped by the well-photographed Horseshoe Bend:
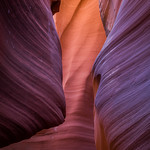
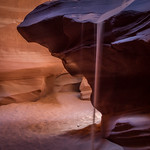
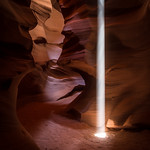
My main reason for visiting Page was for the nearby slot canyons. These are well known – one appears in the default Windows wallpapers – and I found that there was one group that has a dedicated photography tour. I opted for the half day tour which included three canyons, only one of those being the popular Antelope Canyon:
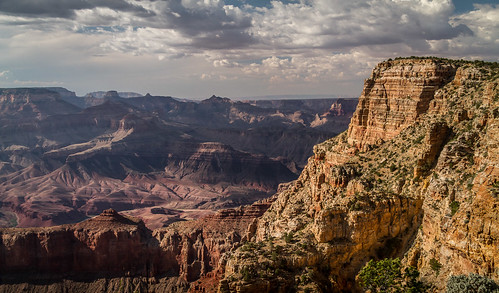
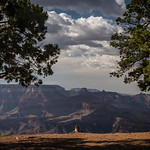
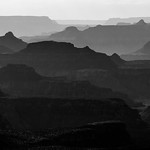
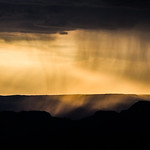
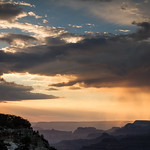
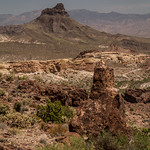
After spending the morning in slot canyons, the remainder of the day was spent driving down to and then along the rim of the Grand Canyon before trying to capture the sunset:
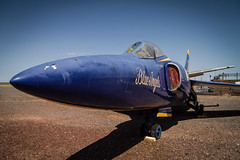
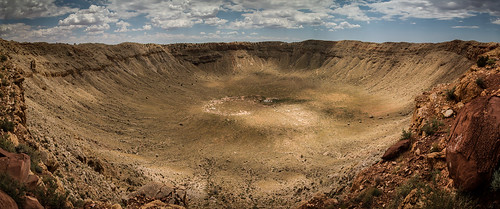
Heading south I stopped briefly at an aircraft museum and passed through Flagstaff on my way to a big hole in the ground, Meteor Crater:
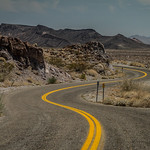
It was now time to head west along parts of the old Route 66 before stopping at another dam and then back to Las Vegas:

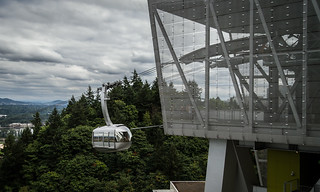
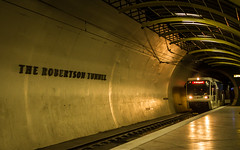
Tomorrow I fly up to Portland, Oregon for a couple of days sightseeing and then OSCON, a huge open source conference.
Tagged with: photos, road trip
Monday, June 2nd, 2014 at 11:11pm
As a rule I try to avoid spending too much time post-processing my photos which is why I have been generally satisfied with the simple (compared to full Photoshop) adjustment tools within Lightroom. There are of course the occasional exception to any rule.
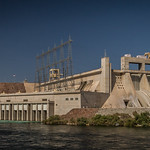
I have mentioned before about how I went from this (as-shot) image of the Albury train station:
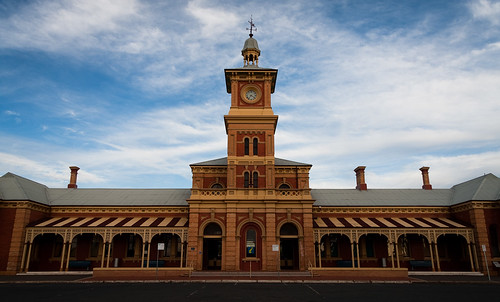
to this brightened, sign and chimney removed, and perspective corrected image:
What I said in the previous post wasn’t quite correct, I actually cloned out the signs and added a gradient before I decided to try to correct the perspective using GIMP. I recall that this took about an hour to figure out how to do, then the image went back into Lightroom to clone out the third chimney and some final tweaks.
That was two years ago. Today in version 5 of Lightroom is a perspective correction tool. You don’t have full control to change the perspective, instead it is a couple of correction settings that work in an automatic way. Since it was introduced it has been a very handy tool.
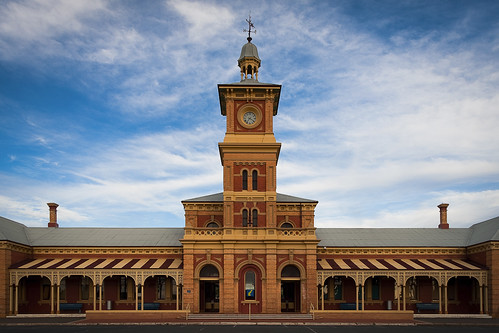
I don’t know why, but a few days ago I thought of this image and wondered how the built in perspective correction would do. So I went to the original image in the Library (ie all the edits up to the point it was exported to TIFF for GIMP), made a virtual copy, clicked the ‘Vertical’ perspective button, recropped and then cloned out the third chimney to arrive at:
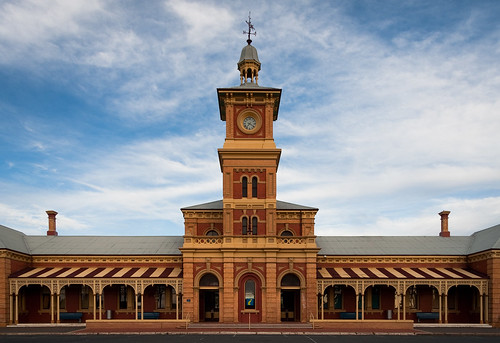
If you open both modified images and swap between them you can see that the only difference is a slight difference to the proportions of the building. But when you consider one was a few seconds to click a button while the other was at least an hour and then the change history is split across two files, I am glad that Lightroom now has built in perspective correction.
I am also hoping that over time the perspective correction tool is expanded into something like the Adaptive Wide Angle filter from Photoshop. While I am wishing for things, I would also like Lightroom to get content aware fill…
Tagged with: gimp, lightroom, photos
Wednesday, May 28th, 2014 at 02:30pm
I was sorting through some old files (yes, a lot like xkcd 1360) and I came across a PDF of a getting started guide for Lightroom. It is old (version 1.1) but while skimming through it I noticed this overview of the workflow:

The particular thing that caught my eye was the blue “Export to Photoshop” circle to indicate that Photoshop is not the end point, this is what I was saying in my recent post about the false dichotomy between Photoshop and Lightroom.
Tagged with: lightroom, photos, workflow
Wednesday, May 21st, 2014 at 09:23pm
Last night I lugged a bunch of stuff – computer, printer, mat cutter, supplies, past images – up to the camera club to do a demonstration on how I print and submit images for the monthly competitions. While I rambled on and showed things in a non-sequential manner I think that at least a couple of people got something out of the night.
In case this might be useful at other times, here are some notes from my process: (with the disclaimer that this is just my process, there are other ways to print images)
- I was very lucky that at the time I decided to start printing my own images I was able to pick up a secondhand printer at a reasonable price.
- From the beginning I decided to stick with genuine Epson inks.
- I got a sample pack of different Ilford papers and did some test prints with both these and some Epson papers.
- I decided to just use Ilford Galerie Smooth Pearl paper, even though some types of images can benefit from certain types (matt, gloss, art, metallic) of paper. I looked around online to get A3+ paper at a good price.
- Ensure that you use the profile for your paper/printer combination, you get these from the paper manufacturer.
- I do not try to match the print against my screen, instead I care about a print that looks good.
- Do a nozzle check if it has been a while since you last used the printer. The one time I forgot to do this there was a blocked nozzle (fixed by a head clean) that ruined a full size print.
- Any unused areas of the A3+ sheet are salvaged into 6×4″ pieces. Test prints are made on these before committing to a full size print.
- The size of the printed image is worked out based on the size and orientation of the mat board, the border width and allowing for a small overlap.
- Leave a small margin above the image on the paper, this is the area that will be used for tape later.
- Mark everything out on the back of the mat board. These markings are then lined up with the edge of the rail in the mat cutter. I cut slightly longer (both before and after) to ensure a clean cut in the corners with no tear out.
- Only use tape across the top of the image, this allows it to float between the mat and backing, otherwise it might buckle.
- I use double sided tape (squares in the corners, spots along the edges) to attach 3mm foam core board as the backing. As no tape is exposed it cannot peel up and cause damage when in the box with other prints.
- The foam core board is larger than the 16×20″ mat board, this is attached and then trimmed down to the size of the mat board instead of trying to align exactly.
Tagged with: photos, printing, waverley camera club
Saturday, May 10th, 2014 at 11:28pm
Performance
Back when I last upgraded my desktop I made the choice to put my “todo” photos on the SSD which I thought gave a significant speed improvement. I was wrong and over time I came to realise that the real speed improvement was on existing images, not any of the new images, they still had a small ‘Loading…’ delay.
Once I got around to looking into it I found the Lightroom Help / Optimize performance page which is a good starting point. These other 10 tips were also helpful.
Apart from tweaking settings such as the preview size, the biggest change to my process is that I intentionally render 1:1 previews. These previews are stored in the cache which is on the SSD. As the photos didn’t benefit from being on the SSD, all my photos are back on to a single drive (a WD Black so decent speeds) which benefits my import process and also the “todo” to “done” move of the photos.
Lens correction by default
A few months ago I started to apply lens correction and removal of chromatic aberration to all of the new photos. For a while I would do this by going to the first image in the import, checking the two boxes and then syncing the settings to the other images.
To automatically turn on the correction there seems to be two common methods, create a preset to use when importing or to change the default develop settings. As I don’t actually use the import workflow I opted for the latter, so from last week any image taken with a Canon 7D will have correction applied.
Convert to DNG
Whether or not to convert RAW files to DNG is one of those questions with no clear answer. Hence why I currently use RAW files, but as an experiment I will convert the photos from my next outing into DNG.
I expect to get a small (but it will add up) benefit from the slightly smaller file (around 2MB per), but the main benefit should be the embedded fast load data. Time will tell…
Tagged with: computers, lightroom, photos
Saturday, May 3rd, 2014 at 11:52am
If you are talking about photography post processing (be it in a camera club or online) then it is inevitable that you will be part of a debate about whether you should use Photoshop or Lightroom. As there is no simple answer don’t be surprised if things get heated.
The flaw in these debates is that Photoshop and Lightroom are not alternatives for each other. While Photoshop is a massively powerful image editor, you don’t use it to manage your photo library. On the other side while Lightroom has a great library module and gives many adjustment options, it is not an image editor.
So Photoshop and Lightroom and not alternatives, they complement each other and that shows through in how they integrate together. If you need to do something that is beyond the adjustments built into Lightroom then you can take the image out to Photoshop (or other program) and then bring it back to Lightroom for exporting or printing.
Keeping within the realm of Adobe products, instead of comparing Lightroom to Photoshop, the valid comparison is Lightroom against the combination of Bridge and Camera Raw.
So what is the harm in arguing over Lightroom or Photoshop? Apart from the time that is wasted, it can also provide incomplete information to the inexperienced photographer. This may have a greater negative impact in the long run.
What do I mean? Well, at the camera club we want to encourage beginners to be out there taking photos and submitting them in our monthly competitions with the critique feeding back into better photos in the future. To me this includes talking about concepts and effects, not the specific steps in a particular tool.
I have seen an experienced photographer demonstrate to a beginner how to add a vignette to a photo via a complex series of steps (selection, feathering, new layer, fill, opacity blending, etc) in Photoshop. The same vignette could be added in Lightroom (or Camera Raw) by moving a slider which means that the beginner could take in more about why to use a vignette than how to apply it.
My view is that a beginner should start with Lightroom to manage their photos and apply adjustments. It is only once they are much more experienced and are pushing the limits of the Lightroom adjustments that they should consider Photoshop. And don’t forget that taking the right photo in the first place is better than fiddling with post-processing.
Tagged with: lightroom, photos
Thursday, January 30th, 2014 at 11:28am
Last year when I posted that things were going to be different there was something I didn’t mention, because I hadn’t yet made the decision. I was going to be flying over to Perth for LCA in January, and since I no longer had to get back to go to work I pushed my return flight back a week. If I am going to be flying all the way across the country, why not take photos of some of the sights? It is not that long since I was last in Perth, but on that try Perth was just a stop, the purpose of the trip was the journey. This time I could wander around and hopefully find interesting things.
Again I intend to write up another post about the conference itself (though I never wrote up anything about Canberra last year), for now I will talk about what I did afterwards.
Initially I was flying home the day after (Saturday) the conference, because I would have to pay a change fee I ended up opting for a slightly cheaper flight back on the following Sunday. This was a dreaded red-eye, but I didn’t have work to go to on the Monday, and it gave me slightly over a week to explore.
I ended up splitting my time, the first four days exploring Perth and Fremantle, then I would pick up a car and drive north (and back) over the next four days.
What I didn’t expect was for this to coincide with a heatwave. I’m not a fan of walking around in 40+ degree heat, so the first few days were essentially heat out as soon as it was light for a couple of hours and then retire to my room. The consolation at least was that nobody was around that early and I didn’t have to deal with harsh light.
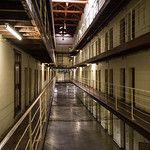
Once the heat broke I spent a day down in Fremantle, inclusing the Maritime Museum and former prison
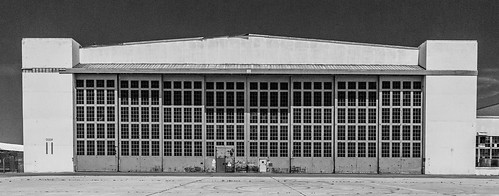
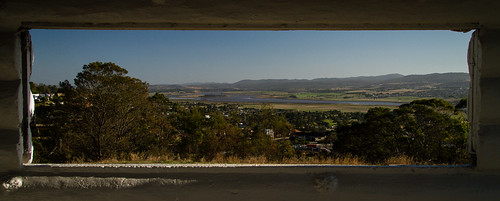
I’m not sure where I found out about it, but on another hot day I caught the train out to the Aviation Heritage Museum in Bull Creek:
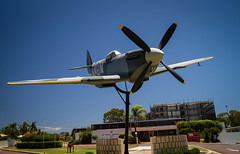
It was then time to pick up the hire car and head north, working my way along the coast as far as Kalbarri and then back on a more direct inland route:

I didn’t cover everything (often too hot to stray far from the car), but I have a better idea of the areas for the next time I go back.
I was back in Perth for a day I drive around a bit to cover some areas that were not in walking distance of a station… (and the middle of the day was quite hot so I went to see a movie for the air conditioning)
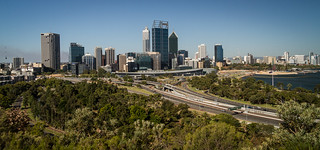
It was good to get out with my camera, and while I should be starting to think about getting a new job I am spending more time on planning other trips, one over the easter weekend to the high country over easter and a big one to the US.
Tagged with: linux.conf.au, photos, road trip
Sunday, March 31st, 2013 at 10:07pm
Earlier this evening the driving portion of this road trip was completed when we arrived back in Devonport. Of course this was with just enough time to check into the motel, find some dinner and then get back to watch the new episode of Doctor Who.
The day started in Launceston with a brief stop by the Trevallyn Dam and a lookout on the western side of town.
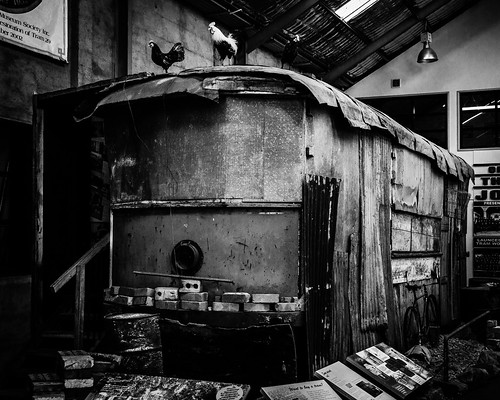
We then visited the Launceston Tramway Museum where it was quite interesting to see that although they only ever had 29 trams, they have managed to track down all of them. Of course not all have survived, some are being restored and this example has been retained as an example of the chook shed it had been converted into.
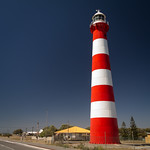
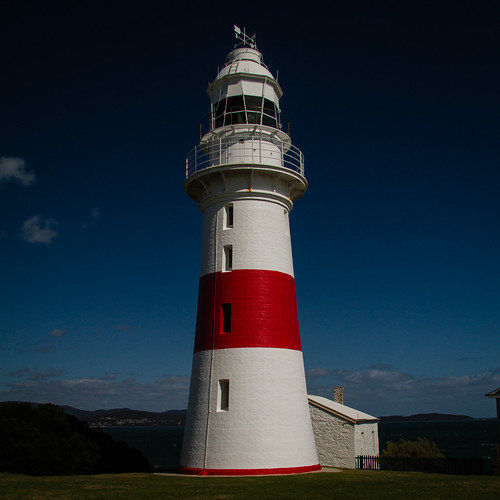
From Launceston we followed the eastern side of the Tamar River to George Town where we were lucky enough to arrive at lighthouse at noon, just at the time that they sounded the restored fog horn.
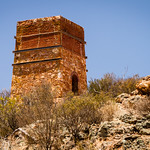
Heading back up the river we stopped at one of the old semaphore stations (that linked George Town with Launceston).
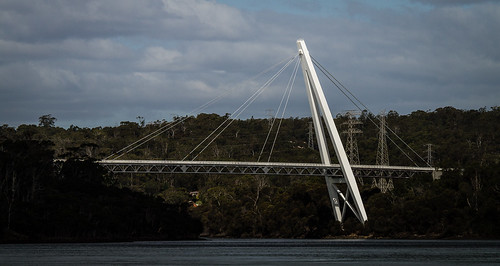
Crossing over the Tamar was via the Batman Bridge – the first cable-stayed bridge in Australia.
Now on the western side of the river we visited the mining museum at Beaconsfield, didn’t see much at Greens Beach, skipped visiting Port Sorell and then arrived in Devonport.
Although we did see the Spirit come into port at Devonport, our booking is for tomorrow (a day sailing) as we wanted to keep our last driving day flexible. We did ask if we could change our booking to tonights sailing, but it would have cost $300 to change it at this late stage…
Tagged with: photos, road trip, tasmania
Saturday, March 30th, 2013 at 09:45pm
As this road trip through western Tasmania draws to a close, today we travelleled north from Hobart to Launceston, but we didn’t just follow the main highway.
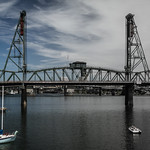
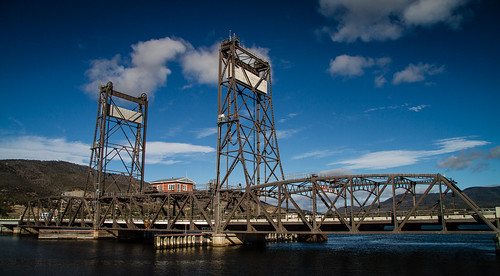
From Hobart we headed back up the Derwent River to have another look at its vertical lift bridge.
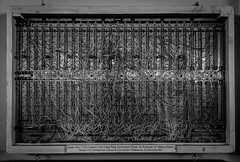
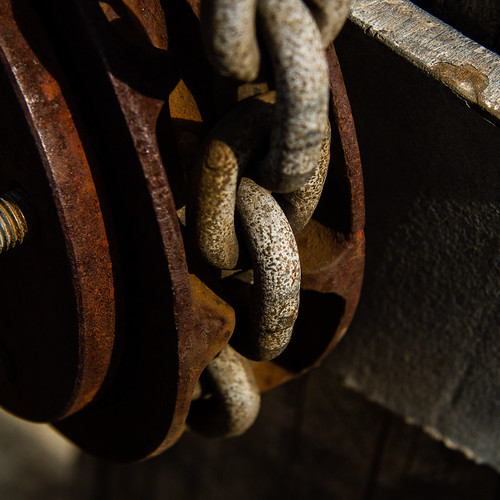
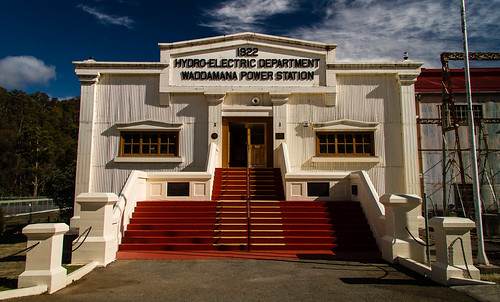
From there we continued north, but then turned off into the hills to the Waddamana Power Station Museum.
The museum was an excellent source for photos of old machinery and switching gear. This alone has provided many photos for me to sort through later.
From Waddamana we headed up to the Miena Dam on Great Lake. The water level was low enough to expose the second Miena Dam (a series of concrete arches) behind the current rockfill dam. It wasn’t quite low enough to expose the first concrete dam, but it was just visible.
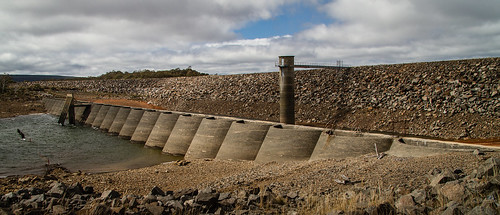
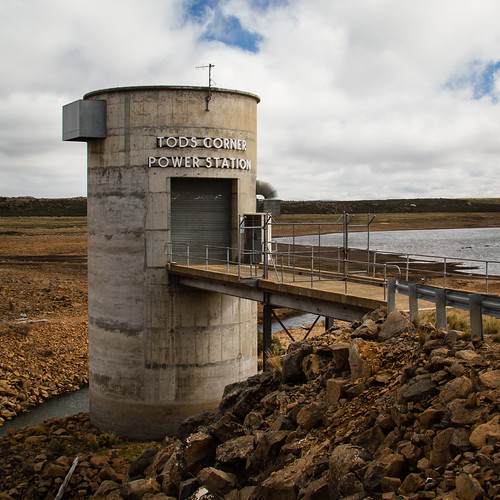
Around the corner from the Miena Dam was the outlet of the pipe where water is pumped up from Arthurs Lake. Here is a small power station that uses that water to reclaim some of the energy.
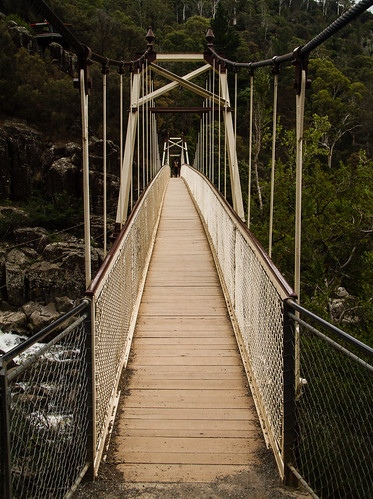
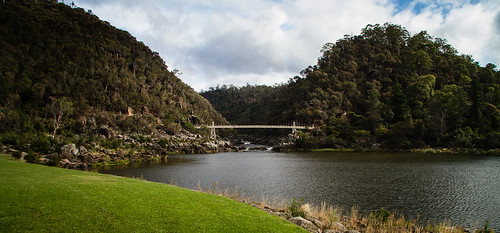
Continuing north we dropped down the Great Western Tiers and then arrived in Launceston in mid-afternoon. This gave us time to visit Cataract Gorge, both First Basin and the old Duck Reach power station.
We also drove around Launceston, noting the Tramway Museum for a visit tomorrow.
Tagged with: photos, road trip, tasmania
Friday, March 29th, 2013 at 10:15pm
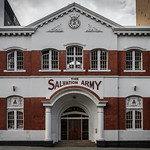
Our Tasmania road trip is almost over with today being a full day in Hobart. Today is also Good Friday. What is Hobart like on Good Friday? In our roaming around searching for things to do or see we did stop by the Waterfront and Salamanca Place. The former featuring a cruise ship in port and the latter the busiest place we saw all day.
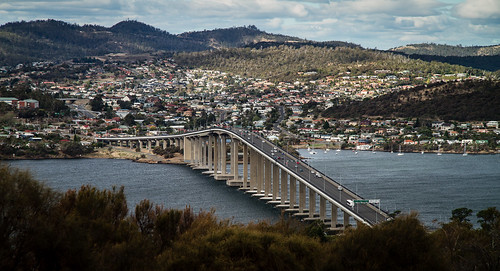
After an early lunch we headed over the Tasman Bridge to the Rosny Hill Lookout, drove past the Bellerive Oval before stopping under the eastern approach to said bridge.
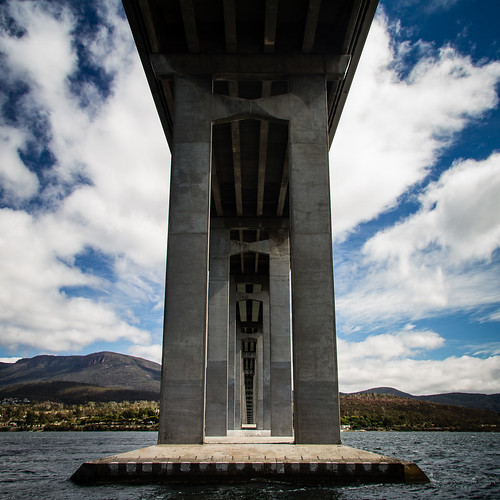
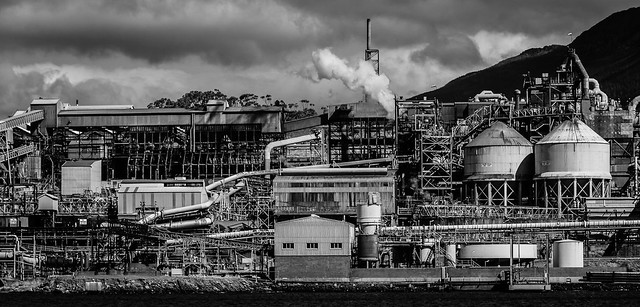
We then headed up the eastern side of the Derwent River, stopping at a few places which included shortly before the Bowen Bridge with a view across the river of the zinc smelter. (and the Incat shipyard, but nothing interesting was visible)

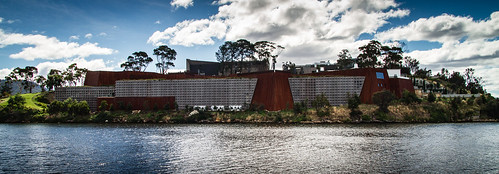
After crossing the river we headed over the the Tasmanian Transport Museum which we understood to be “open on Saturdays, Sundays and Public Holidays”. It seems that Good Friday isn’t a public holiday, as it was not open. With more time to kill, but not in the mood to look at actual art we found a place to photograph Mona from a distance.
Heading back south (we were working our way anti-clockwise) we stopped at the western approach to the Tasman bridge before heading up into Queens Domain. As we now expect, the view from the summit lookout was obscured by trees, but interestingly there was access onto a pair of huge water tanks, from which there was a clear view of the Tasman Bridge.
By now we had exhausted our short list of places to go, but it was only mid afternoon. To fill the time we brought forward our visit to Richmond from tomorrow. On the way we spotted some dishes not far from the road, which turned out to be the Mount Pleasant Radio Observatory.
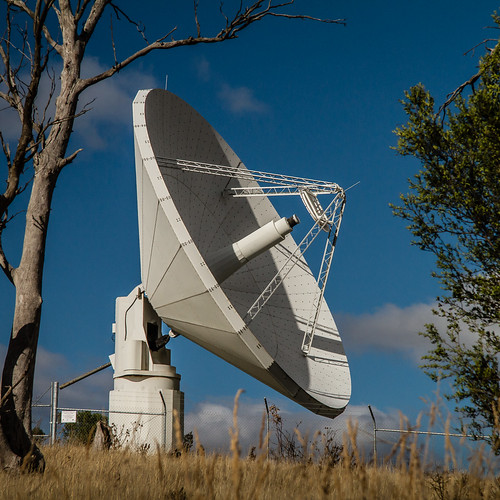
Later research informed us that one of the dishes (not the one pictured) is from the former Orroral Valley Tracking Station which we stopped at on a previous road trip.
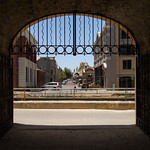
Continuing on to Richmond we of photographed the bridge…
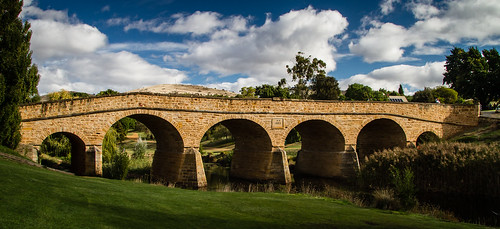
… before heading back to Hobart via Sorrell, Seven Mile Beach and even Rokeby where we spotted this sign.
Since we stopped via Richmond today, tomorrows plan is now to head straight for the Hydro Museum at Waddamana before ultimately ending up in Launceston.
Tagged with: photos, road trip, tasmania
Thursday, March 28th, 2013 at 11:06pm
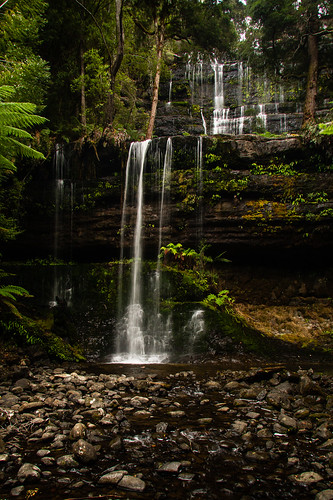
Today’s leg started out with a visit to Russell Falls, but there wasn’t much water flowing over them.
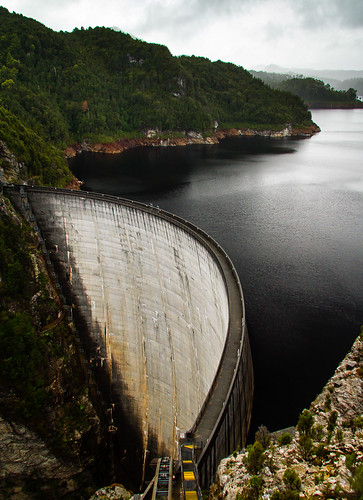
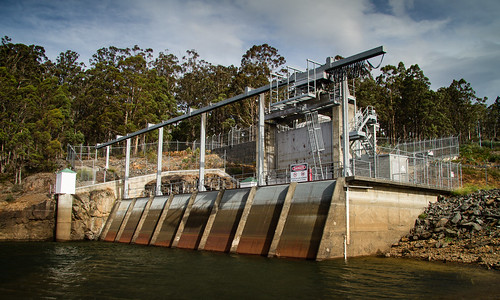
We then headed west to visit the Gordon Dam, a drive of approximately 200 kilometres return with not much to see on the way. It was also raining for most of the drive, we where lucky to get a couple of breaks while at the dam itself. We also stopped by the Serpentine Dam, but that is in no way as interesting to photograph.
Once we returned to the main highway, we followed the Derwent River all of the way into Hobart. In an attempt to catch the sunset we headed up Mount Wellington which was clouded in when we initially arrived, but we were lucky again as that cleared.
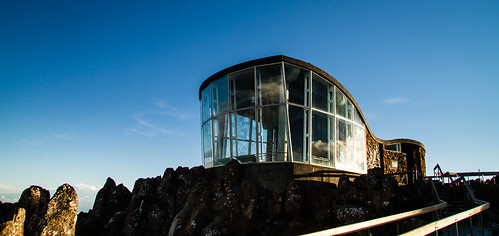
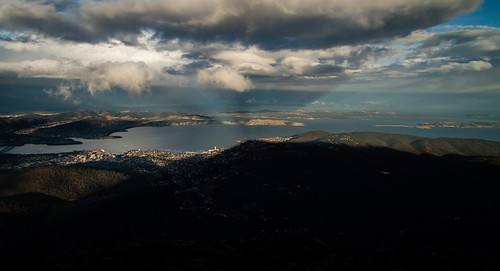
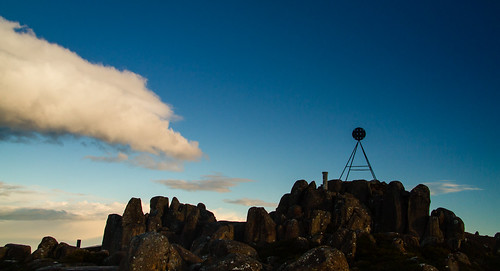
Despite it clearing, it was still cold and very windy, so we didn’t stay long. Instead opting to drive over to Mount Nelson and then down and through Hobart. This is the first of two nights in Hobart, we are still planning what to do tomorrow.
Tagged with: photos, road trip, tasmania
Wednesday, March 27th, 2013 at 10:02pm
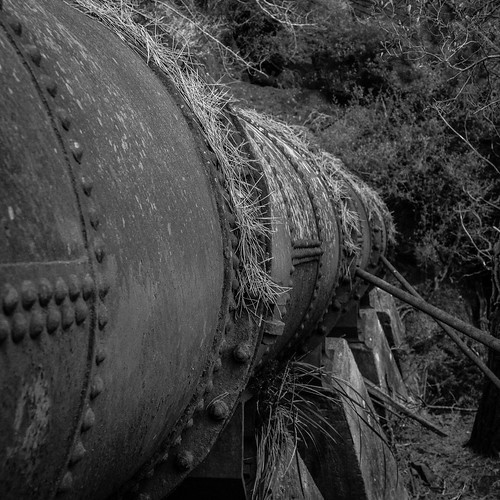
This morning our Tasmania road trip started the day with an underground tour of the Mount Lyell Mine. The tour took around three hours, covering the above ground and (more importantly) the underground operations of the mine. We didn’t go all of the way down, but we got to the crib room, saw underground workshops, the crusher, the main shaft, haulage trucks and all sorts of other things. The operations are quite a contrast to the tour of the Super Pit in Kalgoorlie that we went on two years ago during the Perth road trip.
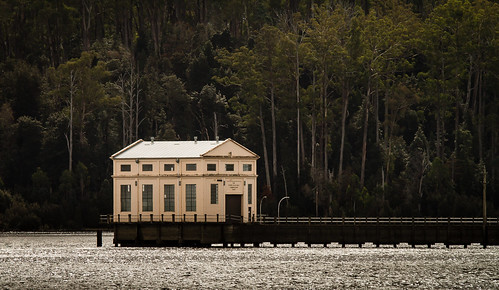
Following the mine we stopped by the Spion Kop Lookout in town before heading east, where our day switched from mining to dams and power stations. Our first stop was at Lake St Clair, where we were not interested in the nature, but in the old pumping station.
Comtinuing on we started to pass the series of dams that supply the Tungatinah Power Station, including the intake portal.
Shortly after that we passed Tungatinah Power Station itself and then the Tarraleah Power Station on the opposite side of the river.
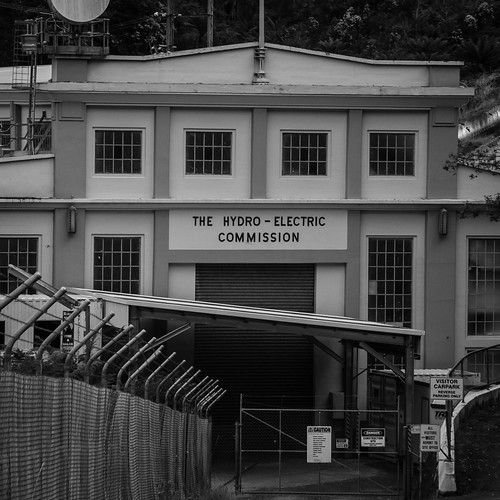
The old village for building Tarraleah is now part of a resort, but it does have a viewing platform above the penstocks.
From there we followed the pipes, canals and aqueducts up to Clark Dam.
Our path then took up down the Derwent River where we spotted the spilling Cluny Dam, but only from a distance.
Our final dam visit was to the Repulse Dam, where they appear to be really keen about limiting loads over the bridge.
Since Tasmania has such a large number of hydroelectic power generation it is not surprising we are seeing so many, in fact we will see more tomorrow (Gordon and Serpentine) and in a few days time when we head back north.
Tagged with: photos, road trip, tasmania
Tuesday, March 26th, 2013 at 10:26pm
As mentioned yesterday, today’s leg of the Tasmania road trip included a trip on the Mount Lyell Railway West Coast Wilderness Railway. The current setup is that you ride the train one way, with a coach shuttle either at the start or end.
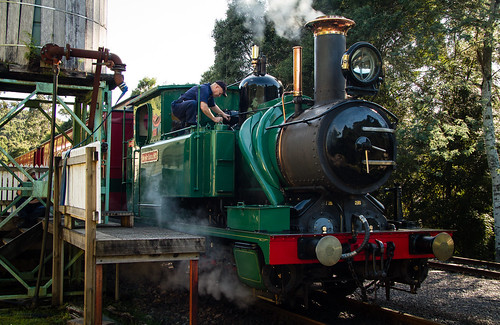
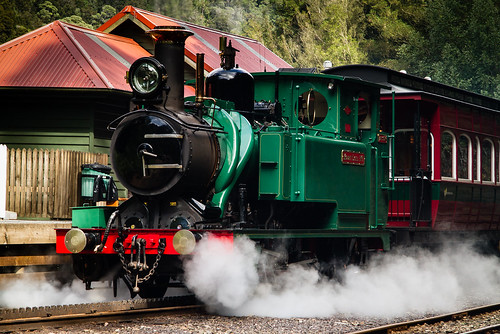
We opted for the 8AM coach from Strahan to Queenstown and then the train back to Strahan which would give us more time under our control, so we had four hours to drive ourselves to Queenstown and explore the nearby area. This included stops at the historic Lake Margaret Power Station, the old Iron Blow mine and dams south of Queenstown.
Even further south we found the Bird River Track which follows the route of the North Mount Lyell Railway and was a contemporary of the Mount Lyell Railway.
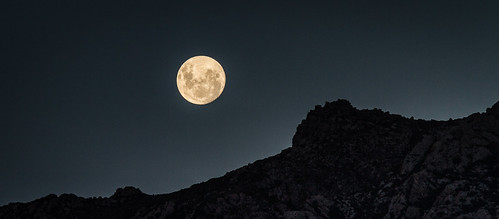
During the return to Queenstown there was interesting light over the hills around the slurry dam and the almost full moon was rising.

Tomorrow we will continue mine related activities with an underground tour of the Mount Lyell tour, followed by a long drive past Lake St Clair, past Tarraleah to arrive at Russell Falls in the Mount Field National Park before sunset.
Tagged with: photos, road trip, tasmania
Monday, March 25th, 2013 at 09:28pm
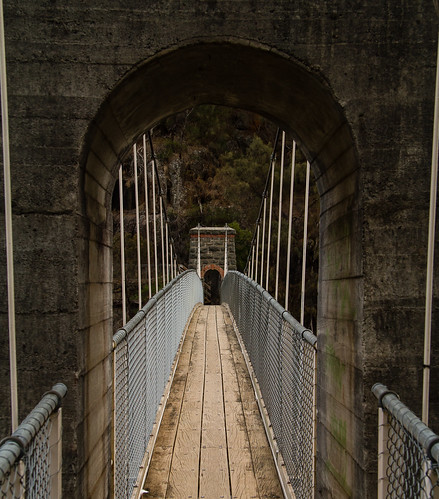
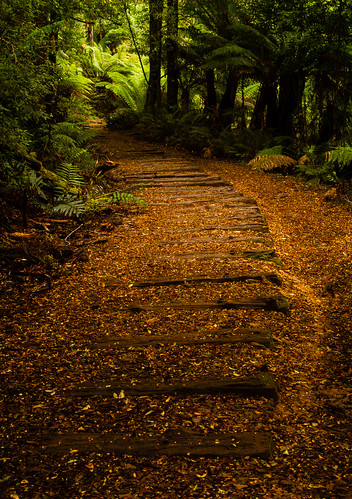
Today’s leg of the Tasmania road trip was quite short, this was to allow for the three hour return walk along the old route of the North East Dundas Tramway to the base of Montezuma Falls, the highest (at 104 metres) falls in Tasmania. Being the old tramway the walk was quite easy, with the old sleepers visible in sections.
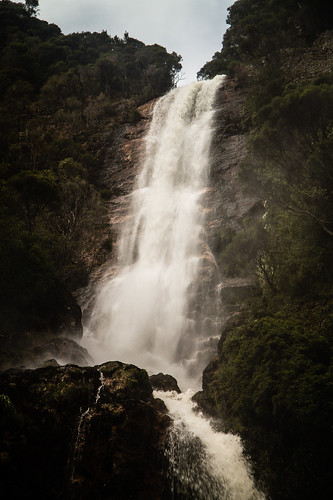
Unfortunately the weather wasn’t the best to photograph the falls, photos of the suspension bridge (across where a trestle bridge used to be) were a lot better.
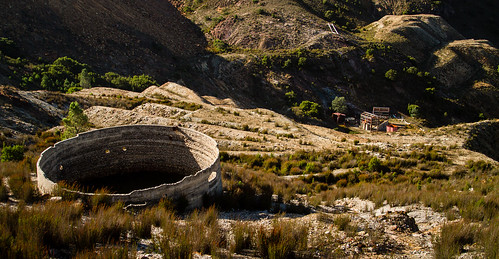
Once back in the car we looked around some of the other old mining area around Roseberry before heading to Zeehan which has a number of old buildings and a mining museum. There is also the Spray Tunnel, a tunnel that serviced the Spray Mine.
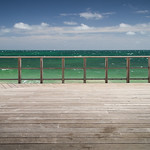
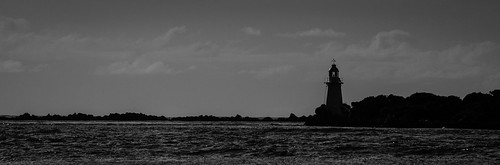
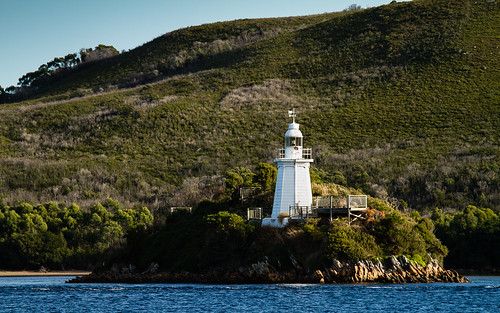
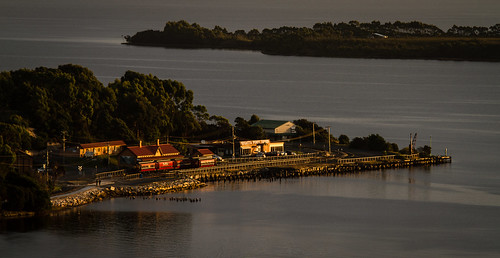
We then headed down to Strahan and after sorting out out (booked) ticked for the train tomorrow, we headed out to Braddon Point where we drove out onto the beach from where we could see the lighthouses at the entrance to Macquarie Harbour.
As the light changed we stopped be a jety, explored some forest tracks, picked up some dinner and then found a lookout over the town.
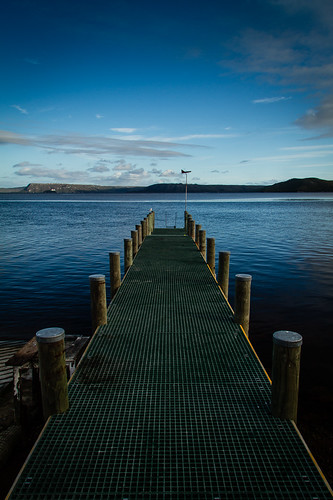
Our plan for tomorrow is also a short day, this time because of the West Coast Wilderness Railway.
Tagged with: photos, road trip, tasmania
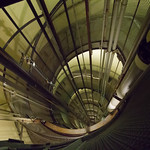
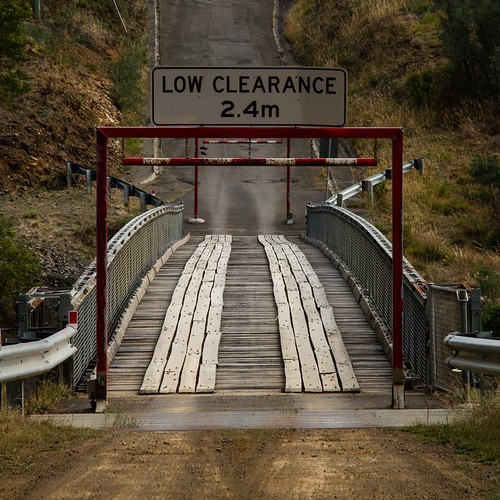
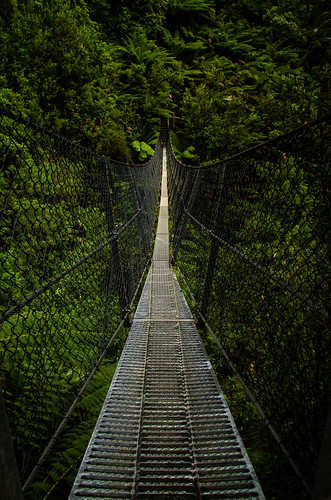
Sunday, March 24th, 2013 at 09:20pm
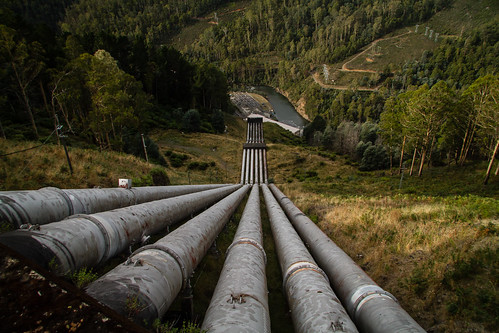
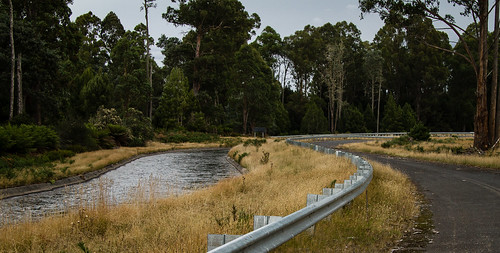
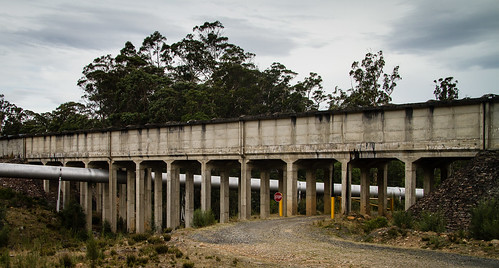
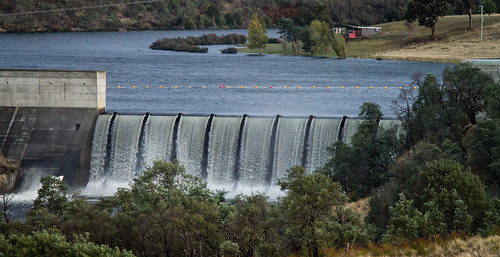
Today’s leg of our Tasmania road trip started with water in one form, and then ended with water in another form.
The first form was the ocean, which we followed from Arthur River through Couta Rocks to Temma. We were surpised by how many coastal ‘shacks’ there were, most quite substantial and a few with slips for fishing boats.
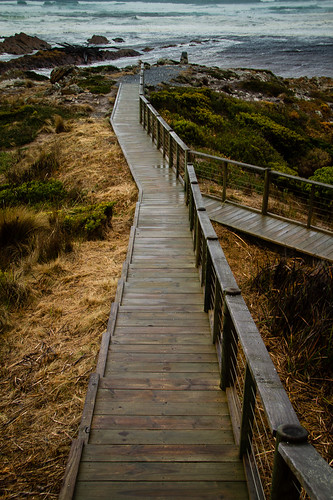

After leaving the coast we followed the Western Explorer Highway south through a variety of environments before arriving at Corrina with its ferry across the Pieman River.
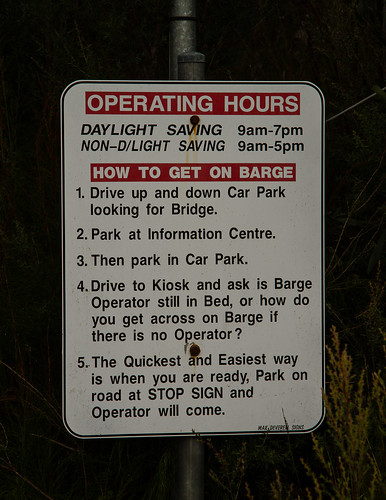
The remainder of the day was dominated by dams and power stations, of course with their water in a stored form. There were a number of them, including one that diverted water through a tunnel from one river system into a reservoir on another river system.
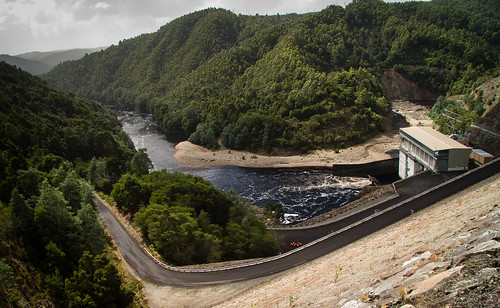
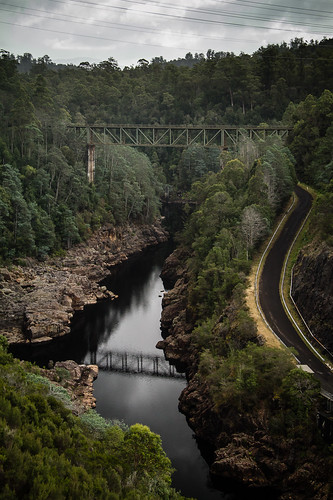
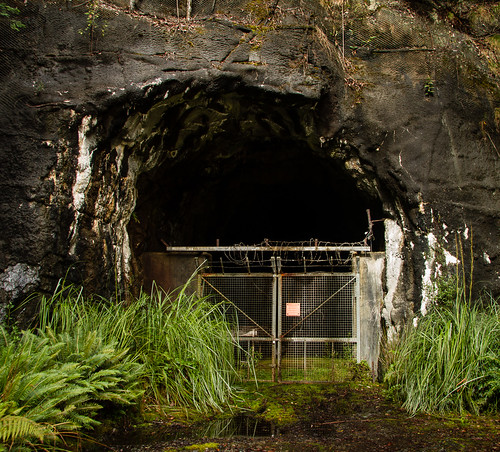
At one point we stopped at a lookout, one that was in need of some upkeep, a situation that we have often found.

Tomorrow we are off to Montezuma Falls (the highest in Tasmania) and then mining history at Zeehan.
Tagged with: photos, road trip, tasmania
Saturday, March 23rd, 2013 at 11:16pm
On day two of this road trip through Tasmania we travelled west along the north coast from Burnie and then south along the west coast to Arthur River. However we did start the day by heading inland to find Guide Falls, only one of the two waterfalls we were looking for today.

The weather was mixed, mostly heavy rain in the morning that was punctuated by patches of clear(er) sky. When it had just been raining and was still overcast the nice rich tones made themselves known.
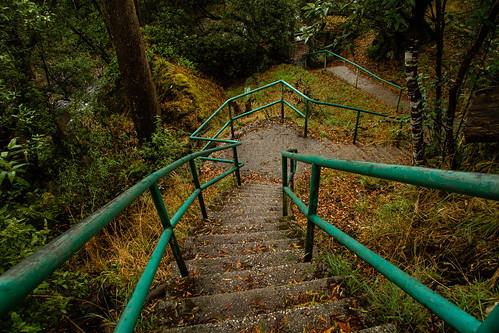
Despite this, it was nice that as we returned to the coast we could see the rain moving away, where it stayed for most of the afternoon.
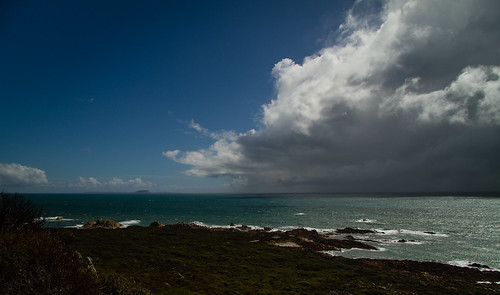
Which, being along the coast, featured a couple of lighthouses such at the one up on Rocky Cape.

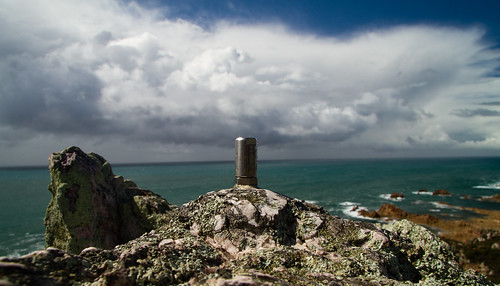
We started to see more wildlife.
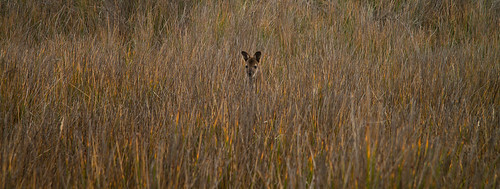
At West Point we failed to find the lighthouse, just these concrete foundations.
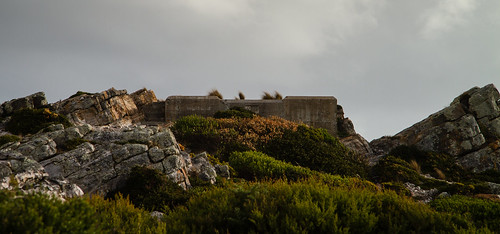
At Bluff Hill Point we found a relatively modern (precast concrete, not stone, masonary or concrete in a form) lighthouse, it wasn’t until looking it up later that we found that when this was comissioned, it replaced the one at West Point that was subsequently removed.
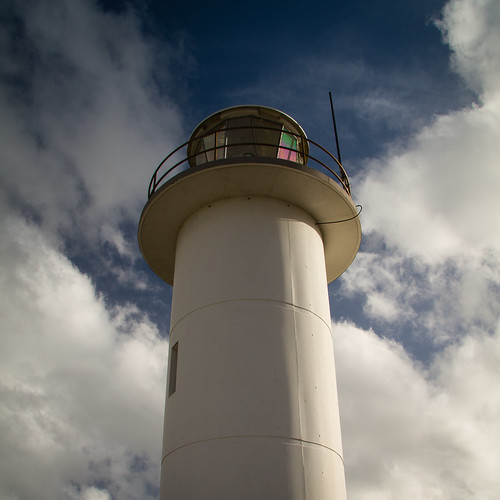
These weren’t the only sights we saw, it is just that I need more time post processing those photos (in some cases that will mean assembling panoramas), but right now the day is over. Tomorrow is heading back inland, first along the Western Explorer Highway through the Tarkine region and then past mines and a number of dams.
Tagged with: photos, road trip, tasmania
Friday, March 22nd, 2013 at 10:09pm
Twenty four hours ago I was about to pass through Port Phillip Heads on my way to Devonport aboard the Spirit of Tasmania. That was the start of a twelve day trip, ten of which involve driving around the north western areas of Tasmania.
After a very poor night’s sleep, we drove off the boat (from the very bottom garage deck) at around 6:30am, picked up supplies at a supermarket and then headed towards Cradle Mountain National Park, stopping at lookouts and dams along the way.
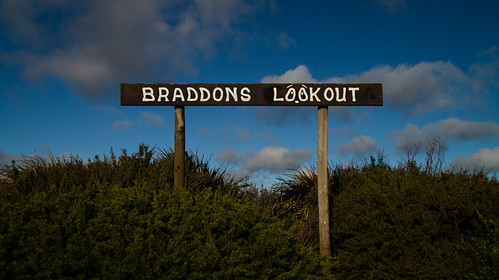

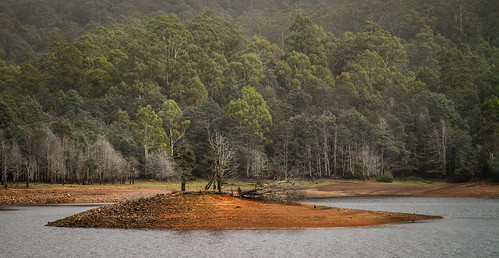
The plan had been to spend a couple of hours at Dove Lake, but the weather was so miserable and wet that we ate lunch in the car and decided to move on. A waterfall and old dam or so later we ended up back on the coast at Wynyard before heading to the accommodation we had booked at Burnie.
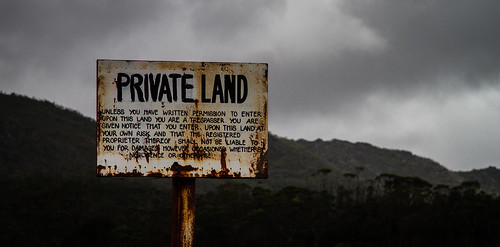
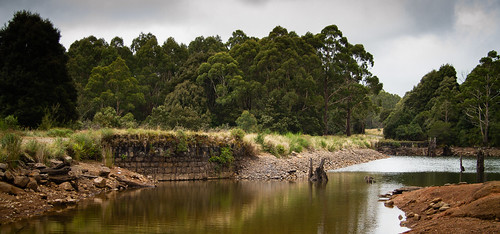
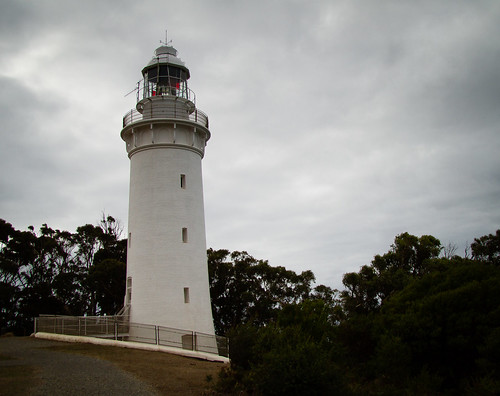
The plan for tomorrow is to start the day at the Hellyers Road Distillery (just for a tasting) before continuing along the coast, past The Nut at Stanley to end up on the west coast at Arthur River.
Tagged with: photos, road trip, tasmania
Wednesday, May 2nd, 2012 at 08:40pm
Two years ago I took this photo of the Albury railway station:
However the version I submitted in the May competition at the camera club was the result of a few hours of processing, the most processing I have ever done to an image:
I first took the image out of Lightroom and into GIMP where I “corrected” the perspective. You know, to make the verticals vertical. I also stretched it vertically because it was looking a bit squashed.
Once back in Lightroom I began to liberally apply the spot removal tool to remove the parking signs and one of the chimneys, the goal being to make the image symmetrical. My final changes were to add a gradient to bump up the exposure of the bottom half and an overall change to the levels.
I entered the image as a print, which the judge awarded a highly commended.
I also recieved highly commendeds for two other images, both from the Perth road trip and both entered as EDI. First was this image of the red earth and blue skies near Marvel Loch:
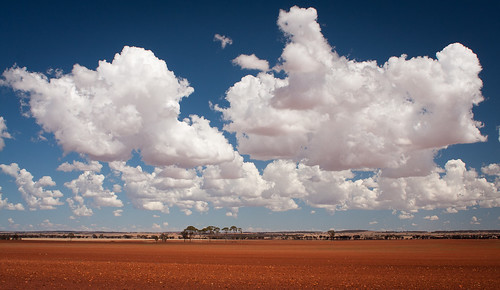
Second was this image of water pooled on some rocks in the desert:
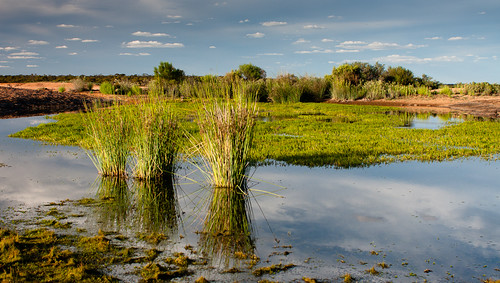
This second image was also modified from when I first posted it to Flickr, it is a different crop, contrast has been increased and a gradient applied to the sky to bring out the clouds.
My final image featured the regrowth on the trees near Marysville, burnt in the Black Saturday bushfires:
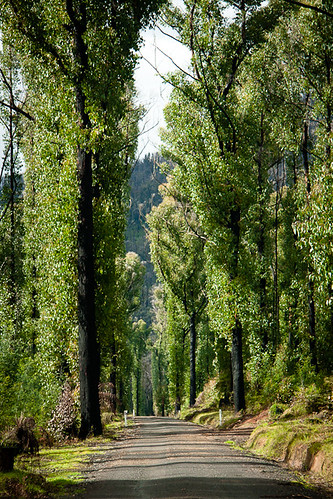
Tagged with: gimp, lightroom, photos, waverley camera club
Saturday, January 21st, 2012 at 01:18pm
A few years ago there was an LCA held in Melbourne, that I regret not going to. What is LCA? It is the abbreviation for linux.conf.au, a large open source conference that is held every year at various locations around Australia and New Zealand. Those familiar with me should know that I am a regular attendee at Open Source Developers’ Conference, my undetrstanding was that LCA is like that but bigger, although more technical and obviously more based around Linux.
When I found out late last year that the next one would be held in Ballarat I decided that I had to go. It was close enough that I could just drive out there, but also far enough away that I could immerse myself in it for the entire week.
That week is now over and I have a lot to think about – will need to make a follow up post about the talks once I have digested it all. Though two that immediately come to mind are one from Andrew Tridgell about the design and build of an open source UAV to rescue “Outback Joe” and other about launching balloons into space which included a live demonstration:
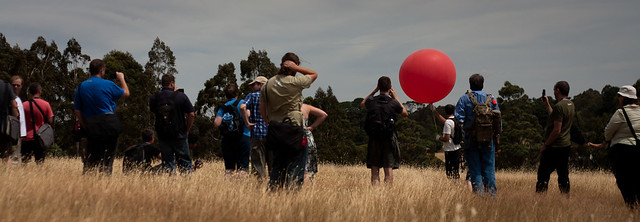
A big difference to previous conferences was a sense of community which was due to it being held on a university campus AND a lot of people (including myself) stayed on campus in the student dorms. This gave a great sense of community, eg on the Monday night a sizable group of us gathered, ordered a lot of pizza and talked about all sorts of things, there was a big BBQ on another night and on yet another night we had a big shared collective dinner:


Next year it will be in Canberra and I have already decided to go, probably driving up. Though this does mean that I will now have two regular conferences in my calendar that are similar but different: OSDC and LCA…
Tagged with: conference, linux.conf.au, photos
Friday, March 4th, 2011 at 11:48am
This time tomorrow, Damien and I should be heading in a westerly direction out of Melbourne. The first day of a three week / 8,000km plus road trip from Melbourne to Perth and back.
View Larger Map
Not much about the trip is set in stone as we don’t know how long we will stop (if at all) at various places. To reflect this we have lists of motels, caravan parks and campsites, but very few actual bookings. If needed we will call ahead a few days in advance, but that is all.
One thing that (some) people seem surprised about is that we will only be spending a single day in Perth. Yes, one day out of three weeks and that is a rest day to catch up on things like washing clothes (there are other rest days as well). This is a road trip, so it is about the journey, not about the destination, Perth is just one of the stops. Driving across Australia is not something you do often, you can always fly over to Perth later.
The last few weeks have been busy with final planning which should all come together tonight with the final pack of the car. But I thought I should mention the technology that we are considering essential:
- Three still cameras (SLR, compact and a bridge)
- One HD video camera (mounted to the windscreen..)
- Three (maybe four) phones (one of mine, the others Damiens)
- GPS unit (in addition to one in the phones)
- UHF radios
- Two laptops
- Telstra internet dongle
- External drives for backup
- Batteries and chargers
I will try to keep identica/twitter/facebook updated, and maybe throw in a blog post or two. But we know that there is zero mobile coverage across the desert (on the train line yes, but not down at the highway) so it will become quiet on the Ceduna to Esperance and Norseman to Ceduna sections.
If nothing else, I expect to be back in three weeks with lots of photos, hopefully some of them good.
Tagged with: photos, road trip
Tuesday, August 10th, 2010 at 08:11pm
Last month I, mostly as an experiment, entered some image in the 6th Pakenham National. Today I heard from them with my results.
I entered eleven images in three categories, most of them being images I had previously entered in WCC competitions.
Four projected images:

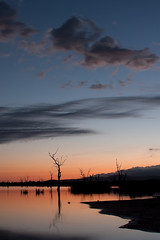


Three open monochrome prints:
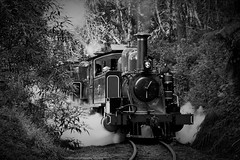
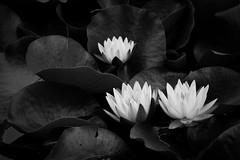
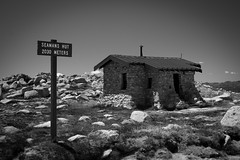
Four open colour prints:

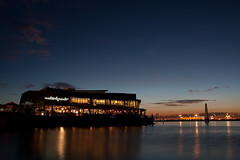
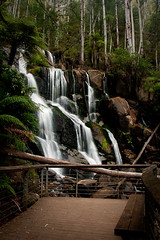
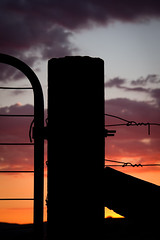
So how did they go?
My lowest score of any of them was 8, while the highest score was 11. The three that received 11 were “accepted” into the exhibition in September. These are one of the first images I entered into the monthly competition at WCC, a recent experiment with long shutter and black thread and a successful monochrome conversion:
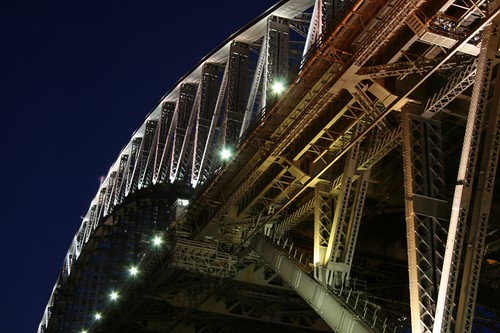
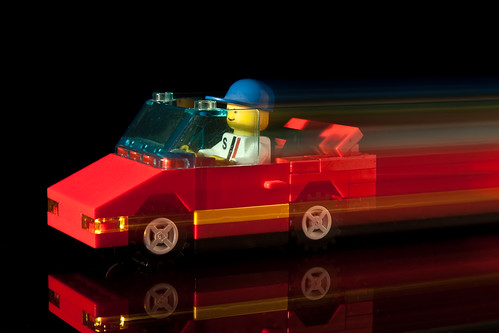

I am pleased and it was definitely a learning experience that will be completed once I see the other acceptances at the exhibition.
Tagged with: competition, photos
Friday, April 23rd, 2010 at 09:59pm
On the first Sunday of 2010 the Waverley Camera Club went on an outing to the Blue Lotus Water Garden in Yarra Junction. I have lost track of how many photos I took on the day, but I have completed processing them down to 34 images.
Obviously most of them are of flowers. Solitary…

…in groups…

…as a bud…

…or somewhere in between.

There were also some bridges of interest…

Two of the images are HDR, the one above for example, but for the others I first cropped, tweaked levels to increase contrast (a lot of tweaking for a couple of the images) and finally added a slight vignette.
All can be viewed in their Flickr set.
Tagged with: photos, waverley camera club
Tuesday, March 9th, 2010 at 11:51pm
For the past three days I have been up at Halls Gap in the Grampians with the camera club. Although I returned home yesterday, I took an extra day of leave because I knew that in addition to the long drive, the weekend itself would be tiring because of late nights and early mornings.
So today I didn’t do much, except some photo sorting. Although I did do a little bit of sorting through my photos from the weekend (mostly getting them off the laptop I borrowed) I decided that it would be better to return to the backlog.
The previous weekend I went out to Healesville Sanctuary on the Saturday, and then to the biannual Air Pageant at the Point Cook RAAF Museum on the Sunday. It was the Point Cook photos that I turned to.
This day really made me regret selling my 75-300mm lens when I sold my Canon 400d. Although it was the kit lens, by definition cheap, it would have given me reach that my 17-85mm lens just does not have. I also could have thought ahead and asked at the camera club. Borrowing a 28-300mm would have been excellent as I would have only needed one lens, but borrowing a 70-200mm f/4 would have been good as well.
The big downside of having a maximum focal length of 85mm was that most of what could have been good shots were just too small in the frame which meant that when cropped down they were too noisy with not enough detail. I shot 2000 photos on the day and my first pass brought the count down to 262. My efforts today brought that down further to the 58 that are now up on Flickr.
The weather was a bit ordinary for an airshow. Mostly overcast with patches of blue sky. That worked for some shots as it cast a moody feel:
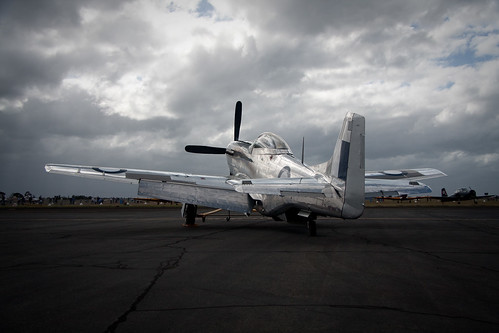
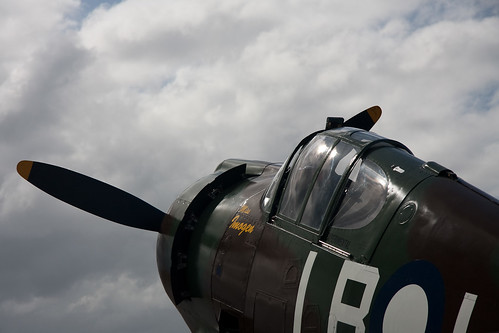
While at other times the break in the clouds gave both lighting and a contrasting backdrop:

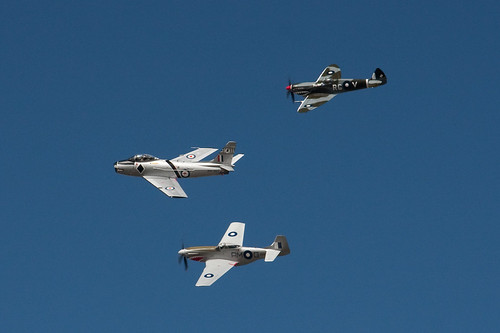
See Point Cook Air Pageant 2010 for all of the images.
Something else that I have done with this set is to try to give each image a unique name, not just “Place/Event (#)”. This did take extra time, but it is something that I should be doing. Plus it makes the subject of the photo much easier to identify.
Tagged with: airshow, camera, flickr, photos
Tuesday, March 2nd, 2010 at 11:06pm
… so finding entries for a ‘monochrome’ topic meant I needed to find suitable photos to desaturate.
After lots of experimenting I ended up with four images that I submitted last month, one of which was awarded a merit tonight:

This is a photo from the club outing to the Blue Lotus Water Garden earlier in the year. The flowers were originally pink/white and after converting to greyscale I spent a lot of time removing distracting spot from the leaves. It turned out to be worth it.
My other printed image was of the cooling towers at Loy Yang Power Station, also earlier in the year:
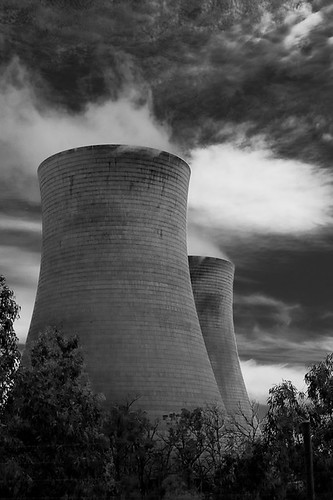
By changing the greyscale mix I was able to increase the contrast on the towers, as well as making the bright blue sky quite ominous.
I also spent a large amount of time fiddling with one of my images of the Murray 1 hydro power station to get:

My final image was taken by combining a Lego Technic figure, a seamless white background and a flash:

Tagged with: photos, waverley camera club
Sunday, February 21st, 2010 at 10:25pm
As promised last week I have continued working through my backlog of photos and have processed my photos from Brisbane last year. And this is despite being distracted first be the ISS and then the sunset.
The photos are a mixed bag:
Water and wildlife:
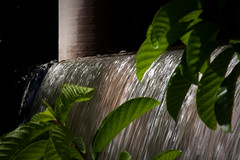
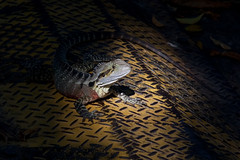
Buildings:
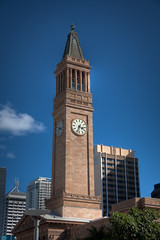
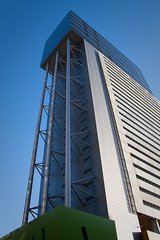
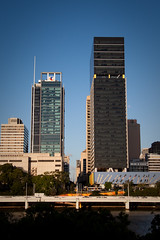
Cityscapes (day and night):
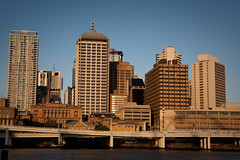
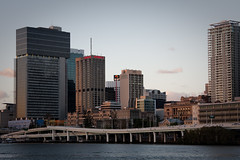
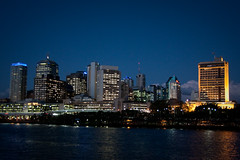
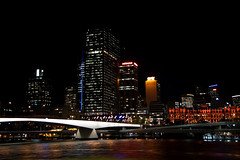
Brisbane 2009
Tagged with: brisbane, flickr, osdc, osdc2009, photos
Sunday, February 21st, 2010 at 09:07pm
On Friday night the Waverley Camera Club met up at Beacon Cove (aka near Station Pier) for a night shoot.
As we sat on the boardwalk eating fish and chips the sky quickly changed through:
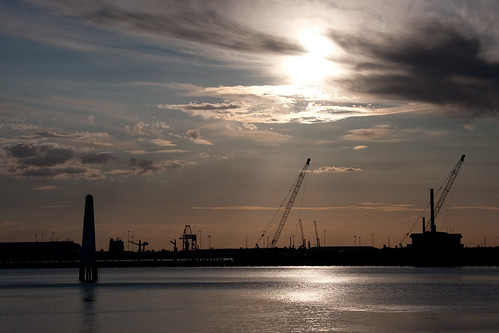
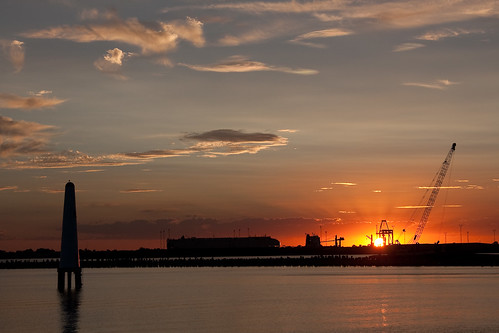

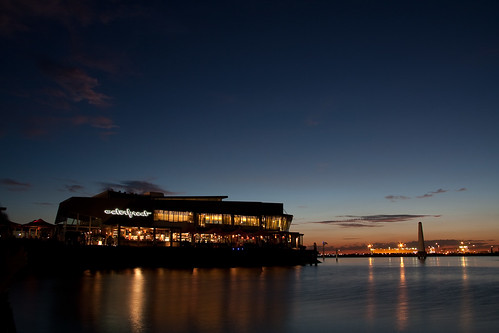
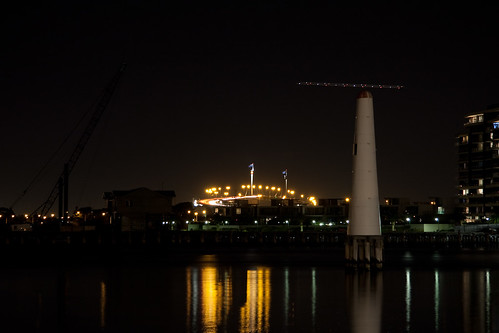
Sunset from Beacon Cove
My final selection of 21 photos are all in the Flickr set. They may look a bit repetitive – there are only so many different shots of a sunset – but this has been thinned down a lot.
Tagged with: flickr, photography, photos, sunset
Monday, February 15th, 2010 at 10:51pm
Earlier in the evening I stood outside on the front lawn in the dark for about half an hour. The result was this:
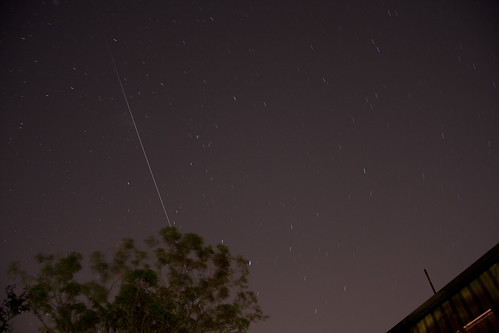
That is my first ever shot of the International Space Station passing overhead.
For a while I have been wanting to capture a shot of the ISS, yet I either didn’t find out about a visible pass, or I found out too late. This is despite knowing about the excellent Heavens-Above which lets you enter your location, and it will tell you whatever you want to know about objects in the sky. You can get a whole sky chart (which I looked up for the WCC star trails attempt earlier in the year) or a list of when an object such as the ISS is making a visible pass. This time I have a timely tweet from Wolf Cocklin to thank.
Now, the photo above isn’t that great as shots of the night sky go (a Flickr search for ‘iss’ returns impressive images), but for a shot taken from suburban Melbourne with plenty of light pollution, I am happy with it.
The actual pass was quite short so I took a few test shots so I would know what setttings to use, plus
As I didn’t know exactly where in the sky the ISS would appear or what it would actually look like to the naked eye, I first took a few test shots before aiming the camera up and to the south-southwest. The tests can be seen in the ISS visible pass (15 February 2010) Flickr set.
As there are other visible passes of the ISS for the next week I will attempt to catch it again, weather permitting.
Tagged with: iss, night sky, photography, photos
Sunday, February 14th, 2010 at 10:10pm
Today I knuckled down and sorted through photos, resulting in two new sets on Flickr. I still have a lot more sorting through as I am still four months behind.
The first set is from a Sunday morning in August when I walked around some of Melbourne’s laneways and arcades with the camera club:
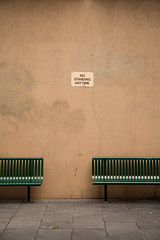
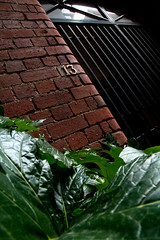

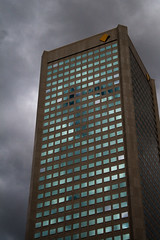
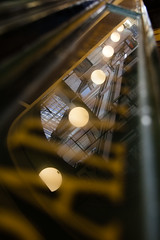
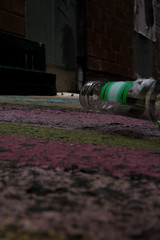
Melbourne laneways and arcades
The other set I uploaded to Flickr was from one lunchtime where I walked over to campus for the specific purpose of taking some photos. This was related to a competition we were running at the time for students and staff to submit photos to appear on the my.monash login page. Although we were not eligible, it was a good enough reason to get over to campus.

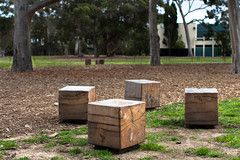
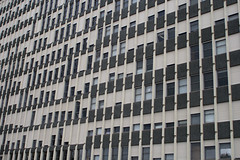
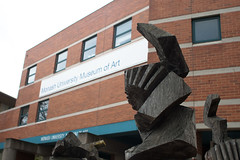
Monash Uni – Clayton
The next lot of photos I have to sort are those from Brisbane, when I wandered around Brisbane CBD and Southbank on the day before OSDC2009.
Tagged with: flickr, monash, photos, waverley camera club
Tuesday, February 2nd, 2010 at 11:43pm
Tonight was the first judging night for 2010 at the Waverley Camera Club. The topic was “Opposites” and I submitted four still life photos created specifically for this competition.
After digging through my box of Lego and my Dad’s box of Dinky toy cars I came up with this as a print:
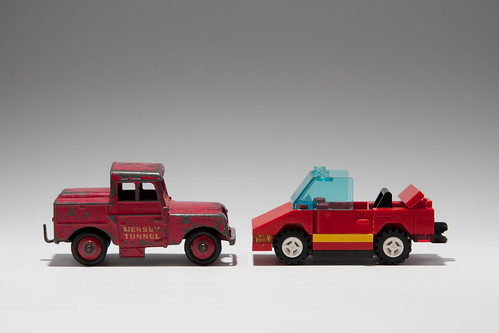
The opposites include: diecast metal versus extruded plastic, new (relatively) versus old, battered versus unbattered and of course facing left versus facing right. The judge awarded this a Merit and also added truck versus car.
My second print was of wine bottles:

I took way too many photos of these (and some others) bottles from different angles, with different lighting (for the shadows), and different orientation before choosing this one. The judge commented that the shadows behind, but at the same level, added interest.
My two digital entries were about denominations and opacity:
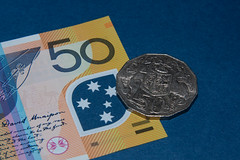
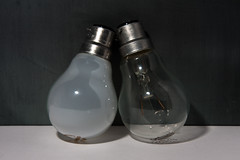
Tonight I submitted monochrome entries for next month, including a last minute change so that at least one shot included Lego.
Tagged with: photos, waverley camera club
Sunday, December 6th, 2009 at 10:29am
In the last week of November I headed up to Brisbane for the sixth Australian Open Source Developers’ Conference and over the three days of the conference I took a lot of photos. Yesterday I completed sorting through them and uploaded 177 of them to Flickr across four sets.
Anyone who follows me on Twitter, identi.ca or Facebook would have seen me commenting as the conference unfolded, but here is a pictorial summary of what I consider to be the highlights.
OSDC2009 – Day 1
The conference began with a talk from Karen Pauley on Understanding Volunteers:
Richard Jones discovered issues with MacBooks an some projectors:
Paul Fenwick told us about the awesome things we missed in Perl:
Adam Kennedy brought us up to date on Padre:
With the day closing with lightning talks:

OSDC2009 – Day 2
On short notice Marty Pauley gave a great talk on simplicity:
Then later in the day Arjen Lentz let us know that failure is not an emergency:

With the day concluding with lightning talks:

OSDC2009 – Dinner
At dinner a certain someone garnered lots of attention by dressing up for his dinner talk:
While everyone else was challenged to illustrate in Play-doh how removing something can be a feature:
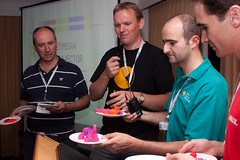
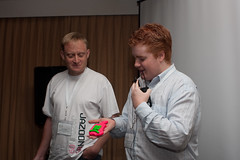

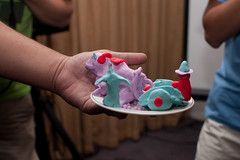
OSDC2009 – Day 3
On the final day we heard about Google Wave:
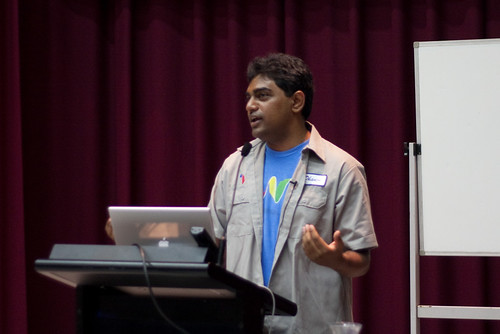
contained more lightning talks:

Before being closed by Pia Waugh talking about open source in government:
It was again a great conference, that I really need to speak at again next year. My only regret this year was that I had to fly back on the Friday night. It would have been better if I had hung around and flown back on the Saturday like I did last year.
Tagged with: conference, flickr, osdc, osdc2009, photos
Monday, November 9th, 2009 at 10:35pm
Tagged with: flickr, photos, web standards group
Thursday, November 5th, 2009 at 09:52pm
For the camera club competitions next year I will no longer in B grade, as my results from a few days ago bumped me up to A grade.
A print of this HDR image from the club outing to Montsalvat received a highly commended:
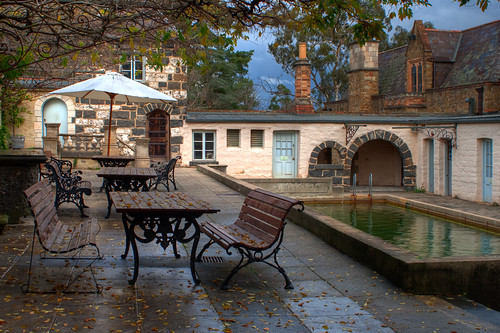
This image is the result of running the bracketed exposures through Photomatix with the default settings. I was quite pleased with how it came out, even though the colours are slightly oversaturated compared to what would be seen in real light.
In addition this image from the club outing to Puffing Billy received a merit:
I played around with this image for quite a long time until I tried it as black and white. It was then a straightforward matter of adjusting the levels to increase the contrast to arrive at the image above.
My remaining images recieved a mix of positive and negative comments. Starting with this heavily processed HDR image from the club outing to Hanging Rock (I have yet to complete sorting the remainder of the photos from tha day):
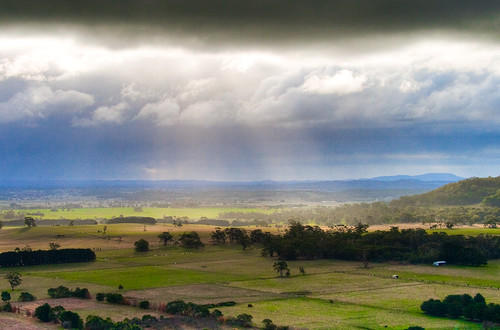
And this image from Melbourne Photo Walk #3:
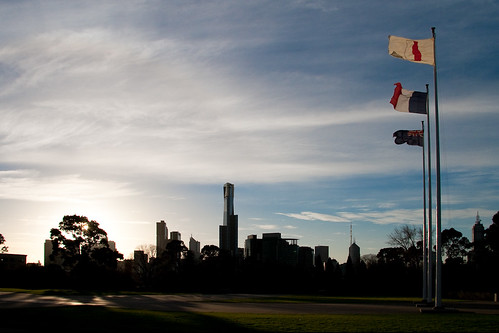
This was the last of the monthly competitions for the year, as next month is the end of year competition which is composed of images that had been entered in the monthly competitions. As I didn’t have any monochrome prints, I entered three prints and there digitial. I shall find out about those in December.
Tagged with: photos, waverley camera club
Tuesday, October 6th, 2009 at 10:17pm
Being the first Tuesday of the month, tonight was judging night at the Waverley Camera Club where the topic was “blue”.
But what is blue? Is it the colour? What about the mood, such as depression? Or sex, such as a blue movie?
My first idea involved taking a lego car outside:
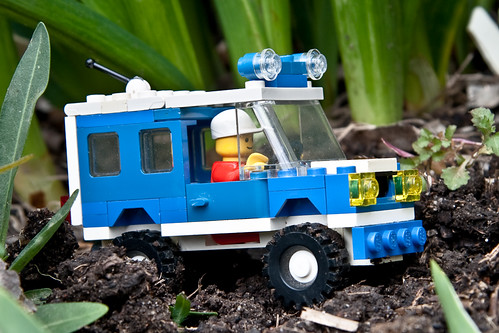
Yes, it is just a blue toy in the garden, but I spent quite a while shooting this in various locations until I thought it conveyed a sense of action. With the dirt on the wheels I can imagine that it is driving up into the frame.
The judge awarded this a highly commended.
Next I spent a lot of time thinking about how to convey the colour blue, but not necessarily with the colour blue. For this I turned to the drawer full of games and was able to assemble a few variations of the word ‘blue’ from non-blue coloured blocks.
But then I started playing around with a Scrabble set and the Wikipedia shades of blue category:
I spent hours playing around with different words layouts and lighting until I was happy with the photo above. But I also had a close alternative image that I would have titled “3-1-1-1”. What that photo would have been is an exercise for the reader.
This print was awarded a merit.
After spending a considerable amount of time on the two printed images, I was lazy with the digital images and ended up picking two that I had taken previously, one from Melbourne Photo Walk #3, and one from the night after the photo walk.
This HDR shot of Eureka was a no brainer due to the sheer amount of blue. The entry was further cropped down to remove a tree from the bottom corner:
This was awarded a merit.
My final image is one that I quite liked, but I considered it flawed because the subject was flawed:
The flaws are evident in the lights of the ferris wheel, some sections are not lighting up and other sections are stuck on the wrong colour.
The judge obviously didn’t care about those flaws and he awarded this the image of the month in the B grade digital category. I was pleasantly surprised.
This is my highest result so far, with all four of my photos receiving an award. This also means that, at this rate, my aggregate score will soon be high enough to push me up into A grade. I welcome the challenge.
Tagged with: photos, waverley camera club
Tuesday, September 1st, 2009 at 11:50pm
Today is the first Tuesday of the month, this means it is judging night at the camera club, when I find out how the photos I submitted a month ago have been judged.
This is also the deadline for next month’s competition – topic of ‘Blue’ this time- so that has been dominating my thoughts for the past week or so. But those photos are done and submitted, so it was time to listen for feedback.
As the September competition was open, aka no topic, there were a record number of entries. Good for the club, good for learning, bad for me individually as there is more competition.
Then it was announced who the judge would be: Pele Leung. After seeing that he was interested in architecture I didn’t expect this fairly safe image of the Sydney Opera House to get much of a reaction:
In his comments Pele said that although technically quite good, it was a pretty standard shot and would have been better from an different perspective than everyone else. Despite this he awarded it a merit.
Earlier that same night I took this photo:
The judge back in May gave this a highly commended award. Significantly because of the interest created by the unusual angle. He said that at first he didn’t recognise it as the Sydney Harbour Bridge.
And my three (because I am entering the full two printed and two digitial) other entries?
On the club outing to Macedon I took this photo low to the ground down from the waterfall in Stanley Park:
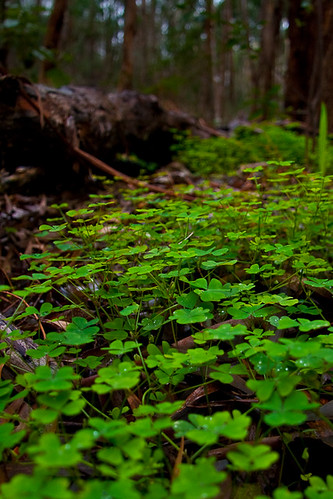
I quite like the shallow depth of field and for me the small green leaves are the item of interest. However Pele didn’t agree, he wanted something of interest amongst the leaves.
My third entry was from the War Memorial which we visited on the third Melbourne Photo Walk:
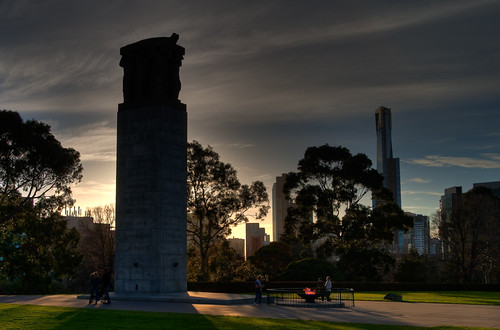
This is actually a cleaned up (some cloning to not have floating body parts) version of the photo for which I received an unexpected prize:
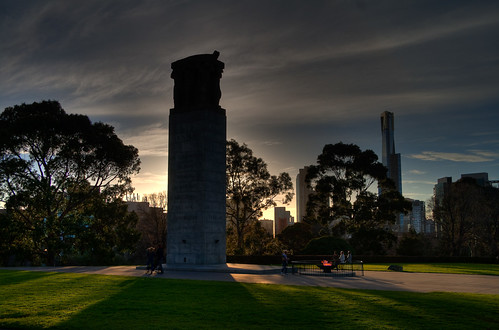
If I hadn’t received the prize I would have entered this photo of the flagpoles on the other side of the forecourt:
I had spent some time in GIMP to correct the perspective from this:
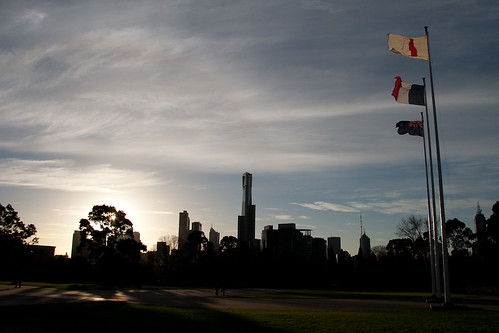
Maybe I should have entered this one as in this case the feature (the flags flying from the flagpoles) are nicely backlit. The comment from the judge about the other photo was that he considered the Cenotaph to be the feature, yet it is too much in shadow.
And my final image? As I wan’t sure what to enter I chose an image of the peacock from Montsalvat for the humour aspect:
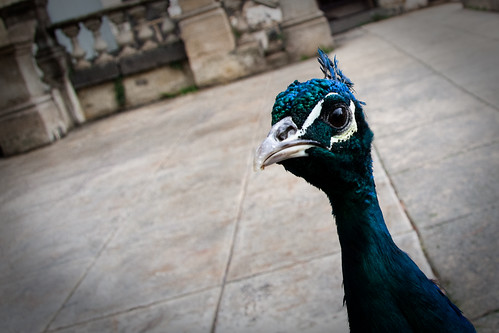
This is a modification of this photo:
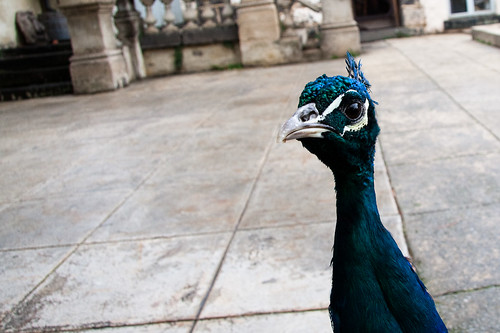
For the competition entry I increased the crop, rotated the image further and added a vignette. I like the quirky aspect, but apart from that it’s nothing special.
I believe that I am learning from this experience and hopefully my photos perform better for the ‘blue’ theme. But as they have been submitted I need to think about the November competion.
Tagged with: photos, waverley camera club
Wednesday, August 5th, 2009 at 10:14pm
When I uploaded my photos from the third Melbourne Photo Walk, I added a selection of them to the group pool. Although it wasn’t my primary intention, this selection of photos then put me in the running for a prize.
On Monday – before I found out the camera club competition results – I found out that this HDR image of the Cenotaph and Eternal flame in the Forecourt…
… was one of two winners of a $50 voucher.
At the time I was still finalising what images I would submit for the September competition at the camera club. I had decided on which two I would submit as prints and I had a shortlist for digitial. This image was in the shortlist, but towards the bottom as I was more likely to submit this image of the Flagpoles on the other side of the Forecourt:
I had even gone as far as using GIMP to correct the perspective (so the flagpoles were not leaning over) and to clone out the couple of people. But then I decided to go with the Cenotaph/Eternal flame image.
As the people had moved in between the bracketed exposures the final image contained some extra body parts. It would have been too much work to remove the people entirely, so I just removed any excess body parts. Have a close look at the image on Flickr to see what I mean. I also changed to a tighter crop, but that is all I did before submitting it last night. Now it is a matter of waiting a month before I hear the results.
If I find some time on the weekend I will upload the modified flagpoles image to Flickr for comparison. I might even upload the current camera club competition entries. Previously I have waited until after I hear the results, but I don’t really have a compelling reason to wait.
Tagged with: melbourne photo walk, photos, waverley camera club
Tuesday, August 4th, 2009 at 11:45pm
… because without his lunchbox technique, last night at the camera club would not have been as good.
Being the first Tuesday of the month it was a judging night. The topic was “Still life” and the judge was Adrian Smith. It was noted that while the number of entries were lower than normal, they were even lower than expected for a competition with a topic (compared to an “open” competition) as still life can be particularily difficult.
I had entered four images, two prints and two digital, so when the judging began I didn’t know what to expect. As it quickly became clear that Adrian has a preference for diagonals and that the photo needed to tell a story, my expectations fell.
I was wrong.
This image pretty much follows Strobist’s technique to the letter:

As it was my second favourite image of those stress balls (my favourite would have worked square, but I had already cut the mount for 3:2) I got it printed. It received a highly commended award.
On the same night I experimented with all sorts of lighting and I thought this one using direct lighting came out quite well:

As I didn’t like it quite as much as the sport one (and I didn’t want to enter two prints that were pretty much the same) I entered it as a digital image, where it received a merit award.
While looking around for inspiration for still life I played around with various arrangements of the items I use to cut out the photo mounts and ended up with this:
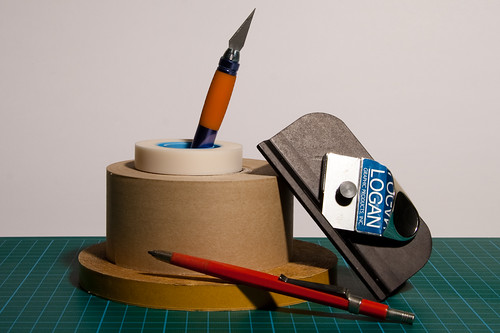
I printed this out and it also recieved a merit.
By the time I got around to selecting my second digital image I had run out of ideas, so I grabbed one of my small Lego sets and shot it against a white background:
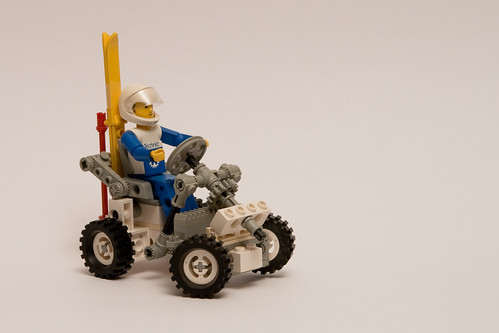
I like it, but it doesn’t really grab me. It didn’t grab the judge either and this didn’t earn any awards.
So, for a topic that I was not confident about I ended up with three awards. I am happy, except now I have to wait a month to find out about the images I submitted tonight, and I need to start finding images now for the following month’s competition: “Blue”
Tagged with: photos, waverley camera club
Monday, July 27th, 2009 at 11:14pm
Sunday week ago I went on the third Melbourne Photo Walk. I have just completed sorting through the photos and uploading them to Flickr.
How I have processed them is a bit of a mixture. The range from pretty much as shot:
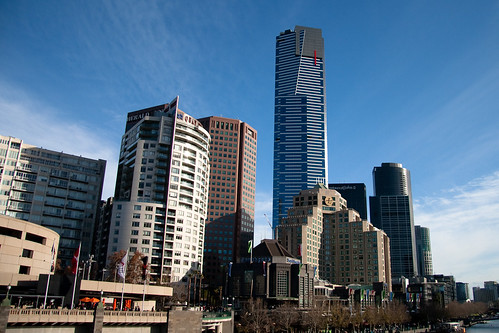
to HDR processed that start to look unnatural:
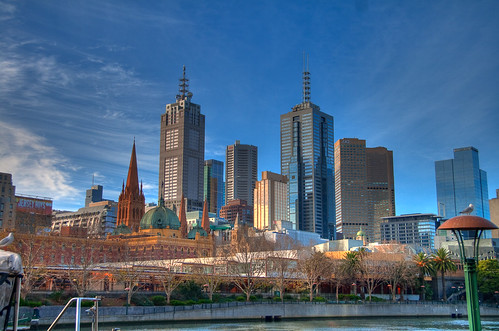
I also played around with the levels of a few to make silouhettes:
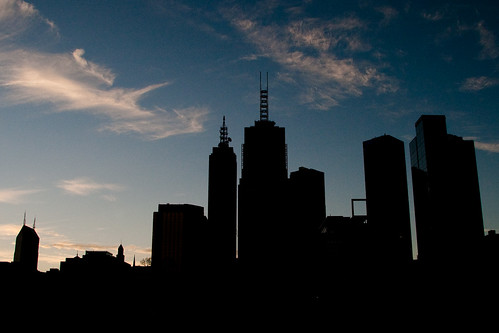
All of the images can be seen in the set: Melbourne Photo Walk #3 (July 2009)
Now I really need to get back to the photos I took a few weeks ago on the WCC outing to Macedon as well as the photos from the past three Web Standards Group meetings…
Tagged with: camera, flickr, melbourne photo walk, photos
Sunday, July 26th, 2009 at 02:05pm
For a long time now I have been using the map within Flickr to locate the photos that I have uploaded.
Since I bought a GPS unit I have taken it on long rides as well as some other journeys to allow me to follow a route and to track where I have been.
In the back of my mind I was aware that you can add GPS information to the EXIF data of images, but it wasn’t until a talk and presentation on geotagging last Tuesday at the camera club that I finally put them together for geotagging.
So, from this point on, I am going to attempt to geotag as many of my photos as I can where the location is appropriate (eg it isn’t for model shots of lego). For photo walks or camera club outings this means that I will have my GPS unit in the top of my camera bag. While for events such as Web Standards Group which is at a fixed location, I will add the location of the venue to the EXIF data instead of just in Flickr.
So how do I actually add the location?
I already use exiftool to sort my images into date based directories and to shift the dates if needed, so one initial thought was to write my own program.
No, first I would see what free programs were available. So over the past few days I have been looking at the first few programs I found: GPicSync, Geotag and PhotoMapper. I also came across gpsPhoto.pl which I will keep in mind if I write my own program as it is in perl, but I’m not looking at a command line tool yet.
- GPicSync worked, but was slow and didn’t give a preview before writing to the files and generating a KML file
- Geotag was fast and allowed me to preview before writing to the files. It also allowed me to tweak the time offset of the photos within the program, but I would still prefer to sync the files with GPS time first.
- PhotoMapper was also fast and it provides a preview using Google Maps within the program before modifying the files. Unfortunately it only appears to support JPG, I also need support for RAW files.
I will keep looking at different programs until I am clear on how to fit geotagging into my workflow and which program will best do that.
Tagged with: geotagging, photos
Thursday, July 16th, 2009 at 10:49pm
Over a month ago, back at the start of June, I went out to Montsalvat for the monthly outing of the the Waverley Camera Club. I have finally found some time to finish sorting through the photos I took that day and uploaded them to Flickr.
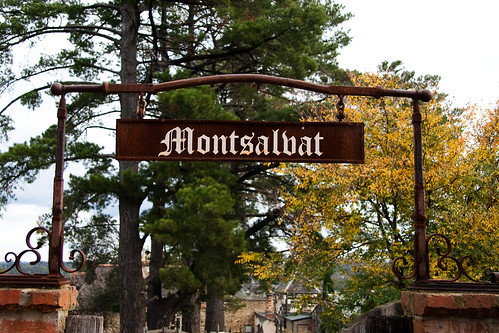
I had never been there before and although the weather didn’t quite cooperate – a fair amount of rain – it was quite a good day out, although the eclectic mix of buildings doesn’t really appeal to me.
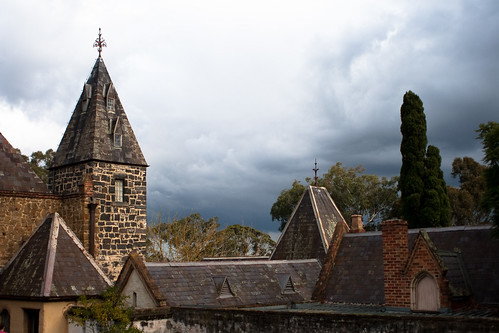
The photos in the Flickr set have been minimally processed – cropped and levels tweaked to increase contrast. I do have a few more that I took multiple exposures of for processing as HDR, but they will be posted later with another blog post.
Tagged with: outing, photos, waverley camera club
Thursday, July 9th, 2009 at 09:33pm
Two nights ago it was the first Tuesday of the month, ie judging night at the camera club. I had four entries, two digital and two prints, but none of them received an award.
The two prints (this time in mounts I cut out myself) were:
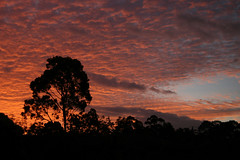
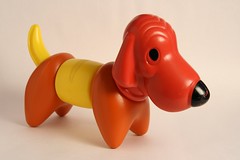
Yes, that toy dog is real Tupperware, it is part of the Zoo-it-Yourself set. I had planned to take a photo of the three animals in the set for the still life competition, but that didn’t happen.
The two digital entries were:
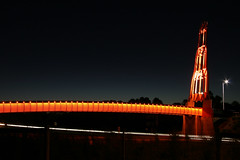
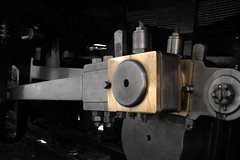
My original plan had been to enter the bridge as a print instead of the sunset image. However when David printed it for me the orange wasn’t quite as intense, but the sunset one came out fine. The close up on the connecting rod was taken on the Puffing Billy outing a few months ago.
As usual I prefer to keep the image manipulation to a minimum. All of the photos have been cropped and the levels tweaked a bit. The connecting rod image was the most manipulated, however that was a focal black and white filter to only keep the colour on the brass plates.
Tagged with: photos, waverley camera club
Wednesday, June 17th, 2009 at 09:55pm
Last night at the camera club we popped balloons, set of party poppers and smashed light bulbs.
These activities in a dark room containing a bunch of photographers and a sound triggered flash resulted in balloons like this:

party poppers like this:
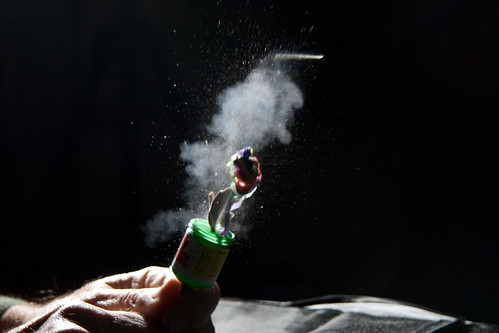
and light bulbs like this:
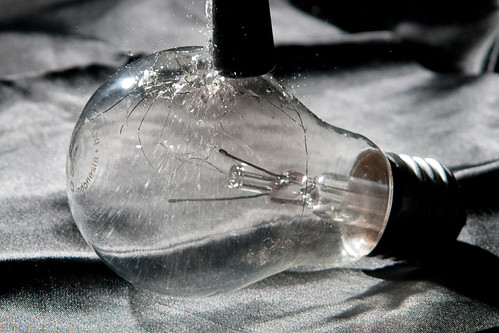
These photos plus more are in the Balloons, bulbs and party poppers set on Flickr.
Although it was only the other day that I saw an article about this, it has been on the club’s program all year and the trigger we used was built by George about twenty five years ago.
It was a good night and David and I have actually borrowed the trigger. However a design improvement that would have been handy last night was the “double fire” protection that this simple circuit has.
Tagged with: photos, waverley camera club
Tuesday, June 2nd, 2009 at 11:04pm
I have just returned from the judging of the June competition at the camera club. Although I didn’t go as well as last month, I am happy with the result.
Against the theme of “Melbourne’s Parklands (taken within a Melbourne park)” I entered three photos, one print and two digital. Although I had a number of photos that met the theme, I struggled to narrow that down to ones I like.
The photo that I liked the most was this one of the flag of the Governor of Victoria flying from the belvedere tower at Government House framed by trees:
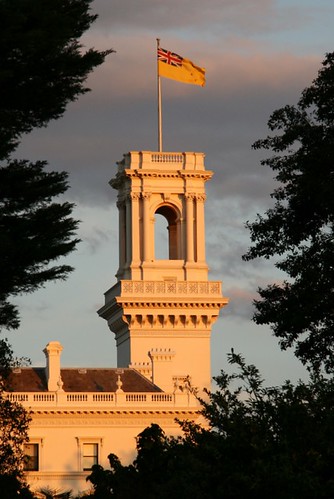
It earned a merit.
My other digital entry was taken at Jells Park of a tree and some cloud patterns:
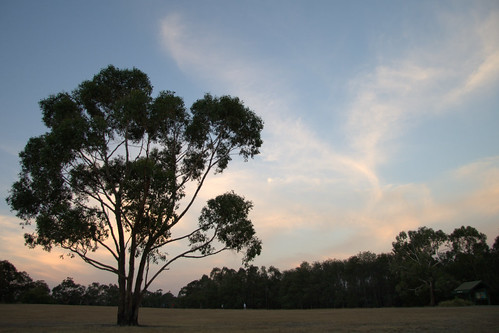
The judge commented that it would have been improved by increasing the colour saturation of the clouds to bring out the orange.
My final entry was a print of a photo, taken on the same day as the one of the Governor’s flag, of bare trees reaching up to the moon:
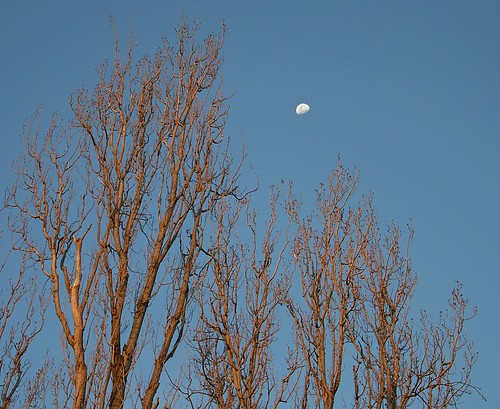
The judge didn’t really comment on this one.
Tonight was also the deadline for the July competition, thankfully the topic is “Open”, in which I have entered two printed and two digital images. The prints were again printed by David, but I cut the mounts myself.
However, now I have a month to sort out my entries for the August competition. The issue there being that the topic is “still life” for which I will have to take photos from scratch.
Tagged with: photos, waverley camera club
Thursday, May 21st, 2009 at 08:57pm
At the WCC workshop night earlier in the week there was a demonstration on how to cut the mount for a printed photo from mat board. Although I had read about how to do it – including a detailed guide from Hugh Sykes (PDF, 195KB) from a club in Sydney – an actual demonstration shows more of the detail.
The main demonstration was done by Roger:
- Use two L shaped pieces of mat to determine what size the cutout should be for the particular print, eg 160x240mm
- Double the chosen border size (eg 60mm) and add to the cutout dimensions to get the overall size of the mount, eg 280x360mm
- Cut the mat board with a straight edge to size
- On the back of the board mark the sides of the cutout
- Mark the top and bottom of the cutout so that it is slightly above centre, eg 58mm for the top, 62mm for the bottom
- Align the straight edge with the marked line
- Using a pull style 45° cutter, cut along the line with multiple passes
- Repeat for each side of the cutout
- If the cutout doesn’t release cleanly, use a craft knife
- Run an emory board along the newly cut edges
- Place a strip of tape along the top edge of the print and set it face up
- Put the mount down on the print in the correct location and press to make the tape stick
- Attach a backing board to the mount
Fred then showed us another way to attach the print without using tape, instead he attaches the print to the backing board using sticky photo corners. This means that there isn’t any tape on the print and makes it easier to reuse the mount.
Now I know in a fair amount of detail two ways to cut the mount and three ways to attach the print to the mount. Which way will I use?
Last week I ordered two push style cutters from the US. I ordered two to save on international postage as I will easily sell the second one. Now, although this is the same cutter that Fred showed, Roger used a pull style cutter that includes a marker bar that would make it easier to mark the cut lines.
Today I bought a sheet of black mat board from a local framing shop. While I wait for the cutters to arrive I will cut it down to size, I’m thinking a size suitable for 6:4 printed on an A4 sheet which would give me six mounts from the raw mat sheet.
Tagged with: mounting, photos, waverley camera club
Tuesday, May 5th, 2009 at 10:49pm
At the camera club tonight I had two digital images in the competition. This is actually the second month that I had entered photos, but last month there was a mixup and my entries were missed.
This month I am extremely happy with the response, one receiving a ‘highly commended’ and the other with positive feedback.
I took this photo of the whistle on top of one of the Puffing Billy locomotives on the WCC outing last month:
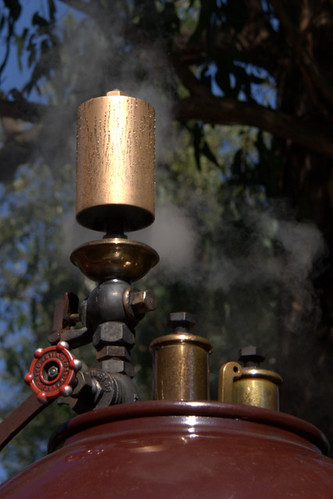
I entered this image because I liked the condensation on the whistle and how the whistle was framed by the steam in the background. I wasn’t quite happy with the sharpness of the other parts of the image, and the judge picked up on that.
So that means that this image of the Sydney Harbour Bridge that I took last year before OSDC2008 received the ‘highly commended’ award:
I took this image as it was getting dark. This was just one of many long exposures I took from around the same area.
The judge commented that he didn’t recognise the bridge at first because it wasn’t taken from the typical angle. He also liked that there was still colour in the sky and the varied colours in different areas of the bridge.
All up a very good experience.
Now I need to work out how to best print and then mount images so I can enter four images (two printed and two digital) each month. I am also planning to post some images to the club’s comment gallery in addition to taking some along to the next workshop meeting which is a photo discussion night.
Update: The images are now available in the club’s gallery: Steam whistle, Bridge at night. In the galleries you can see what other photos were being judged that night, for both A and B grades there is one for digitial images of the prints and another for the digitial entries.
Tagged with: photos, waverley camera club
Thursday, March 19th, 2009 at 08:16pm
Last weekend was StixCampNewstead, a Melbourne BarCamp out in the sticks. The general consensus is that the event can be summarised in a single word:
Awesome
This one word covers:
- the talks/discussions – schedule of talks
- the venue – Welshmans Reef Vineyard
- the food – BBQ lunch; wood fired pizzas; bacon, egg and sausage rolls; homemade dumplings
- the people – too many to list
- the adhoc discussions – to varied to list
If you didn’t come along, you must come along to the next BarCampMelbourne in September and next year’s StixCamp, wherever that will be.
Over the weekend I took almost 600 photos, earlier in the week I sorted through them an uploaded 129 into a set on Flickr. There are photos from others on Flickr, or you can check out what people said before, during and after the event on Twitter or Identi.ca.
Tagged with: community, people, photos, software, stixcampnewstead, unconference
Tuesday, February 24th, 2009 at 11:13pm
A few days ago I went into the city for the photo walk that I had previously mentioned.
After catching a train into the city I was quite surprised about how many other people had turned up, I think at least 15.
The walk was quite enjoyable and after Docklands we ended up going past the new exhibition centre to Flinders Street Station. Most people headed home, but a couple of us went for a coffee/beer. I intend to go along on the next one. Whenever that will be.
I took over 500 photos (in RAW which means 5GB of data) and I have just finished sorting through them and uploading the final 67 to a set on Flickr.
I still need to add proper descriptions (instead of the timestamp) and choose which ones to add to the group pool. It is interesting to see others have already added to the pool as it allows me to compare how other people saw the same situation.
Tagged with: camera, flickr, melbourne photo walk, photos
Tuesday, February 17th, 2009 at 11:02pm
Tonight, aside from catching up on a couple of blog posts, I went with David to the Waverley Camera Club meeting: A BBQ at Jells Park.
I ended up taking about 200 photos, some of which are multiple exposures ready for some HDR experiments. Now I need to find time to process them, but I have run out of time tonight, and tomorrow I’ll be in the city for Sub Standards.
Tagged with: blogging, camera, photos, waverley camera club
Thursday, February 5th, 2009 at 08:56pm
Earlier in the week I went along to another judging night at the Waverley Camera Club. Like the first meeting I went to, hearing the comments from the Judge, Peter Ryan, was quite informative:
- being technically correct (focus, DOF, exposure, etc) isn’t enough
- don’t take the same photo as everyone else, be different
- what is cropped out is often more important than what is left in
- removing distracting elements from the edges
- ditch the rule of thirds and other ‘traditional’ rules
- push objects of interest into the corners
- use diagonals to draw interest around the frame
He also briefly talked about how he processes his images; from shooting in DNG and the programs he uses for various tasks.
This made me think again about my digitial workflow, which is currently:
- Shoot in JPEG
- Copy files to date based directories with a perl script that uses ExifTool
- Using Picasa:
- Review photos and delete unwanted ones
- Basic editing (cropping, colour adjustment)
- Export to JPEG
I need to change the first step which is to start shooting in RAW, specifically CR2. But where do I go from there?
- Do I leave them as CR2 or do I convert them to DNG? This is supposed to be better for long term support.
- Copying the files from the CF card based on the EXIF data will continue to work after I change my script to look beyond JPEG files.
- Picasa does support RAW files (both CR2 and DNG), but it doesn’t give the control that a program with proper RAW support gives. I have installed Canon Digital Photo Professional which came with my camera, but there are plenty of other tools (mostly non-free).
- If I batch update the white balance of the photos, do I then have two copies to manage?
It is a lot to think about. My next step will be to read through explanations of other people’s workflows that I have bookmarked.
Tagged with: camera, photos, waverley camera club, workflow
Sunday, January 18th, 2009 at 04:34pm
Last night Damien and I spent a few hours taking photos from various places around Eastlink before heading over to East Malvern where they had shut down the freeway to remove the pedestrian over-bridge. I have just finished uploading a selection of the photos to Flickr and here are some of them:
Eastlink at night
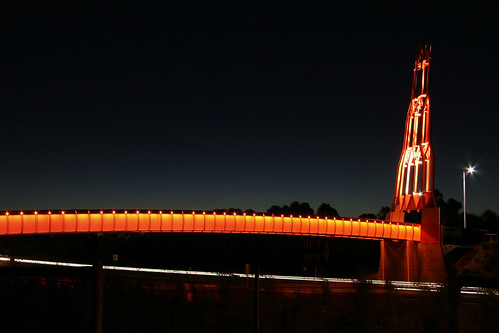
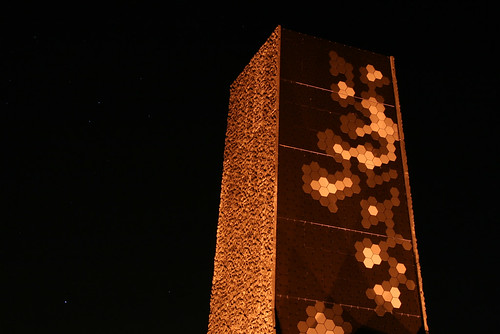
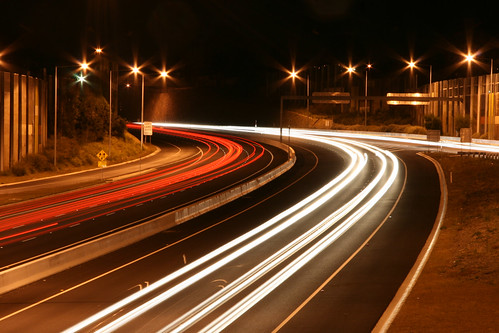
Removing the East Malvern pedestrian bridge
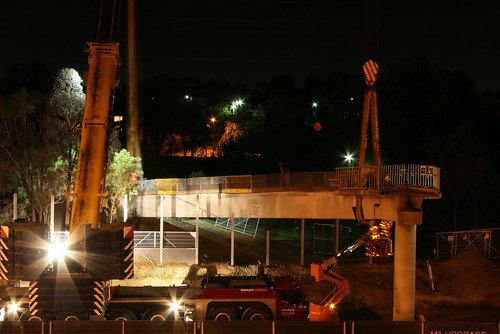
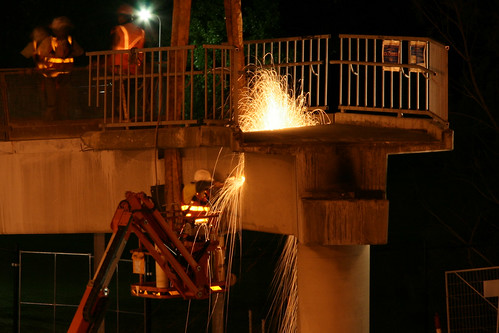
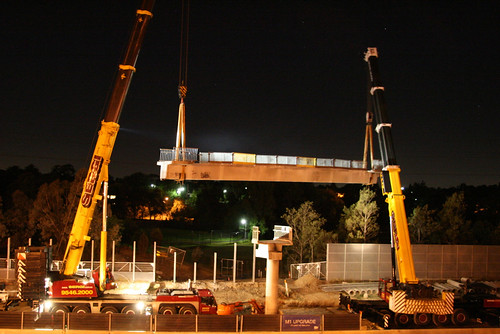
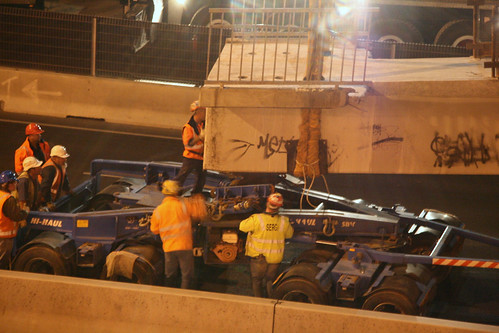
I also uploaded a couple of other recent(ish) photos:
Sunset on clouds from my window:

A handheld shot of the city at night:
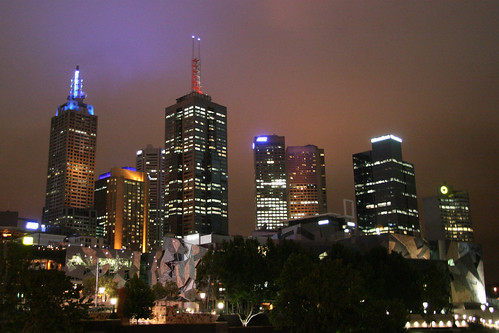
and finally Alfie in his attention grabbing pink top:

Tagged with: construction, eastlink, flickr, photos
Sunday, December 7th, 2008 at 10:29pm
I have just finished sorting through my photos from the conference and have uploaded the better ones to Flickr in a set for each day:
Almost all of them are of people in between the talks or in the evening at the dinner or at various pubs.
The photos I took of presenters as they were presenting didn’t come out the best, the 50mm f/1.8 would have been very nice. Despite this I am glad that I resisted the impluse to go and buy one as I ended up being the winning bidder for a secondhand one, at half the retail price.
Of all of the photos, this one requires to be singled out:
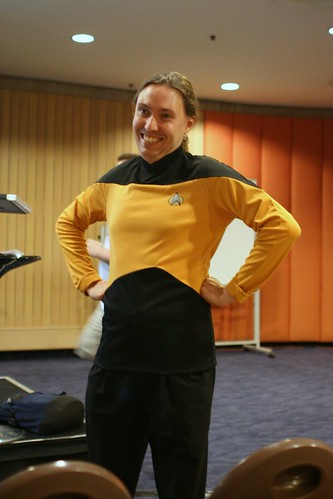
I have a lot more other photos from Sydney. I should be able to sort through them soon.
Tagged with: conference, flickr, osdc, osdc2008, photography, photos
Sunday, November 23rd, 2008 at 05:51pm
Tagged with: flickr, photos, web standards group
Sunday, November 16th, 2008 at 10:13pm
Tagged with: flickr, photos, web standards group
Sunday, September 28th, 2008 at 08:05pm
After a long delay I have finally caught up with putting my photos from Melbourne Perl Mongers and the Web Standards Group up on Flickr:
At some later point I need to change the name of each photo to be descriptive, not just the image filename.
Tagged with: flickr, melb.pm, photos, web standards group
Monday, September 1st, 2008 at 06:21pm
Last Monday was the last week of the digital SLR course that I was doing with David. After covering long exposures we covered exposure, perspective, depth of field and (not) using the flash. From this I have added some more photos to the Flickr set.
These include the stereotypical flower for depth of field:
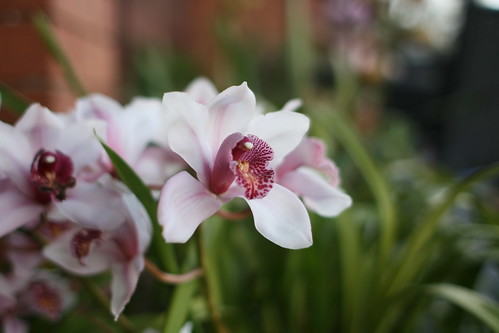
double exposure using an external flash twice in a long exposure:
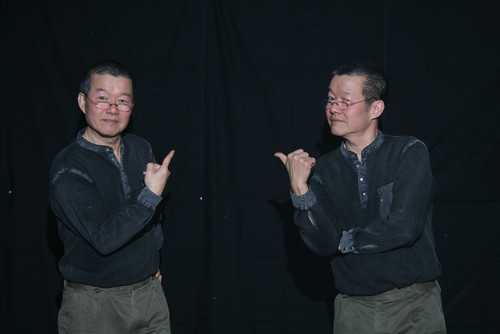
and using long exposure again, but with a moving sparkler and the external flash:

I would recommend the course to anyone.
Tagged with: camera, flickr, photos
Tuesday, July 29th, 2008 at 08:37pm
Last night was the third week of the digital SLR course, and this time we were outside taking long exposures:
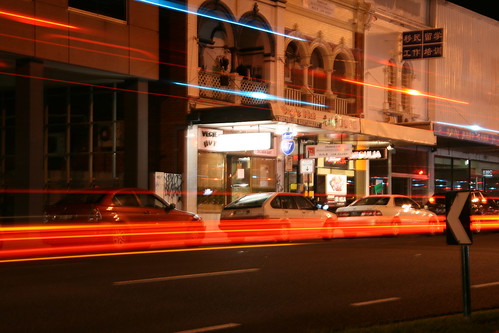
If you look carefully you can see the fire truck.
On the second week we were assigned some homework to get photos of moving water and to do some panning which David and I went out to get on Saturday afternoon down at Dandenong Creek. At 3 seconds the water flowing around the rocks looked more like fog than water:
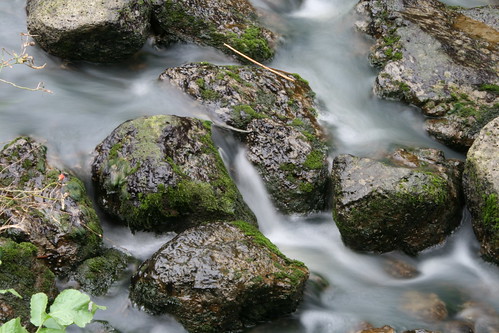
More photos can be found in a Flickr set and I will be adding to it as the course proceeds.
Tagged with: camera, flickr, photos
Wednesday, May 21st, 2008 at 11:33pm
Last week contained both a Perl Mongers meeting and a Web Standards Group meeting. I have just finished sorting through the photos I took and have uploaded the best (not so much for WSG) to Flickr.
Wednesday night was Perl Mongers at a new location, across the road from Federation Square. Wes brought along his 50mm f/1.4 lens which is a significant improvement over the 50mm f/1.8 lens that I had used previously.

Melbourne Perl Mongers (May 2008) – a set on Flickr
(That raspberry wheat beer was very popular…)
On the Thursday night was a WSG meeting, tied in with the Web Directions South conference, where I was back to borrowing the 50mm f/1.8 lens. There was hardly any light and the lens (and camera) really struggled.
Web Standards Group (May 2008) – a set on Flickr
While most of the photos look ok when small, some are really bad when the large versions are viewed. Adjusting the light levels just made it worse.
The upshot of all this is that I have more practical experience with different lenses and I now know that in the situation where a 50mm lens (on a crop body) is suitable, I should really get the f/1.4 over the f/1.8. A pity about the massive price difference.
Tagged with: camera, flickr, melb.pm, photos, web standards group
Thursday, April 24th, 2008 at 09:22pm
Last night I went to the April Web Standards Group meeting where Gerry Gaffney talked about how users really search and John Allsopp talked about the web away from the desktop, in particular on mobile devices.
But that isn’t really what I want to talk about.
In a repeat of the recent Perl Mongers meeting I borrowed a co-workers 50mm f/1.8 lens. This time I kept the lens on my camera all night as it was working really well.
At the venue there was hardly any light but I was able to get some shots:
Downlight above Gerry, reflection from the projected image and light from the laptop screen.
John was directly lit by the projector, downlight for the background.
Light from behind the bar.
In this case the narrow angle of view at the 50mm turned out to be what was needed as I was able to take these photos from the other side of the room. It is definitely something to consider in my future lens choice.
One other change I made was that instead of having the camera in aperture priority with it wide open, I had it in shutter priority at (mostly) 1/25 second in order to freeze action with the intention of lightening the photos later if they were a bit too dark. It turns out that I only needed to do that to one photo that had nowhere near enough light.
Tagged with: camera, flickr, photos, web standards group
Sunday, April 20th, 2008 at 06:36pm
Wednesday week ago, Melbourne Perl Mongers was held at a new location in Southbank followed by dinner and drinks at the Town Hall Hotel in South Melbourne.
This afternoon I finally got around to sorting through the photos and uploading a select few to flickr:
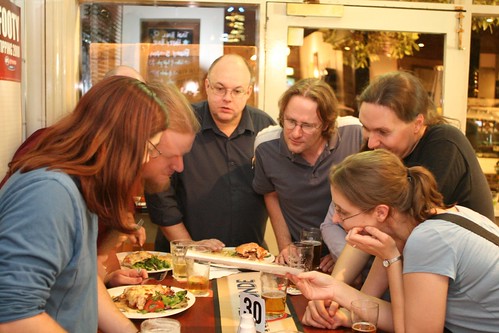
Melbourne Perl Mongers (April 2008) – a set on Flickr
For the night I borrowed what a co-worker refers to as his “nifty fifty”, a 50mm f/1.8 lens. This is a pretty cheap and inexpensive lens, so I wanted to try one out before getting one. This was also my first opportunity to use my new camera bag, a Crumpler 5 Million Dollar Home.
I found that f/1.8 is a big improvement over the f/2.8 of my 28mm lens, but being 50mm it is too narrow which meant I didn’t use it for much of the night.
When talking to Wes I found that even though he has the better 50mm f/1.4 lens, he is finding that it is too narrow and is thinking about the faster 28mm lens.
That Canon 28mm f/1.8 lens is very temping as it gives a ‘normal’ angle of view on a crop body and is nice and fast due to its wide aperture. It also doesn’t hurt that it it a USM lens as the motor in the 28mm f/2.8 is slow and loud. What would hurt is the price and that it doesn’t appear to be anywhere near as available secondhand as the f/2.8 is.
I had also lined up a Speedlite 430EX flash to borrow for the night but that fell through at the last minute because its owner had to make a decision between catching the body or the flash before they encountered the floor. The flash is what ended up breaking.
This coming Wednesday is a Web Standards Group meeting which will give me another opportunity to experiment in low light.
Tagged with: camera, community, flickr, melb.pm, photos
Sunday, March 16th, 2008 at 09:17pm
The kit lens from my digital SLR is a Canon 18-55mm lens. As well as the quality not being the best (I am far from alone in that opinion) it doesn’t have the zoom range that I want for a general purpose walk-around lens.
A few weeks ago I went into Luna Park with David to take some photos. For this I borrowed Hamish’s Canon 28-90mm lens (that he has since sold) and the extra length was good. However 28mm just wasn’t wide enough.
Last week I went to the Steamrail open weekend (repeating last year with a better camera) and this time I took along Hamish’s Sigma 18-125mm lens (that he has has his main lens). Although this is both longer and shorter than the 28-90mm, it is the shorter length that I used the most.
From a number of options I has narrowed down my choice to the Canon 17-85mm IS lens and for the past two weeks I have been monitoring eBay. After bidding on a few listings, last night I was the winning bidder for the lens, a hood and two UV filters for half what they would all cost new and consistent with the final price of other listings. Fortunately the seller (from the other side of the city) was coming my way and they delivered it today.
I knew it was physically bigger than the 18-55mm kit lens, but until I had handled it I hadn’t realised how much. Compared to my 28mm it is massive:
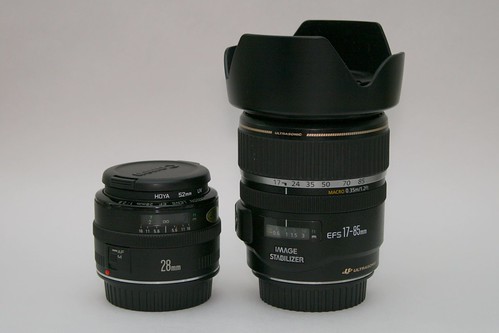
This difference means that the case I got a few weeks ago is now not big enough for this lens, and it is a bit too big if I have the 28mm on. Maybe I should have got a slightly smaller bag for when I will just have the 28mm (such as the upcoming Pub Standards meeting) and a bigger bag to take the camera with 17-85mm attached and the 28mm in a pocket.
That photo above of the two lenses was taken against some off-white paper (slightly larger than A3) curved up against the wall and with a business card to bounce the flash off the (white) ceiling. So it didn’t look dull I had to adjust the fill light in Picasa which resulted in it being a bit grainy. That is why I need to make a lightbox. Decent external lights (flash or floodlights), the camera on a tripid and controlling it via software would be a massive improvement.
Tagged with: camera, ebay, photos
Thursday, March 13th, 2008 at 10:50pm
Due to venue issues, there was no Melbourne Perl Mongers last night. Instead there was a ‘Pub Mongers’, sort of the same thing except entirely at the pub with no planned talks.
But that didn’t stop Paul:

Pub Mongers (March 2008) – a photoset on Flickr.
One other change is that I didn’t bother taking my laptop along as the most I have used it for at a meeting for a long time is making a note of something to look up later. What I did take along was my good camera.
I only took along the kit 18-55mm lens (instead of the 28mm F2.8 lens I also have) as I still haven’t got a better walkaround lens (looking at a EF-S 17-85mm IS lens on eBay). This still gave me some experience in pretty bad light so hopefully things will only improve.
Continuing my plan on going to as many community events as I can I should be repeating this next week at Pub Standards Melbourne.
Tagged with: camera, community, flickr, melb.pm, photos
Monday, January 28th, 2008 at 07:25pm
Yesterday, two weeks after assembling them, I got around to taking photographs of the Lego sets that had been stored in the roof. They are available for all to see in a Flickr set.
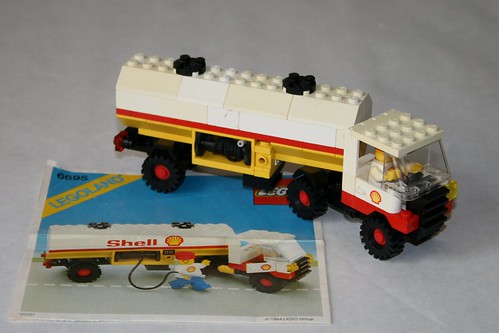
The technique I used for the photos was near a window with sheer curtains drawn and on top of some off-white paper. I ended up using the flash as there wasn’t quite enough light. I’m thinking about getting (probably make one) a lightbox to make it a lot easier to take photos like this. And a tripod. I tried to take all of the photos from the same angle and a tripod would really have been appreciated.
What I have photographed so far is only the discrete sets that we had. There is a lot of older mixed bricks that could be used for anything, and don’t forget my Technic sets that have been (most of them) on display (of sorts) since I last played with them.
While I was taking photos continued on and photographed all of my father’s die-case Dinky Toys that had been brought down from the roof. They are also available in a Flickr set with (usually) three shots per toy.
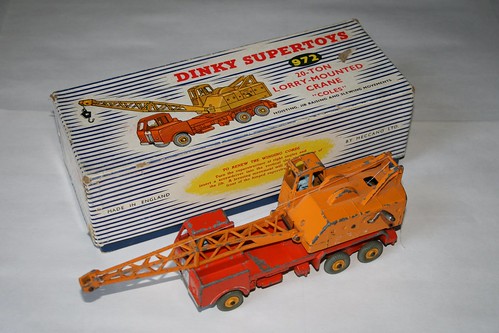
The challenge with these ones was identifying what each one was. dinkytoys.ch was a huge help with most of the toys. For others a google image search with various keywords eventually turned up a reasonably confident answer.
As these will all be packed back up and returned to the roof (for the time being at least), the photos will help us know what is actually up there. And by making them available it should help others identify their own toys, in addition to existing resources of course.
Tagged with: dinky, flickr, lego, organisation, photos, toys
Sunday, January 20th, 2008 at 03:11pm
Yesterday Damien and I went on our first ride since last May, what was planned as a nice big loop that included Belgrave and Croydon.
First we went via Scoresby and Upper Ferntree Gully to Belgrave:
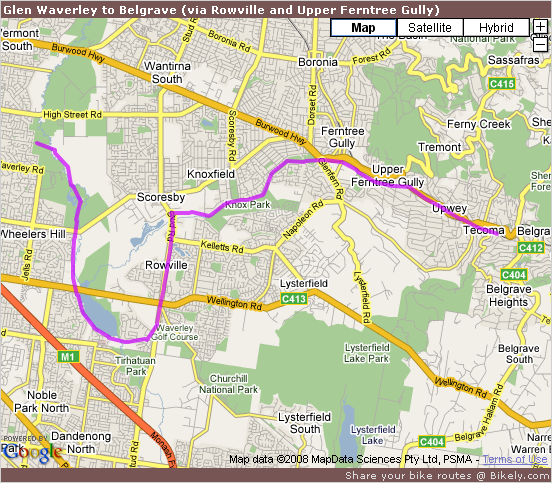
The new bridge for the Eastlink Trail is well underway at the south end of Jells Park:
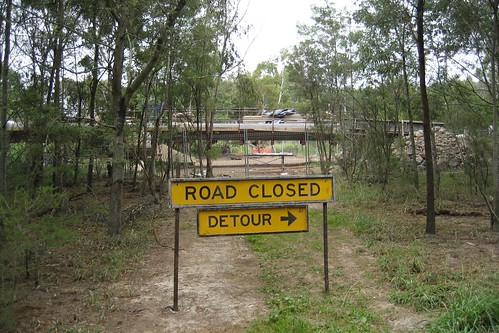
And, despite the website saying otherwise, the upgraded trail south of Ferntree Gully Road is open:
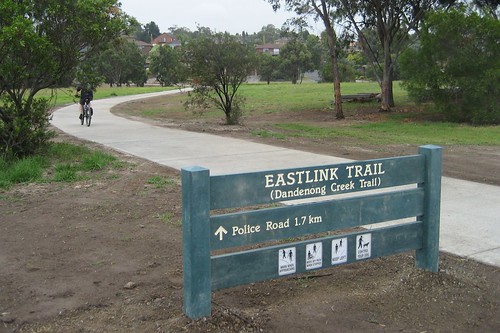
all the way to where Eastlink crosses the Dandenong Creek in Mulgrave:

But some landscaping and cleanup is still to be done.
Since it drizzled for much of the ride to Belgrave we decided to catch the train to Ringwood and continue riding from there:
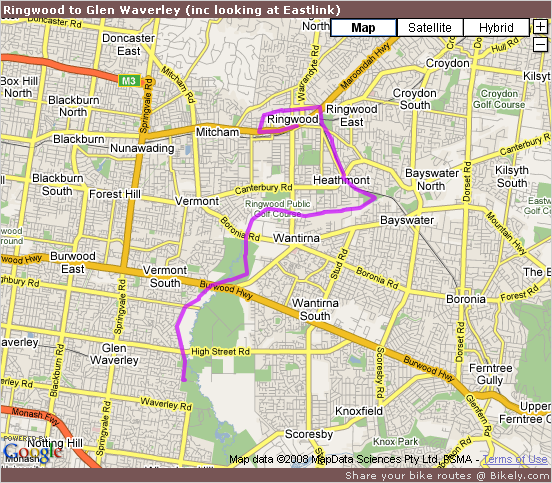
Paths near the Ringwood Bypass are done, but not yet open:

And the upgraded path through Koomba Park has been open for six months now:

Apart from the drizzle it was an enjoyable ride and once Eastlink is complete there will be a decent network with many combinations to enjoy.
Part of what we skipped was a loop from Bayswater to Croydon (via the Tarralla Creek Trail), Ringwood (via the Upper Mullum Mullum Creek Trail) and back to Bayswater:
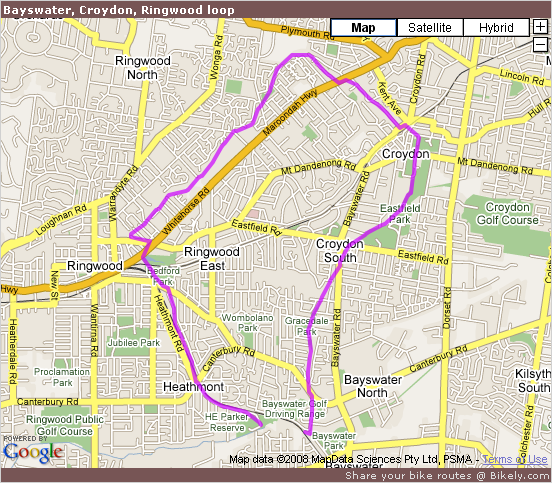
Some more photos are available in my Bike paths and Eastlink (January 2008) Flickr set.
Tagged with: cycling, eastlink, flickr, photos
Friday, September 21st, 2007 at 11:04pm
Further to my thoughts about getting a digital SLR camera I have borrowed Hamish’s Canon EOS 300D. In particular his 28mm f/2.8 lens for candid shots in low light without needing the flash.
Tonight we had a family dinner and during the evening I took over 500 photos, almost all of which were of my nephews. The large number was thanks to continuous mode which allowed me to capture interesting actions and expressions. Looking through the photos later it appears that there is only one good photo from each burst. However, that still results in a fair number of good photos.
Something that worked out well for some photos and not so good for others was my decision to attempt to select a appropriate white balance setting:
- The kitchen has fluorescent lights and the fluorescent setting worked out very well.
- The dining room has a single incandescent light and with the incandescent setting the photos are slightly yellow. But that could be expected as there isn’t much light in that room.
- The lounge has compact fluorescent lamps but I was using the incandescent setting. It was only when I was reviewing the photos later that I saw that all of these ones had a green tinge.
For a while now I have been using Picasa as a way of browsing through all my photos. I was pleasantly surprised to find that the automatic colour adjustment did a very good job of removing the green tinge and the fill light control is good for lightening up the photos that are a bit dark.
So, apart from some mistakes that experience should eliminate, using a digital SLR was worth it.
Tagged with: camera, photos
Tuesday, September 18th, 2007 at 11:06pm
Early last year I chose convenience in my choice for a digital camera. This has allowed me to have it with me almost all the time, including being readily accessible while out riding.
Ever since one friend got a secondhand Canon EOS 300D and another got a new Nikon D80 I have been thinking about getting a digital SLR of my own. What impressed me was the speed and sensitivity of the camera, in particular in low light without using a flash and an appropriate lens.
The other area I would appreciate an SLR is in taking photos for my computer collection. It would give me much greater control of the photos and also allow me to rely less on the flash (although better lighting would also do that).
So what would I get?
I’m not yet sure. Over the last couple of days I have been reading up on two cameras that are at a similar price point:
The Canon is much more popular and there seems to be a much availablity of lenses for it. Also, the Canon has now been out for over a year and should be replaced in arond six months, while the Nikon has only been out for a few months. I don’t know how this affects any decision I make.
I suppose my next step is to go to some camera stores and have a look at them in person. It would also be interesting to see what the salesperson “recommends”.
Tagged with: camera, photos
Saturday, July 28th, 2007 at 04:20pm
Last night and this afternoon I finally got around to putting the better photos from the airshow up on Flickr:
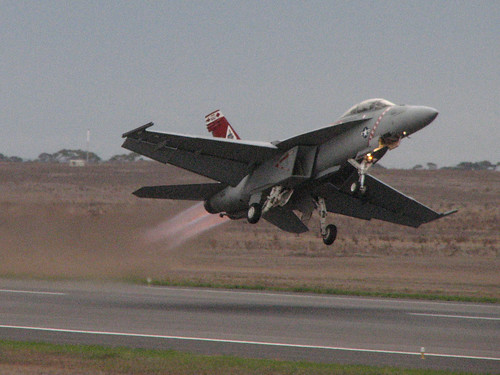
– Australian International Airshow 2007
I haven’t quite finished putting meaningful titles and tags on all of the photos…
Tagged with: airshow, flickr, photos
Friday, March 23rd, 2007 at 11:11pm
I have just returned from the Airshow. Apart from a few things (the incident in the Burnley tunnel delaying our journey, it being windy and dusty, poor traffic management leaving the carpark) it was well worth it.
I ended up taking around 500 photos although a large number of those were taken using the continuous mode on my camera in order to try and capture a good shot of the aerial displays. I’m not going to sort through them (and upload them to Flickr) until sometime next week as I am going to wait until I can get a copy of the photos Damien took.
Although in the last week I have uploaded some other photos:
Tagged with: airshow, flickr, photos
Sunday, March 18th, 2007 at 06:05pm
Two weeks ago I mused about taking photos while riding. Last week I picked up a small camera pouch from a computer swap meet for the grand sum of AU$5 with an eye to mounting it on the handlebars of my bike.
Earlier in the week I modified the pouch to remove and extra bit of padding that actually made it more difficult to fit my camera (which is one of the smallest…) and today was the maiden voyage one my ride out to Endeavour Hills and back.
How did it go? Excellent as I was able to take a lot more photos that I normally would. It also gave me a location to store a map of where I was riding, given that I folded it up pretty small. My next action is to make a more secure mount as I don’t quite trust the velcro on the belt loop, at minimum I will add a backup connection to ensure that the pouch doesn’t go far if the velcro lets go.
And here it is (follow the link to flickr to see notes):
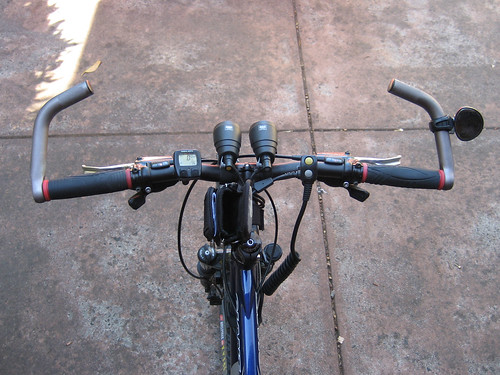
Tagged with: camera, cycling, photos
Sunday, March 4th, 2007 at 08:56pm
Ever since I got my camera I have had it with me almost all of the time, either in a pocket, in the top of my backpack or in my laptop bag. When I am riding, such as commuting or rides such as this afternoon, I rarely take photos as it is a hassle to stop, release two clips, swing it around, and unzip the top of my backpack in order to get to the camera.
For a few weeks now I have been considering getting another pouch for the camera to attach to the handlebars of my bike, the headstem in particular. This would make the camera readily accessible. Instead of stopping I could even take the riskier path of actually taking the photos without stopping.
As well as taking photos of landmarks or interesting things I have also been thinking about documenting my commute as has been done by others, and they are just some local ones.
What about taking it further?
Some time ago I found an article about building a simple camera mount. There are other homemade solutions as well as options you can buy but for me they all have the same issue. The view is fixed to be ahead of the bike. What if you want to take a photo of something else?
The next step is to consider recording video instead of taking still photos. As well as homemade options there are commercial options targeted as pretty much any action sport. But whatever option you take it seems that the cost is non-trivial which eliminates it as an option for me.
So what is the outcome of all of this? I’m going to look for a suitable pouch or small bag that I can attach to the side of my headstem. This should only set me back at most AU$20…
Tagged with: camera, cycling, photos
Sunday, October 1st, 2006 at 10:53am
Last night I uploaded the photos I took two weeks ago while wandering through the city.
I still need to add titles and descriptions but I did geotag them…
Tagged with: flickr, photos
Saturday, September 16th, 2006 at 04:31pm
After leaving the bazaar I walked around Federation Square and Southbank for around about an hour before catching the train back to Clifton Hill.
A large amount of this time was looking at the exhibition of overhead photos by Yann Arthus-Bertrand that were on display. They were stunning and I almost bought some posters of them but I couldn’t decide what to get. The remainder of the time was spend taking photos of various things, mostly over at Southbank, which I should upload to Flickr.
Tagged with: photos
Saturday, May 20th, 2006 at 10:51pm
A few days ago I decided that I would use Flickr for my photos instead of continuing my manual system or installing an existing package such as Gallery. Although I don’t have as much control over what I can do with sharing the photos there is the advantage of now have to worry about any bandwidth usage but more importantly there is a greater chance that people will see and possibly comment on my photos.
Since then I have moved the sets that I had already made available over to flickr and added some rudimentary integration by automatically showing the thumbnails in their place. My next step is to go through all of my photos and add them as well…
Tagged with: flickr, photos
Friday, April 28th, 2006 at 07:25pm
A few weeks ago I rambled on about getting my own digital camera. A few days ago I made a decision and as of this afternoon I have a Canon IXUS 60 with 1GB memory card and leather pouch to do with as I please. As it is smaller than my wallet, even in its pouch, I have absolutely no excuse to not have it with me at all times. Finding suitable things to photograph will be the next challenge and after that will be a convenient mechanism to publish them.
One thing I didn’t realise about this camera is that it lacks the remote capture features that both my parents camera (PowerShot S45) and my other finalist (PowerShot S80) have. I do have to say that I have never taken advantage of that and the last time I saw someone do so was a few years ago for a time lapse of our last lan party…
Tagged with: camera, photos
Sunday, April 16th, 2006 at 10:53pm
For some time now I have been thinking about getting my own digital camera instead of simply borrowing my parents camera, a Canon PowerShot S45. Although it is now a few years old it is still a good camera and except in low (or no) light (were a tripod should probably help) I have been very pleased with the quality of the photos. The biggest problem I have is that it is not my camera and if both my parents and I want to use it they win out.
When I was thinking along these lines a few months ago I was tempted to get the current version of it, the eight megapixel PowerShot S80. My current thinking has been altered by two things: that a couple of people of work have ultra compact cameras such as the Canon IXUS 60 and how impressive the photos posted to forums such as the Victoria forum on SkyScraperCity that are taken with digital SLR cameras. However there is no reason I could even come close to justifying that kind of expense.
This leaves me with two options:
- A good camera that is no bigger than my wallet which makes it extreemly convenient to carry around (eg the IXUS 600 for AU$460); or
- A better camera that is bigger which makes is less convenient (eg the PowerShot S80 for $680);
Since both of these options are an improvement on the camera that I currently have access to my current inclination is to go for the more convenient (and cheaper) option and see how much I do use it…
Tagged with: camera, photos
Sunday, May 15th, 2005 at 03:55pm
I have just finished sorting through another batch of photos, this time of Kooyong Station from after perl mongers the other night.
Tagged with: photos
Saturday, May 14th, 2005 at 02:16pm
I have just finished sorting through and uploading two sets of photos:
Tagged with: cycling, photos, trams
Friday, March 18th, 2005 at 10:21pm
In an unprecedented move I somehow found the time this week to organise the photos that I took last Sunday around Springvale and Westall Stations. There are even descriptions this time.
I should end up with more photos to organise tomorrow as this weekend they are closing the interstection of Springvale Road and Burwood Highway for construction related to the tram extension to Vermont South. The plan is to stop by with a camera on my way back from golf…
Tagged with: photos, trains
Tuesday, March 15th, 2005 at 10:29pm
Tonight I finally got around to sorting through the photos that I took back in February when the QE2 stopped by Melbourne. The final selection has been processed and uploaded for your perusal.
At some point in the future I will enter descriptions for the photos but that may be not for some time given that I have another large collection of photos that I took the other day of the rail infrastructure (sidings, yards, etc) around Springvale and Westall stations…
Tagged with: photos, trains
Saturday, February 12th, 2005 at 01:07pm
This morning I got up at the disgustingly early hour of 6AM in order to drive in to Station Pier to watch the arrival of the QE2.
After taking a number of photos of the QE2 being turned around to dock against the west side of the pier there wasn’t much to see so we decided to take advantage of the time to have a look around Port Melbourne and Fishermens bend. This produced photos of the old Webb Dock rail line, the underside of the West Gate Bridge and even of a container ship heading out and a tug boat heading back up the Yarra River.
Since we still had plenty of time before either of us had to be back we went over to Spencer Street Station to have a look and unlike my previous visits to take photos we actually went through the V/Line section of the station to take photos.
Hopefully I can find some time to sort through and upload all of these photos by the end of the weekend…
Tagged with: photos, trains
Wednesday, December 8th, 2004 at 10:12pm
Tonight was the final Melbourne Perl Mongers for the year and since the OSDC was just last week we didn’t bother with any talks that might make us think and just went straight to the pub. Also due to the OSDC were two new faces; Debbie, who actually teaches at Monash, and Greg, who used to work with John (from work) at Ericsson.
Like last month I got a lift in with Alfie and we stopped at Spencer Street Station to look at the progress and take some photos. However I ended up taking better photos from the car of bits of the CBD as we drove along Kings Way/ King St which will be available shortly.
Tagged with: melb.pm, photos
Thursday, November 25th, 2004 at 07:09pm
Tonight I caught the shuttle bus over to the Caulfield campus to attend the first event by a new Service Oriented Computing special interest group that has been setup by the Victorian branch of the Australian Computer Society. It was pretty interesting and the topic is likely to become very relevant to how the my.monash portal integrates with other services in the future.
As the shuttle bus had stopped running by the time it finished I had to catch a train and a bus to get back to the Clayton campus in order to pickup my bicycle and ride home. This meant I was able to spend about half an hour taking photos of Caulfield Station.
Tagged with: acs, photos, web services
Friday, November 12th, 2004 at 07:34pm
On my way to and from Melbourne Perl Mongers on Wednesday night I was able to spend a few minutes taking some photos of Spencer and Flinders Street Stations.
Tagged with: melb.pm, photos