Blog entries from May, 2009

A year with Windows Vista

Tuesday, May 26th, 2009 at 10:19pm

It has now been a year since I started using Windows Vista on my home desktop. My verdict: it’s not as bad as people say.

But I can’t think of anything in Vista that I actually use in comparison with XP. My typical complement of applications include Firefox, Thunderbird, Putty and VLC. I could even say that if it weren’t for the comparative ease of things TV recording, video editing, DVD burning with windows applications, I could even be running Linux.

So, apart from my initial issue with DVD burning and the later issue with Foxit Reader, it has been solid. I put this down to running it on new hardware (plenty of RAM) and keeping the system simple by not installing unnecessary programs. In fact keeping the system simple is advice than can be applied to any operating system.

However, it is not without some annoyances:

  • Moving, copying and deleting files through explorer is slow. Especially over the network or on USB drives. It isn’t that the transfer speed is slow, it is the pre and post actions that take ages. In comparison performing the same actions from the command line are quick, in particular deleting files. This led me to find TeraCopy which is a must for Vista, it is also handy under XP.
  • I regularily get ‘ghost’ files. These are files that I have deleted or moved through explorer, but hang around (except are not readable) until a reboot.

In short there is nothing wrong with a properly setup Vista install, but if I hadn’t been given a free (but legit) copy of Vista I wouldn’t have bothered.
Tagged with: ,

Learning how to mount photographs

Thursday, May 21st, 2009 at 08:57pm

At the WCC workshop night earlier in the week there was a demonstration on how to cut the mount for a printed photo from mat board. Although I had read about how to do it – including a detailed guide from Hugh Sykes (PDF, 195KB) from a club in Sydney – an actual demonstration shows more of the detail.

The main demonstration was done by Roger:

  • Use two L shaped pieces of mat to determine what size the cutout should be for the particular print, eg 160x240mm
  • Double the chosen border size (eg 60mm) and add to the cutout dimensions to get the overall size of the mount, eg 280x360mm
  • Cut the mat board with a straight edge to size
  • On the back of the board mark the sides of the cutout
  • Mark the top and bottom of the cutout so that it is slightly above centre, eg 58mm for the top, 62mm for the bottom
  • Align the straight edge with the marked line
  • Using a pull style 45° cutter, cut along the line with multiple passes
  • Repeat for each side of the cutout
  • If the cutout doesn’t release cleanly, use a craft knife
  • Run an emory board along the newly cut edges
  • Place a strip of tape along the top edge of the print and set it face up
  • Put the mount down on the print in the correct location and press to make the tape stick
  • Attach a backing board to the mount

Fred then showed us another way to attach the print without using tape, instead he attaches the print to the backing board using sticky photo corners. This means that there isn’t any tape on the print and makes it easier to reuse the mount.

Now I know in a fair amount of detail two ways to cut the mount and three ways to attach the print to the mount. Which way will I use?

Last week I ordered two push style cutters from the US. I ordered two to save on international postage as I will easily sell the second one. Now, although this is the same cutter that Fred showed, Roger used a pull style cutter that includes a marker bar that would make it easier to mark the cut lines.

Today I bought a sheet of black mat board from a local framing shop. While I wait for the cutters to arrive I will cut it down to size, I’m thinking a size suitable for 6:4 printed on an A4 sheet which would give me six mounts from the raw mat sheet.

Tagged with: , ,

Posters and frames

Sunday, May 10th, 2009 at 05:35pm

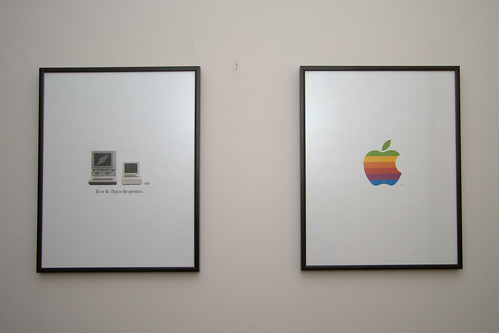
For many many years the first sight when entering my computer room was a frame containing sixteen Wallace and Gromit postcards in a grid. Today I replaced it with two smaller frames:

IIe or IIc: That is the question

This is an old Apple poster that I have had for quite some time. As I had two smaller frames that I could reuse and I have two of these posters, I decided to split the poster down the middle.

Why is it now that I finally got around to doing this? Because earlier in the week there was a poster sale on campus.

With the intention of getting some new posters I first had to work out what posters I had, and I found that I had more than I thought, most of them for some time. In the case of the Wallace and Gromit posters that time is more than a decade for some and just under a decade for others.

Despite this I ended up buying some more. I got two from the poster sale (one being for Blue Harvest), ordered two online from the same company that ran the poster sale, and then ordered two more from the UK.

Once they all arrive I will have to work out which ones and where to hang them. This will also included determining if any of my unused frames – some bought new, others saved from being thrown out (if you looked at the back of the frames I used above you would see ballet shoes) – are appropriate.

Tagged with: , ,

Assembling the Lego bulldozer

Saturday, May 9th, 2009 at 03:32pm

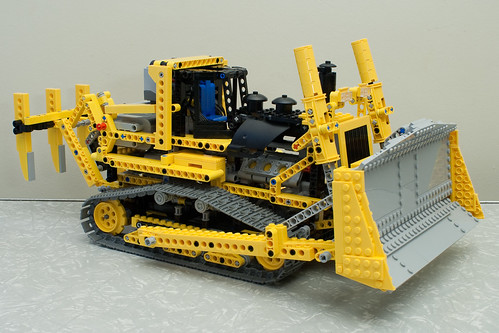
Yesterday I picked up a big cardboard box from Rowville. After I got home and had something to eat I began to assemble the contents, to end up with this:

Lego Motorised Bulldozer (8275)

Yes, this is the Lego bulldozer that I mentioned last week.

As usual the design is quite ingenious. At each of of the tracks is a large yellow cog, with one XL motor driving the left rear cog with another XL motor driving the right front cog. There are also two normal motors that each drive a worm gear, one for lifting the front blade and the other for the ripper on the back.

The remote control is quite funky. The remote itself has two controls and a switch to select one of four channels. One receiver on the bulldozer controls the two XL motors for the tracks while the other reciever, on a different channel, controls the two motors for the blade and ripper. The battery box is held in by two pins which make it easy to remove in order to change the batteries.

For long term display I will probably remove the ripper, but that is easy because it is held on by four pins and a drive connection. A parallel could be drawn with power take-off on real bulldozers/tractors.

I do have one regret, that I didn’t build the B model (in this case referred to as a ‘quick build’ as it is nowhere near as complex) first. It looks like it would also be fund, but I would have to pull apart the bulldozer and then afterwards pull it apart and rebuild the bulldozer. I don’t know if I could find the time for that.

However, I might be able to find the time to rebuild this as its B model:

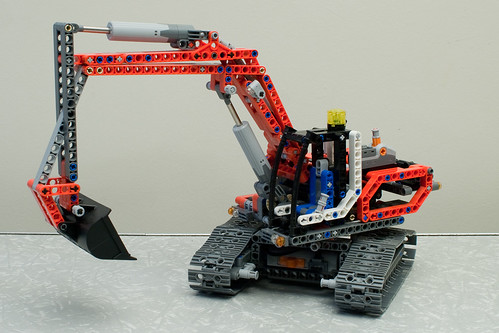
Lego Excavator (8294) with Power Functions (8293)

That shouldn’t take too long as it looks like the base with the tracks is only slightly different. So only the top would need to be pulled apart.

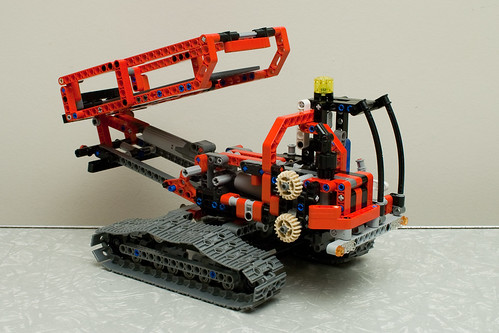
Update: The excavator now looks like this:

Lego Excavator (8294) B model

Tagged with:

Happy with the judge’s response

Tuesday, May 5th, 2009 at 10:49pm

At the camera club tonight I had two digital images in the competition. This is actually the second month that I had entered photos, but last month there was a mixup and my entries were missed.

This month I am extremely happy with the response, one receiving a ‘highly commended’ and the other with positive feedback.

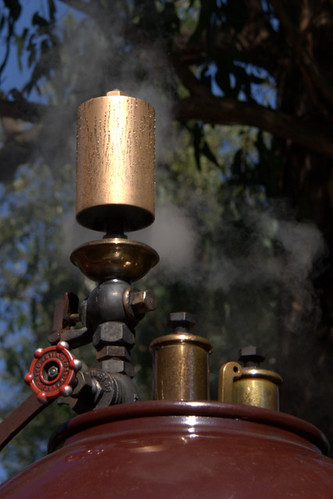
I took this photo of the whistle on top of one of the Puffing Billy locomotives on the WCC outing last month:

Steam whistle

I entered this image because I liked the condensation on the whistle and how the whistle was framed by the steam in the background. I wasn’t quite happy with the sharpness of the other parts of the image, and the judge picked up on that.

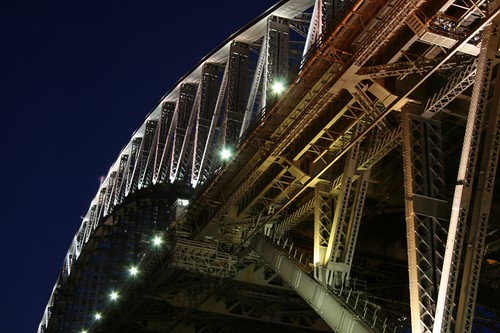
So that means that this image of the Sydney Harbour Bridge that I took last year before OSDC2008 received the ‘highly commended’ award:

Bridge at night

I took this image as it was getting dark. This was just one of many long exposures I took from around the same area.

The judge commented that he didn’t recognise the bridge at first because it wasn’t taken from the typical angle. He also liked that there was still colour in the sky and the varied colours in different areas of the bridge.

All up a very good experience.

Now I need to work out how to best print and then mount images so I can enter four images (two printed and two digital) each month. I am also planning to post some images to the club’s comment gallery in addition to taking some along to the next workshop meeting which is a photo discussion night.

Update: The images are now available in the club’s gallery: Steam whistle, Bridge at night. In the galleries you can see what other photos were being judged that night, for both A and B grades there is one for digitial images of the prints and another for the digitial entries.

Tagged with: ,

I have found my new bicycle lights

Monday, May 4th, 2009 at 10:09pm

A few weeks ago when daylight saving ended I setup the lights on my bike for riding home in the dark. A Cateye HL-EL135 light and a Cateye HL-EL530 light.

Although I used these lights last year, I was never quite satisfied with the EL530, the bright spot in the beam isn’t very wide.

So I started looking around for other options and I came across this impressive setup that didn’t use lights designed specifically for bicycles: Fenix L2D Premium 100 Flashlights as Bicycle Headlights. I was impresssed, but I wasn’t sure so I ordered one of the lights online to test. I reasoned that if it wasn’t suitable for my bike I still needed a new torch.

It arrived today.

It is very impressive.

(I got an L2D Premium Q5 which is slightly higher spec than the L2D Premium 100)

Next to this, even at the lower settings, the EL530 is pathetic. In turbo mode the difference is insane.

Now I have to work out how to mount the light. Do I go the lockblock method which doesn’t allow for much adjustment, or do I do something else? I might be able to rig something up temporarily using the Cateye mount as a base with velcro straps to hold the light on.

Also, do I buy a second one to mount on the handlebars? Two at the lower power level would mean a wider coverage and less battery changes. What about one to mount on my helmet? A helmet mounted one could be very handy.

Tagged with:

I have power… Lego power functions

Saturday, May 2nd, 2009 at 05:40pm

Six months ago when I bought my first Lego set in years, the 8294 Excavator, I temporarily motorised it using the motor from my old Lego sets.

Since then I have been keeping an eye out for the current power functions motor set. None of the physical stores bother to stock it, so I had to turn to online stores. Even though a lot of them list the set, they don’t have it in stock.

However, there are a couple of sellers on eBay that were listing (and selling) the set on a regular basis. So, after just thinking about it for a while, this morning I bought the set from a seller that is located nearby and offers pickup. A few emails and a short drive later and I had it, and I have just finished adding it into the Excavator.

It is fun.

But it is also quite nice how the new style of motor, battery box and switch fit completely inside the model. I am a bit disappointed that the Excavator doesn’t use the lights, even though there are places on the boom there it looks like they would go.

After all this I have a decision to make. After seeing some videos of the Motorized Bulldozer – it’s remote controlled! – I want one.

Should I?

(After seeing this video I want the other bulldozer, but that’s a custom build)

Tagged with:

The islands are no longer just painted on

Friday, May 1st, 2009 at 10:07pm

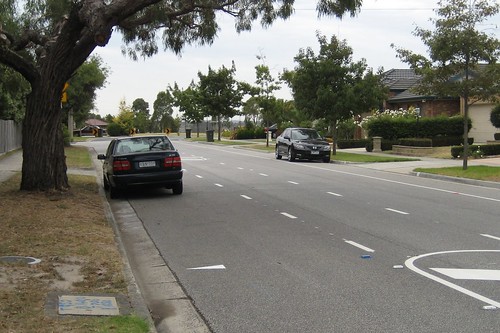
A bit over a year ago I took this photo of England Road after it was changed from having no line markings to having a shoulder for parking and a series of painted islands between the traffic lanes:

Is this legal parking?

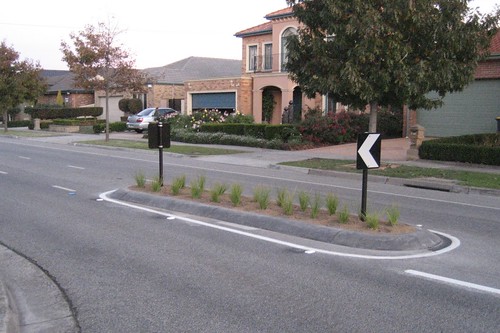
Since I took that photo I have been varying my route home, but I usually go this way once or twice a week. Earlier in the week work began on the four painted islands and yesterday I took this photo of the result, all four are now actualy traffic islands:

The islands are no longer just painted on

(The photo isn’t the best, it was quite late and there wasn’t much light, and in hindsight I should have recreated the original photo.)

So what does this mean?

Previously when riding home this way cars would simply drive over the painted islands (I still don’t know what the road rule is about that), but now I suppose that they have two choices:

  • wait until after the traffic islands where there is space for them to overtake; or
  • try to overtake in one of the gaps between the islands.

I sure hope that they choose the first option, there is not space for the second.

Tagged with: , ,