Lightbulb on a tablet
Sunday, September 20th, 2026 at 04:16pm
While building and initial playing around with my DIY pixelstick was fun, I was stalled a bit because the next step was to go out and try it, but I needed to work out some locations and find some other people to assist. So I looked through my list and picked one that didn’t need much setup and I already had all the parts: clear object on tablet.
I had seen this around with people using clear plastic or glass objects lit from below by an image on a tablet. I don’t have any glass figures or ornaments, but many people were using lightbulbs, so last time I was at Bunnings I picked up a globe that I thought would be suitable.
The bulb had to be clear, it is a smaller size so there is less empty space within, the screw base was more interesting than a bayonet base, and I liked the long thin LED elements:

To illuminate the bulb I needed some colourful patterns. The guides I had seen online suggested stock images or free patterns, but I decided to use my own images. I found about 20 images I thought would be suitable, ones with lines or shapes, and strong patterns or bold colours, and started to experiment.
The setup is fairly simple, a small table with black cloth behind, my 8″ tablet with the bulb on top, camera on tripod in front:
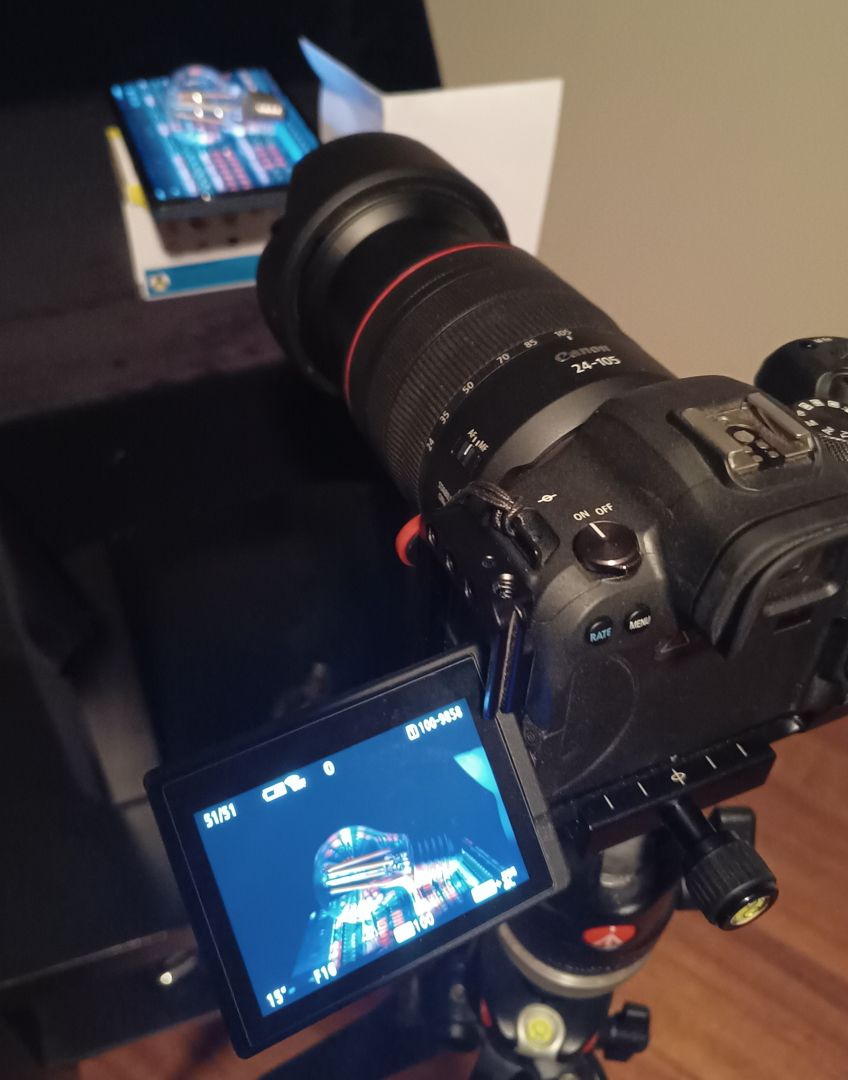
The tablet is on another small box to raise it up a bit so the camera was at a more comfortable height, but that folded piece of white paper? That is there to bounce a bit of light back onto just the top of the screw threads, to complete their shape.
My first session of experimenting gave promising results. I had the table in different orientations, I changed the angle of the camera to the tablet, I rotated the bulb on the tablet, I zoomed in and out of the image to change its position in the bulb to get different effects.
In that behind the scenes shot above I was still using my regular 24-105 lens, but I later switched to my 100mm macro lens which gave a clearer result that was easier to focus. The final images were taken at f/16 ISO100 for (most at) 10 seconds, so I am glad I picked up a bluetooth remote so I could move away from the setup during the exposure?
Why stay away? The lightbulb is glass and metal sitting on the glass front of the tablet, this is very slippery and any slight movement from the floor would cause the bulb to shift. Initially I had a small piece of blutack behind the threads, but you could see that in the final shot, so I 3d printed a little black arm that came out from behind the tablet and stuck to the back of the threads with blutack, even then the bulb would slide around a little bit.
All of this led to the second session where I knew the setup that I wanted so I worked my way through all of my chosen images on the tablet. Once I had those images in Lightroom I selected the best dozen and then got to work tweaking their sliders (all of them got a lot of clarity) and a decent amount of spot removal
Those dozen images are in my Lightbulb on a tablet album. The description of each image has a link to the image that was being displayed on the tablet. I couldn’t decide between two images that used Sockets, so I included them both.


This also means that this item is completed, I have crossed it off the list.
Some videos I found useful for this were:
- What’s the secret to Perfect Lightbulb Reflection Photos? – YouTube
- Lightbulb on tablet: Creative photography ideas for fun projects to try at home! – YouTube
- Lighting glass abstract photography – YouTube
- Glass Reflection Tablet Photography Tutorial – YouTube
Tagged with: photography

