Blog entries from November, 2018

Controlling the heating

Tuesday, November 27th, 2018 at 09:52pm

After achieving my first long term goal of a clock that I do not need to adjust for Daylight Saving, I moved onto remote control of my central heating. Thanks to some Home Assistant components this came together quite easily.

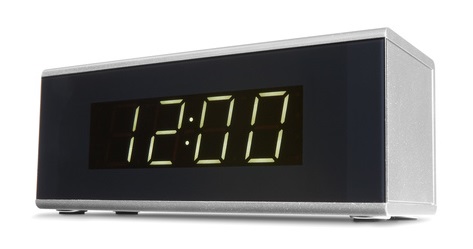
I have gas ducted central heating with a controller mounted in a central location. You could say I didn’t need to change a thing as it was already “smart”:

Yeah, nah…

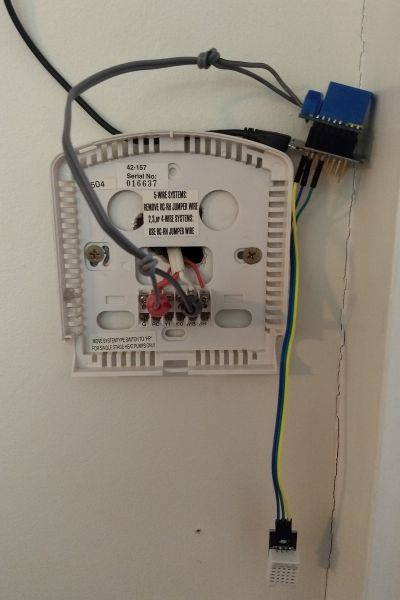
This is what is referred to as a 5+2 programmable thermostat, there are two sets of schedules, one for the five days of the week and another for the two days of the weekend. The interface between this thermostat and the heating unit itself a pair of wires carrying around 25VAC, close the circuit to turn the unit on, this would be done instead by a relay connected to an Arduino.

On the user interface side I was planning to use a Google Calendar as I could put in events to represent the schedule and I could already manipulate it from my phone the the web interface which covers off remote access. The regular schedule would be in as repeating events, but I could adjust them as needed if I knew I wasn’t going to be home until later than usual.

My original plan had been to write something that would query the google calendar and push that information to the thermostat Arduino which would compare the target temperature against the current temperature and set the state of the relay appropriately. This approached changed when I saw that there was a Generic Thermostat component in Home Assistant that would handle the logic of being a thermostat. I wouldn’t need to implement that on an Arduino, it could just be a dumb relay control for Home Assistant to turn on or off. As Home Assistant can use any type of switch component for this and I was already basing things around MQTT I looked at the MQTT Switch component.

I don’t really know how a switch should be implemented, but from the desired behaviour it was easy to work out that the Arduino would listen on a topic for a state (OFF/ON) and ideally it would publish the new (or current) state on another topic. An additional thing I added was a failsafe, the relay would timeout after five minutes, if something went wrong (eg wireless went down or Home Assistant crashed) I didn’t want the heating to run forever.

I did encounter one snag with the relay shield that I had, it was hardwired to have the relay on pin D1, but that was one of the default I2C pins. While I wasn’t using one of the I2C displays in this situation, I was trying to share code between my devices. Later versions of this relay shield let you configure which pin it uses, so in my case my I pulled out the D1 pin (I had already soldered it up) and ran a wire around to another pin.

Adding the switch logic to the Arudino sketch didn’t take long, nor did adding the configuration to Home Assistant, so it wasn’t long until I has it connected up for testing:

This worked well, so I moved onto implementing the scheduling aspect using the Google Calendar Event component and automations.

Despite parts of the documentation not matching the implmentation (I need to follow that up, possibly asking on the forum or even submitting a patch…) it wasn’t long until I had automations configured to set the target temperature when a calendar event started, and to then turn off the thermostat when the event ended.

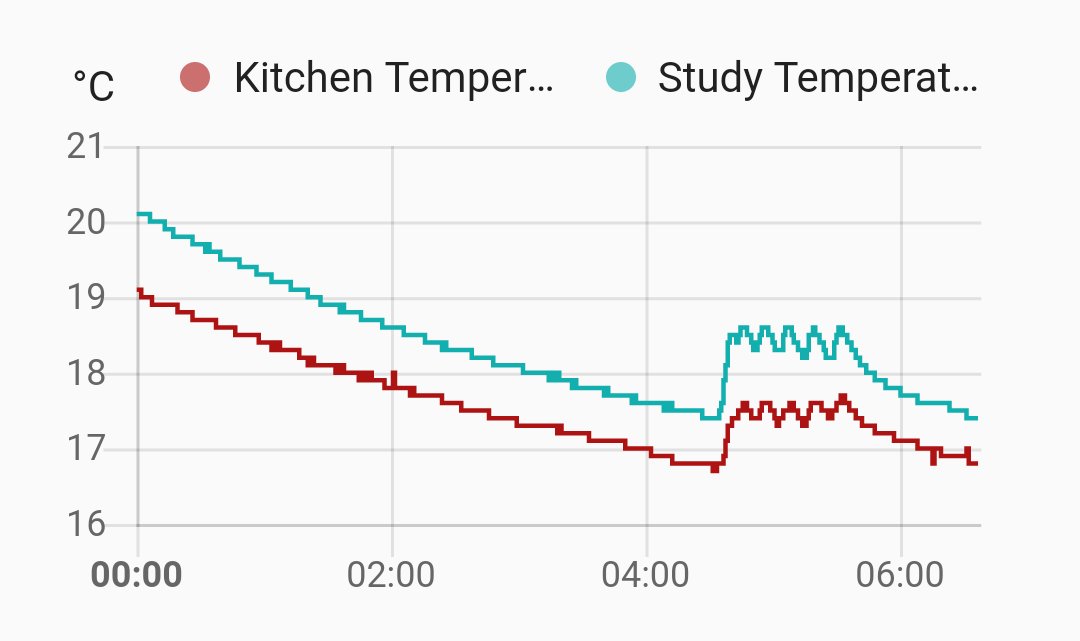
It was now a waiting game as I needed to let the automations trigger over time, and I also needed the weather to cooperate. Fortunately I am in Melbourne where despite it almost being summer we had a week or so of cool enough weather for this to happen:

I was quite happy with this, just in time for summer to really kick in and I no longer have a need for central heating… but that does give me time to sort out a proper mounting and power supply. I was initially thinking about finding some kind of unobtrusive box to mount on the wall, but the idea of featuring the electronics (such as a Tripler Base mounted to a blank plate) is growing on me…

Tagged with:

Linking bricks

Thursday, November 22nd, 2018 at 06:16pm

Many years ago I picked up a bulk lot of Lego because it included most of a set that I had always dreamed of having, the Car Chassis from 1980:

Lego Car Chassis (8860) with box

The most obvious pieces missing are two of the wheels, so at the time I picked up some replacements through eBay and that is how the set has been since then. When I put the set together I kept a list of the missing pieces, which I forgot about until coming across it around the same time that this video came out showing how to use BrickLink to part out a set and order the pieces from various sellers:


How to buy cheap retired LEGO sets LEGALLY! – YouTube

Although there were a couple of sets I wanted to try this on, I decided to test out the process using the handfull of missing pieces from the Car Chassis. This was successful and while I haven’t gone back to add those pieces to the assembled set, I have put together two sets at a cost lower than a used set is selling for and much lower than what a new set sells for.

So which sets am I referring to?

First up was the Curiosity Rover:

LEGO 21104 NASA Mars Science Laboratory Curiosity Rover

Followed by a Lunar Lander:

LEGO 10029 Lunar Lander

For the lunar lander in particular I opted to not to get the stickers or the minifigs, while they would have been nice, they were also the same price as all the other pieces combined, so no.

In confunction with a Space Shuttle, a Saturn V and Women of NASA, I now have the top of two Billy bookcases dedicated to NASA sets. I’m not sure if there are any other sets I will put together this way, but I won’t rule it out…

Tagged with:

This is not a clock

Monday, November 12th, 2018 at 08:01pm

Do you see this thing that looks a lot like a bedside clock? While it may be displaying the current time, it is not really a clock…

To explain what I mean I need to go back a few weeks to when I was inspired to finally do something with the various electronic components I have collected over the years (five years since I plugged in a DS1820 sensor) for home automation. After some tinkering and relying heavily on the examples that come with the libraries I had this going:

On this breadboard is a D1 mini microcontroller, a DHT22 temperature and humidity sensor, and a 4-Digit 7-Segment Display from Adafruit. It is fantastic that other people have done the hard work of sorting out the libraries for the board (with wifi), the sensor and the display. Everything I have done with these is based on the examples provided.

What is happening in this photo is that it is alternating between displaying the temperature and the humidity, but over the following few weeks I continued to tinker until I had it publishing the temperature (and humidity) over wifi to an MQTT server in order to get the data into Home Assistant which displayed this:

Yes there are two data sources, because I had five (more on the way!) of these microcontrollers and they are cheap and simple enough to scatter around the house. They are easy to run from a USB charger, so anywhere I have a powerpoint I can have a device. I now have a lot more configured in Home Assistant and I am feeding in data from other sources, but they will be posts of their own, for I need to get back to explaining why this is not a clock.

Apart from adjusting to the time change, my biggest annoyance with daylight saving is the clocks that need to be manually changed. It is a lot easier these days as phones/computers/etc will automatically update, but I still have a few clocks that need to be adjusted.

My bedside clock is one of these and while I know you can buy a clock that adjusts automatically, when I last looked (it has been a while) I didn’t like the look of them and they were too expensive. So this was going to be my first project and at first I was going to make it a clock that would use time protocols to get the correct time, but you still needed to deal with timezones and other things.

So why not make it dumb? I have a linux box that is always on (where I am running services such as Home Assistant) and it has already dealt with the timezone and DST changes. Every minute it could publish what it thought was the current local time, something as simple as cron running a bash script:

#!/bin/sh
DATE=`date +%H:%M`
mosquitto_pub -h localhost -t home/localtime -m $DATE

The requirements for the “not a clock” are pretty simple:

  • Connect to wifi and the MQTT server, subscribe to the home/localtime topic
  • Every 60 seconds publish temperature/humidity to MQTT (for Home Assistant to collect)
  • Whenever a message arrives on the home/localtime topic, output to the LED display

Making enclosures is probably what I will have the hardest time with (do I buy a 3d printer?) and until this evening I had bare electronics hanging from the wall in four locations around my house. With the need to be able to see the LED display I had the idea of using a clock radio as the enclosure. I decided against gutting my working clock radio so over the weekend I stopped by the local Kmart where I found a clock radio for the lofty price of $15:

(I’m showing the silver model as the picture gives a better idea of what it is, the black model is just a black obelisk, it also comes in rose pink if that suits your colour scheme)

It is not designed to be opened up so some force was required, but after removing the internals and the strategic application of tape and hot glue I have what is in the top picture. I have the temperature sensor taped to the side because I think it wouldn’t get the best reading being inside the case, limited airflow and some heat from the electronics could skew the reading.

An unexpected bonus of this specific radio (and it makes sense from an electrical certification point of view) is that it runs from 5 volts and comes with a small power supply. I retained the socket for this and wired it up to the D1 mini instead of using a USB power adapter. I also kept the board for the buttons on the top of the clock, in the future it might be nice to use them to as a trigger for some action…

I have a lot more to say about Home Assistant, including how I am testing out control of my central heating (just in time for summer…) using a D1 mini equiped with a relay. I have also realised that the remaining clock I have to manually adjust for daylight saving is my stereo, the 25 cd stacker double tape desk stereo that I use as my alarm to play the radio… is there a wifi speaker in my future?

Tagged with: