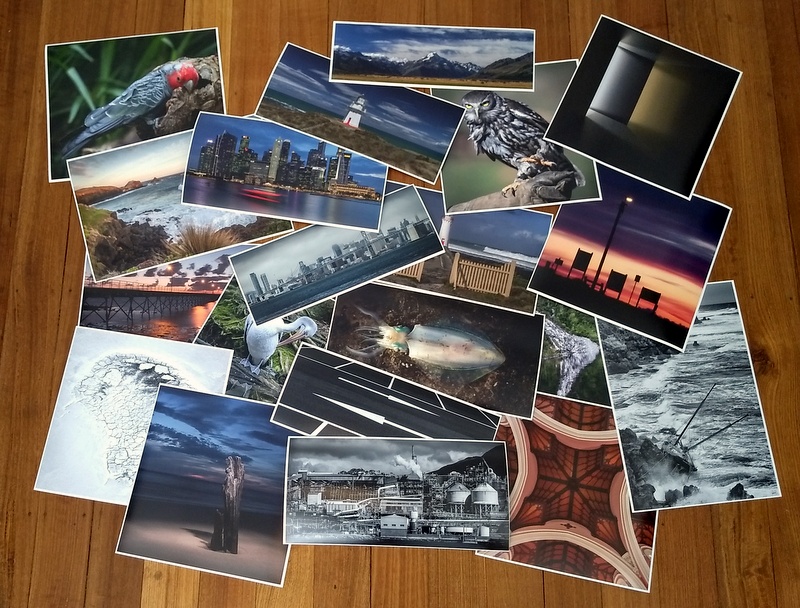
I have written before about how I print images, but I haven’t mentioned what I do with them once I get them back from the camera club competitions.
As they are images that I like and they are all the same size, I bought a number of 16×20″ frames so I could hang them up at home. I like the look of the simple black frame around the off-white mat board, and I have a few larger frames containing some other posters which includes Up Goer Five.
There were two locations that I wasn’t quite sure what would be best suited, in one spot a single 16×20″ seemed a bit lonely and in the other two 16×20″ images seemed two crowded. I realised that panorama images would work better. But what images and what frames?
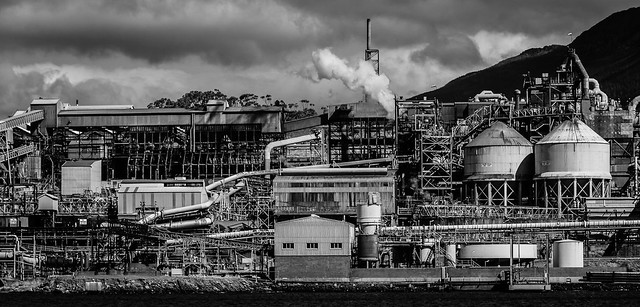
It didn’t take me long to come up with the two images that would work:


After playing around with the numbers I worked out that Mechanical could be printed at 21×10″ to go in a 28×16″ frame, and Downtown behind printed at 28×9″ for a 34×16″ frame. Then it was time to work out the various components…
The mat board comes in 40×36″ sheets and the last time I got some I had them cut them into quarters, much easier to handle and no further cutting required as that takes them down to the 16×20″ size. For the larger images I picked up a full sheet, cut it down the middle for the 16″ dimension, then cut those down for the 28″ and 34″ lengths.
The frames were also straightforward and I went down to the place where I got all of the other frames and ordered them. While they have 16×20″ at a standard size, they didn’t have what I wanted as a standard size, but a couple of weeks later (I was in no hurry) I picked them up. At the same time I also ordered a frame to fit the 12″x48″ Up Goer Five poster.
Printing the images involved a lot more research and thinking…
While I had previously printed both of these images, I had printed them on A3+ paper to be mounted on 16×20″ mat board. The A3+ paper is 13″ wide so that is sufficient, but the other dimension is 19″ which is too short. I briefly thought that I could get an A2 sheet that I could cut in half, but that would still only give me a 23″ length which isn’t enough.
So I started to investigate getting the images printed, but as well as the cost there is the uncertainty about the quality of the print. Until something made me think about roll paper which my printer supports.
A significant issue I would have with printing on roll paper is that my printer only supports paper up to a maximum 13″ width. Epson make roll paper at that size, but my preferred Ilford paper is only available in 17″ and up. I could cut the roll paper into smaller sections manually, but apart from being able to print these large panorama images would there be any cost benefit?
If I am printed for mounting on 16×20″ mat board I will leave at least a 2″ border. This means the largest visible image will be 12×16″, but bump that up to 13×17″ to allow for a generous overlap under the mat board.
Hmmm, 17″ is the width of the Ilford roll paper and 13″ is the maximum width of what the printer can take. The roll of paper is 27 metres long, so can be divided up into 81 and a bit sections. A price for a roll is $193 which translates to a per section price of $2.38. From the same place a box of A3+ paper (13×19″) is $57, that contains 25 sheets at $2.28.
So far the roll paper is looking like it would be both more expensive and less convenient.
Looking around I found another site that that has the roll paper on special, for a price that brings the cost down to $1.68. Even once postage was allowed for this is a small but significant saving, so I ordered a roll of paper.
I picked the paper up from the post office after work and I spent the evening printing and then mounting these images. I haven’t been able to get a decent photo of it, but I am quite pleased with the result.
The first image I printed myself for a camera club competition (after various test prints on different papers) was Mechanical, so it was a nice coincidence that it would also be the first print I did on the roll paper. Trimming the width of the first piece of paper was a bit of a juggle as I was cutting along a 24″ length but using a mat that is only 18″ wide. Working out where to set custom paper sizes in the print dialog also took a couple of minutes but once that was entered it was a straightforward matter of selecing the custom size, setting the dimensions of the image, centering it and then starting the print. It was a little bit nerve-wracking watching the print slowly appear, but it worked out.
I also increased the difficulty with mounting this image as I repeated the same treatment I had done previously which was to leave a 5mm border between the print and the mount. This means no overlap and the mount must be cut very accurately, but the final look is the image, 5mm of the white paper, the white core of the mat board on the 45°, the off-white of the mat board, then finally the black frame.
Printing Downtown behind was easier as I had already figured things out, and this time I had the mat board overlap the print, no ultra-precise cutting to leave a 5mm border.
Now that I have gone through all this effort I don’t know when I will next print an image larger than A3+, but it is now an option and once I have used up the last few sheets of A3+ I will be using sections cut from the roll…


