Blog entries from October, 2026

Layering paper

Thursday, October 8th, 2026 at 10:24pm

While I had things setup to take photos of paper strips on edge I also did a quick dabble with layering sheets of paper:

Layered paper (6) Layered paper (7) Layered paper (5)

While this did give some interesting results, they were not as interesting as what I got from the edges. I will still add it to my list of ideas and I did take enough images for a gallery, but I doubt it is something I would try again.

I saw one video about this technique:

Tagged with:

Paper on edge

Wednesday, October 7th, 2026 at 10:37pm

In my quest to work through my list of photo ideas I decided to cross of one that required minimal setup and equipment, abstract images of paper, specifically when placed on edge and lit from below.

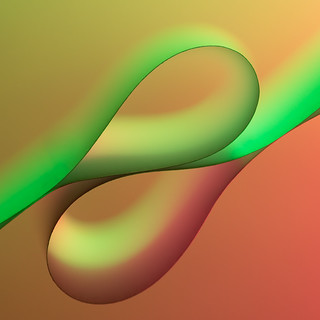
Paper on edge (1) Paper on edge (15)

This is a similar setup to what I used for oil in water, but on the glass shelf I placed strategically shaped strips of paper:

Another difference is that instead of firing a single flash down onto coloured objects, I am using two flashes each with a different coloured gel. The colour of the gels, the locations of the flashes and the orentiation of the paper provide a lot of variety, though not at much as the very random soap bubbles.

In my first dabble I cut up strips of paper myself but it was a pain to get them exactly the same, so I picked up some paper for an impact receipt printer (known as Bond Roll). As well as being exactly the same width, these also come pre-curved.

Stapling sections together into loops lead to one style of shape:

Paper on edge (16) Paper on edge (17) Paper on edge (7)

Folds can be added:

Paper on edge (3) Paper on edge (10) Paper on edge (18)

Simple strips can be placed:

Paper on edge (4) Paper on edge (8) Paper on edge (20)

One effect that surprised me was whether I set the focus on the near (to the camera) edge of the paper or on the far (against the glass) edge of the paper. When near you get a dark line along the edge and the “glow” effect is generally towards the inside of the shape, while when far there is no dark line and the effect is outside of the shape.

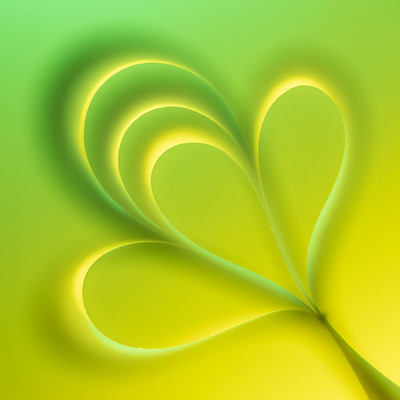
Paper on edge (14) Paper on edge (22)

A downside of focusing on the far side meant that any dust on the glass would then be in focus, so those images ended up needing a lot of spot removal.

Across four different sessions I took around a thousand images, ending up with my final selection of twenty six: Paper on edge

Videos for this approach:

Tagged with:

Soap bubbles and thin-film interference

Thursday, October 1st, 2026 at 05:54pm

The latest item to cross off my list has been to photograph soap bubbles, specifically the patterns and colours that form on their surface. This has been fairly tricky to work out, but I ended up with a setup that worked for me.

With so much variance in the results I ended up with a lot of images and struggled to limit my final selection, so here is a gallery with sixty images: Soap bubbles

This was the setup on my kitchen bench:

The progression of a bubble is reasonably predictable:

  • bands of colour will appear at the top of the bubble and slowly work their way down
  • if you disturb the bubble (eg blowing gently) then you can mix up these bands, creating patterns or mixing across the whole bubble
  • the bright purple and blue will give way to a gold
  • eventually holes will appear gradually increasing in size
  • at any stage the bubble might just pop, so you start again…

Soap bubbles (37) Soap bubbles (1) Soap bubbles (6) Soap bubbles (23) Soap bubbles (51) Soap bubbles (58)

Soap solution
There is no consistent recipe for a good soap solution, all I know is that what I used has dishwashing liquid, glycerine and water.
Dish
The container you use to hold the bubble needs to be round and black, the suggestion of of a lens body cap worked out well for me.
Light
Have your largest smoothest light diffuser as close as possible to the bubble. I used one of those round springy ones. Initially I used a softbox, but the creases in its front diffuser would show up.
If using flash as I did, then have plenty of rechargeable batteries ready to be swapped over.
Blowing
Many videos show using a straw to blow and then manipulate the bubble. I had a length of aquarium air tubing which I used instead, it was much easier to only reach my arm into the small gap between the bench and the diffuser.
Focus
Place a pencil or similar object on your dish where the front of the bubble will be and manually focus on that. If you focus on the centre of the dish, only the edges of the bubble will be in focus.
Exposure
As I was using flash the shutter speed was at 1/250. I tried between f/11 and f/22, settling on f/16 at ISO400.
Patience
Be prepared to blow a bubble, gently manipulate it and constantly take photos, then repeat…

Soap bubbles (7) Soap bubbles (5) Soap bubbles (20) Soap bubbles (26) Soap bubbles (53) Soap bubbles (56)

In my final session playing with this technique I took over two thousand images, these were culled to eight hundred, and then I narrowed them down to the sixty. All the images have a boost to the exposure and clarity, as well as being cropped and rotated in some way.

The videos I found useful for this technique:

Tagged with: